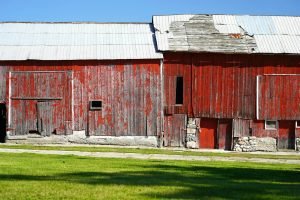

You’re staring at quotes from contractors for your flat garage roof and wincing at the $8,000-$12,000 price tags. Someone mentions rubber roofing is “DIY-friendly,” and you’re wondering if that’s actually true or if it’s a recipe for disaster.
Here’s the reality: DIY rubber roofing installation can save you 40-60% on costs, but only if you do it right. I’ve seen plenty of successful DIY jobs at Rainy Roofers and I’ve been called to fix plenty that failed after the first storm.
The difference? Following a proper process and knowing when a project is beyond DIY scope. Let me walk you through exactly what’s involved so you can make a smart decision.
Is DIY Rubber Roofing Worth It? Real Cost Savings
Let’s start with the numbers because that’s what actually matters.
Professional installation costs:
- Materials + labor: $7,000-$23,000 for typical residential roofs
- Labor alone: 60% of total cost ($4,200-$13,800)
- Timeline: 2-3 days with crew
DIY installation costs:
- Materials only: $1,500-$3,000 for same roof
- Tools/supplies: $300-500 (one-time investment)
- Your time: 2-4 days (working solo or with helper)
- Total savings: $4,000-$10,000+
For a simple 600 square foot garage roof, you’re looking at roughly $2,000 DIY versus $6,000 professional. That’s $4,000 in your pocket if you do it correctly.
But here’s what nobody mentions: failed DIY installations cost more to fix than hiring professionals initially. Water damage from a leaking roof can run $5,000-$15,000 in repairs.
DIY rubber roofing makes sense for simple, flat roofs on garages, sheds, or single-story additions. It doesn’t make sense for complex roofs with multiple levels, lots of penetrations, or when you’re not comfortable working on roofs.
Tools and Materials for DIY Rubber Roofing Installation
You don’t need specialized equipment for EPDM installation. That’s what makes it DIY-friendly.
Essential tools:
- 9-inch paint roller
- Push broom or heavy roller
- Utility knife with sharp blades
- Chalk line and measuring tape
- Ladder (properly secured)
- Safety harness
Materials needed:
- EPDM membrane (60 mil recommended, not 45 mil)
- Water-based deck adhesive for main bonding
- Contact adhesive for perimeter and edges
- Lap sealant for seams
- Seam tape if you have seams
- Primer for certain surfaces
- Flashing material for penetrations
- Edge trim pieces
Most suppliers sell complete DIY rubber roofing kits that include everything. Budget $2,000-$2,500 for a 600 square foot roof including all materials.
Get 60 mil thickness, not 45 mil. The thicker membrane costs slightly more but is significantly more puncture-resistant. Spending an extra $200 on thicker material beats dealing with repairs.
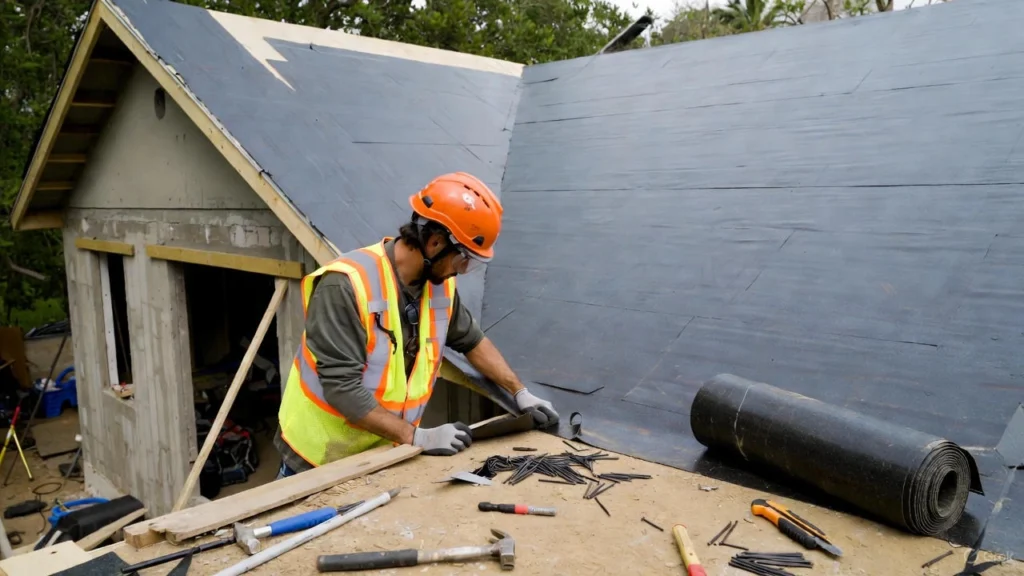
Step 1: Preparation and Surface Cleaning
Good prep is 90% of the job. Rush this and you’ll have problems.
Start by completely stripping your existing roof down to the deck. Old roofing material, nails, screws—everything comes off.
Surface prep checklist:
- Remove all debris – Sweep thoroughly, no dirt or dust
- Pull all protruding nails – Nothing should stick up
- Inspect for damage – Check for soft spots, rot, or water damage
- Replace bad wood – Any deteriorated decking gets replaced now
- Ensure proper drainage – Flat roofs need slight slope (1/4 inch per foot minimum)
- Install vapor barrier – Roofing felt or underlayment goes down first
I worked on a DIY repair last year where the homeowner skipped the deck inspection. Three months later, water got in through a section with hidden rot. We had to tear everything back out. That “time-saving” shortcut cost him an extra $2,000.
Check the weather forecast. You need dry conditions for at least 48 hours. Temperature should be above 50°F, ideally 60°F+. Cold weather prevents proper adhesive bonding.
Step 2: Measuring and Cutting Your Rubber Membrane
Accurate measurement prevents expensive mistakes.
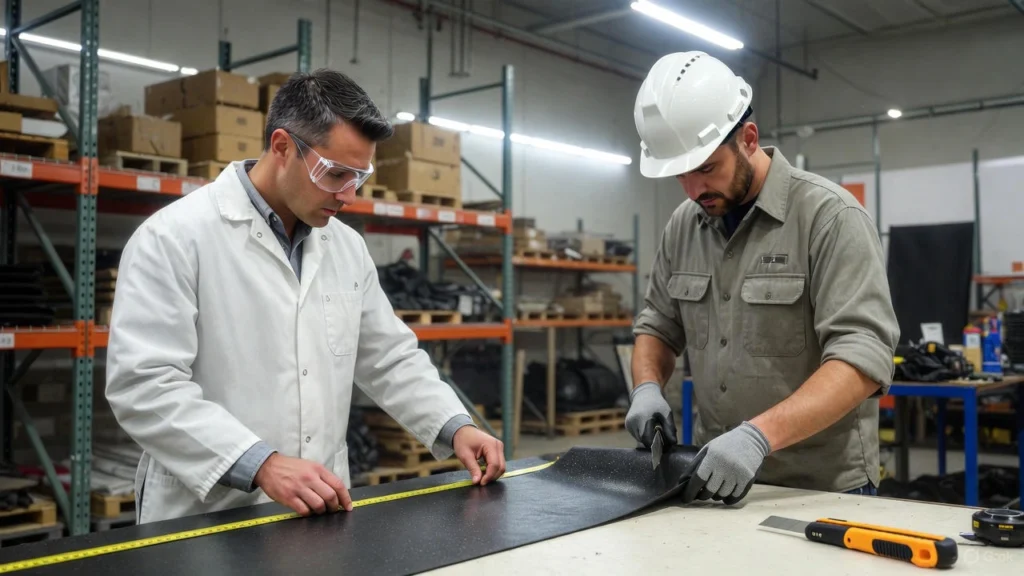
Measure your roof length and width. Add 6-12 inches to each dimension for overhang and edge detail work. For any upstands or walls, add that height plus 6 inches.
Order your membrane in one piece if possible. Most residential roofs under 1,000 square feet can use a single sheet. No seams means no leak points.
When your membrane arrives, unroll it completely on the roof. Let it sit for 30-60 minutes to relax. This step removes curls and wrinkles from being rolled up.
Don’t skip the relaxation period. EPDM expands in warm weather. If you bond it immediately, it might pull at the edges later as it expands.
Use chalk lines to mark your layout. This keeps everything square and aligned before you commit with adhesive.
Step 3: How to Install Rubber Roofing with Adhesive
The fully adhered method is what I recommend for DIY projects. It creates the strongest, most leak-resistant installation.
Here’s the process:
Fold back half the membrane. Don’t try to do the whole roof at once. Work in halves.
Apply water-based deck adhesive using your 9-inch roller. Cover the exposed deck evenly. Don’t puddle—thin, consistent coverage works best.
Leave a 6-inch strip around the perimeter un-bonded. You’ll use contact adhesive there later for a stronger edge seal.
Wait 5-10 minutes for the adhesive to get tacky. Touch it lightly—it should feel sticky but not transfer to your finger.
Lay the membrane back down. Start from the middle and work outward. Use your push broom to press it down firmly, pushing out air bubbles as you go.
Repeat for the other half using the same process.
The most common DIY mistake? Bonding before the adhesive is tacky. If you lay membrane on wet adhesive, you get a weak bond full of bubbles.
Step 4: Perimeter and Edge Sealing
The perimeter is where most DIY installations fail. This part requires contact adhesive, not water-based.
Fold back the outer 6 inches of your now-adhered membrane. Apply contact adhesive to both the deck and the underside of the membrane.
Critical: Wait for it to become touch-dry. This takes 10-20 minutes depending on temperature. When you touch it gently, it should feel tacky but not wet or stringy.
If you bond it while wet, you’ll get bubbles and weak seals. Test it with your knuckle first.
Once touch-dry, carefully press the edge down. This bond is instant and permanent. You only get one shot, so position it correctly.
Work in small sections (3-4 feet at a time) to maintain control.
Step 5: Flashing and Penetrations
Every pipe, vent, or protrusion needs proper flashing. This is where professional expertise shows its value most.
For simple pipe penetrations, use pre-formed EPDM pipe boots. These slip over pipes and bond to the membrane with lap sealant.
For vents or more complex penetrations:
- Apply primer around the penetration
- Cut your flashing material to size with generous overlap
- Secure with adhesive and seal all edges with lap sealant
- Ensure water flows away from the penetration
If your roof has skylights, chimneys, or HVAC equipment, seriously consider hiring professionals. These complex details are where DIY jobs most often fail.
Common DIY Rubber Roofing Installation Mistakes
I’ve fixed dozens of DIY jobs. Here are the mistakes that keep showing up:
Improper surface prep – Dirt or debris under the membrane causes adhesion failure. Clean thoroughly.
Bonding too soon – Not waiting for adhesive to get tacky creates weak bonds and bubbles.
Inadequate overlap at seams – If you must have seams, overlap at least 3 inches and use proper seam tape.
Poor penetration flashing – Rushing flashing details leads to leaks. Take extra time here.
Skipping the relaxation period – Bonding membrane before it relaxes causes edge pulling and stress points.
Working in bad weather – Rain, humidity, or cold temperatures ruin adhesive bonding.
A customer tried DIY installation last fall when temperatures dropped to 45°F. The adhesive never bonded properly. When spring came, the membrane was lifting at multiple points. We had to redo the entire roof.
When to Call a Professional Instead
Some roofs aren’t DIY-appropriate, period.
Hire professionals if your roof has:
- Multiple levels or complex shapes
- More than 2-3 penetrations
- Steep slopes or difficult access
- Large surface area (over 1,000 sq ft)
- Architectural complexity
- TPO or PVC membrane (requires heat welding)
Also hire professionals if you’re uncomfortable with heights, don’t have the time, or lack basic construction skills.
At Rainy Roofers, we guarantee watertight installation and provide workmanship warranties. That peace of mind has value, especially if this is your first roofing project.
Frequently Asked Questions
Can I really install rubber roofing myself?
Yes, if you have a simple flat roof, basic tool skills, and follow proper procedures. EPDM is the most DIY-friendly roofing material. However, TPO and PVC require professional installation due to heat-welding requirements.
How long does DIY rubber roofing installation take?
Plan for 2-4 days working solo or 1-2 days with a helper for a typical garage-sized roof. This includes prep, installation, and finishing. Professional crews complete the same work in 1-2 days.
What’s the hardest part of DIY rubber roofing?
Proper flashing around penetrations and getting perimeter seals right. These areas require patience and precision. The membrane application itself is straightforward if you follow the process.
Will DIY installation void my warranty?
Most manufacturers offer material warranties regardless of who installs. However, you won’t have a workmanship warranty unless you hire certified installers. Read warranty terms carefully before starting.
What happens if I mess up the installation?
Minor issues like small bubbles or imperfect edges can often be fixed. Major problems like improper bonding or failed seams require professional repair or complete reinstallation. This is why proper technique matters from the start.
Making Your DIY Decision
DIY rubber roofing installation saves serious money—$4,000-$10,000 on typical projects. But only if you do it correctly.
Simple, flat garage or shed roofs are perfect DIY candidates. Complex roofs with multiple features should go to professionals.
Be honest about your skill level, available time, and comfort working on roofs. A failed DIY job costs more than hiring professionals initially.
If you’re on the fence, consider hiring Rainy Roofers for the complex parts (flashing, penetrations) while doing the basic membrane installation yourself. This hybrid approach balances cost savings with professional quality where it matters most.
Your roof protects everything underneath. Choose the approach that gives you confidence in the results.