
Your contractor just asked which panel profile you want. You’re staring at a spec sheet listing “16-inch snap-lock striated with 1.75-inch seam height” wondering if he’s speaking English.
He assumes you understand the differences. You don’t.
Here’s everything about standing seam metal roof panels explained like you’re a normal person, not a roofing engineer.
The Two Panel Types That Matter
Forget the marketing terms. There are two installation methods that change everything.
Snap-Lock Panels:
Panels literally snap together by hand. One panel has a male leg, the next has a female leg. They interlock with light pressure—no tools required.
Installation is faster (saves on labor). No specialized equipment needed beyond basic metal working tools.
The tradeoff? They don’t seal quite as tight as mechanical seam. Still excellent performance, but mechanical seam is technically superior.
Best for: Residential roofs with 3:12 pitch or steeper, moderate budgets, standard applications.
Mechanical Seam Panels:
Panels are crimped together using a seaming machine that walks along the seam, folding the metal into a tight lock.
Creates the most weather-tight seal possible. Required for low-slope applications (under 3:12 pitch).
Installation takes longer (higher labor costs). Requires $2,000-$5,000 seaming equipment.
Best for: Commercial buildings, low-slope roofs, coastal high-wind areas, premium residential.
Cost difference:
Snap-lock: $10-$14 per square foot installed Mechanical seam: $12-$17 per square foot installed
You’re paying 15-25% more for mechanical seam, mostly in labor.
For a typical residential roof with adequate pitch, snap-lock performs excellently and saves you $3,000-$5,000.
Panel Width Options
Standing seam metal roof panels come in three standard widths.
12-inch panels:
Narrower panels = more seams = more visual lines = traditional look.
Advantages: Better oil canning resistance (less flat surface to wave), more classic appearance, stronger per panel.
Disadvantages: More seams to install (slower, higher labor), more material waste on cuts, higher per-panel cost.
Best for: Historic renovations, traditional aesthetics, smaller roofs where labor time doesn’t dominate cost.
16-inch panels:
The industry standard. Sweet spot between performance and cost.
Advantages: Balanced appearance, good oil canning resistance, reasonable installation speed, widely available.
Disadvantages: None really—this is the default for good reason.
Best for: 90% of residential applications, standard homes, best value proposition.
18-inch panels:
Wider panels = fewer seams = faster installation = lower cost.
Advantages: Fastest installation (lowest labor cost), fewer seams to seal, clean modern look.
Disadvantages: More prone to oil canning (visible waviness in flat areas), may require thicker gauge to look flat, fewer manufacturers offer this width.
Best for: Budget-conscious projects, commercial buildings where appearance isn’t critical, modern architecture that embraces the look.
A client wanted to save money on a 3,000 square foot warehouse. We quoted 16-inch and 18-inch panels.
The 18-inch saved him $2,400 in labor (faster installation). The wider panels showed slight oil canning, but he didn’t care—it’s a warehouse.
Same panels on a custom home? I’d recommend the 16-inch to avoid the waviness.
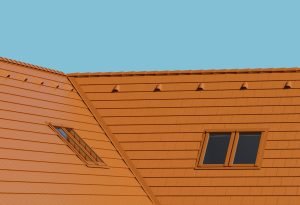
Seam Height Differences
The standing seam is the raised rib where panels connect.
1-inch seam height:
Low profile, subtle appearance. Popular for residential applications where you want the roof less prominent.
Advantages: Less visual impact, sleeker look, lower wind resistance.
Disadvantages: Less water-shedding capacity, not ideal for very low slopes.
1.75-inch seam height (most common):
The standard. Balances performance and appearance.
Advantages: Excellent water drainage, good visual presence, widely available, proven performance.
Disadvantages: None—this is the baseline for good reason.
2.75-inch seam height:
Taller, more dramatic seam. Often seen on commercial or architecturally distinctive buildings.
Advantages: Maximum water-shedding, works on ultra-low slopes, distinctive appearance, highest structural strength.
Disadvantages: More prominent visually (can dominate residential roofs), slightly higher cost.
My recommendation: Stick with 1.75-inch unless you have specific reasons (architectural style, very low slope) to go different.
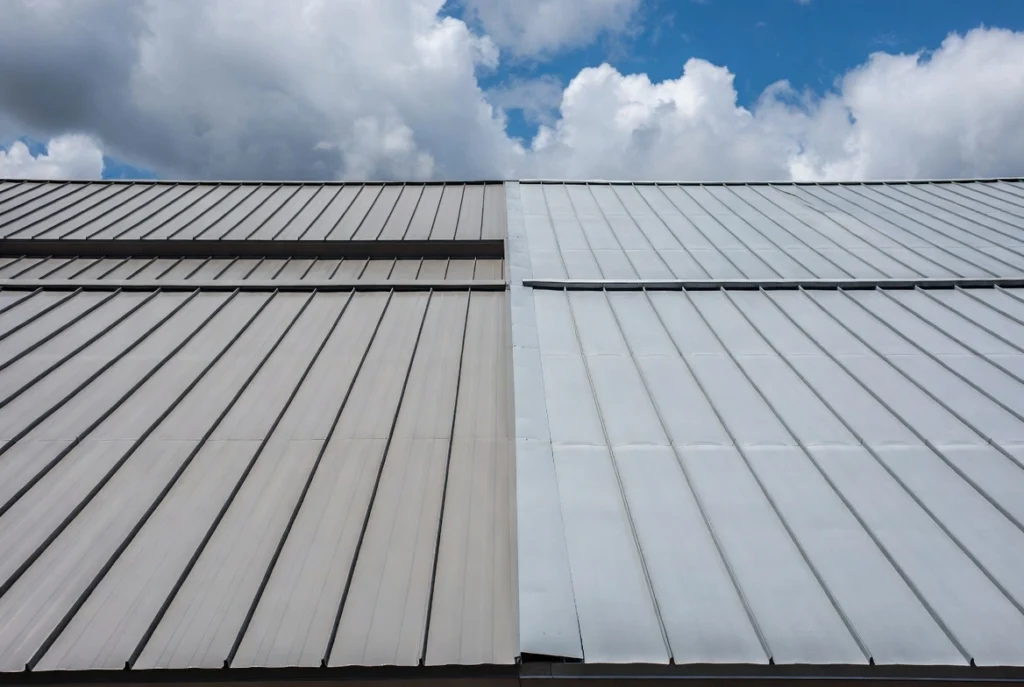
Panel Profile: Striated vs Smooth
The flat area between seams comes in different finishes.
Striated (ribbed) panels:
Subtle vertical ribs or texture running the length of the panel.
Advantages: Hides oil canning extremely well, adds visual interest, reduces glare, looks more premium.
Disadvantages: Slightly higher cost (more complex manufacturing), can collect dirt in humid climates.
Smooth panels:
Completely flat between seams.
Advantages: Clean modern aesthetic, easier to clean, slightly less expensive.
Disadvantages: Shows oil canning more prominently, can look “cheaper” to some buyers.
Which to choose?
Going with wider panels (18-inch)? Get striated to hide oil canning.
Want maximum modern aesthetic? Smooth works if you’re okay with potential waviness.
Budget matters? Smooth costs $0.25-$0.50 less per square foot.
I always recommend striated for residential. The oil canning reduction alone is worth the minor premium.
How Panel Gauge Affects Choice
Panel thickness changes what widths and profiles work best.
26 gauge (standard):
Works perfectly with 12-inch and 16-inch panels. With 18-inch panels, you’ll see more oil canning—paired with striated finish.
24 gauge (premium):
Resists oil canning better. If you want 18-inch smooth panels that look flat, go 24 gauge minimum.
The combination that works:
- 12-inch + 26 gauge + smooth = excellent
- 16-inch + 26 gauge + striated = excellent
- 18-inch + 24 gauge + striated = good
- 18-inch + 26 gauge + smooth = visible oil canning (avoid unless budget demands)
For more on gauge selection, see our 24 gauge standing seam metal roof cost guide.
Symmetrical vs Non-Symmetrical Panels
This affects future serviceability.
Symmetrical panels:
Both legs of the seam are identical. You can start installation from any point on the roof. Individual panels can be removed and replaced without disturbing adjacent panels.
Advantages: Panel replaceability, installation flexibility, easier repairs.
Disadvantages: Slightly more complex manufacturing, marginally higher cost.
Non-symmetrical panels:
The two legs are different. Panels must be installed progressively (left to right). To replace a panel in the middle, you remove everything to the right first.
Advantages: Simpler manufacturing, slightly lower cost, traditional method.
Disadvantages: Panel replacement requires more work, progressive installation only.
For residential: Either works fine. Symmetrical adds future flexibility for $200-$500 on a typical home.
For commercials: Symmetrical makes sense. Easier future maintenance and repairs matter more over decades.
Color and Coating Compatibility
All panel profiles accept the same coatings and colors.
Snap-lock, mechanical seam, 12-inch, 18-inch, striated, smooth—all available in the full color range.
Your panel choice doesn’t limit color options. Choose panels based on performance and budget, choose color based on aesthetics.
For complete color guidance, check our standing seam metal roof colors guide.
Matching Panels to Your Roof
Roof pitch determines panel type:
- 3:12 or steeper: Snap-lock works great
- 2:12 to 3:12: Snap-lock with extra sealant, or mechanical seam
- 1:12 to 2:12: Mechanical seam required
- Under 1:12: Specialized low-slope systems (beyond typical standing seam)
Budget determines width:
- Premium budget: 12-inch or 16-inch, your choice based on aesthetics
- Standard budget: 16-inch (best value)
- Tight budget: 18-inch (saves labor, accept oil canning trade-off)
Aesthetic priority determines finish:
- Want premium look: Striated finish
- Want modern minimal: Smooth finish (if using 24 gauge or 12/16-inch widths)
- Want to hide imperfections: Striated always
Application determines seam height:
- Standard residential: 1.75-inch (default)
- Low-profile residential: 1-inch
- Commercial or architectural statement: 2.75-inch
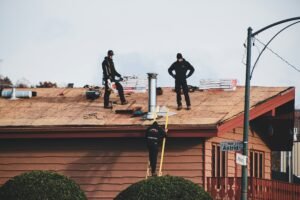
Installation Considerations
Snap-lock installation:
Panels attach to the roof deck with clips and pancake-head screws. The next panel snaps over the clip, hiding fasteners.
Faster installation (3-4 days typical for 2,000 sq ft). Standard metal-working tools only.
Mechanical seam installation:
Panels attach with clips. Then a seaming machine crimps the standing seam, locking panels together.
Slower installation (4-6 days typical). Requires specialized seaming equipment.
Both methods hide fasteners. Both provide excellent weather protection. The difference is sealing tightness and slope requirements.
For detailed installation info, see our standing seam metal roof installation guide.
Common Panel Selection Mistakes
Choosing smooth panels on 18-inch width with 26 gauge:
You’ll get oil canning. Either go striated finish or thicker gauge (24).
Spec’ing snap-lock for 1:12 pitch roof:
Won’t seal properly at that low slope. You need mechanical seam below 3:12.
Over-specifying for simple applications:
12-inch panels with mechanical seam on a standard residential roof? You’re paying for features you don’t need. The 16-inch snap-lock does the job for 30% less.
Under-specifying for demanding applications:
Coastal property with 18-inch smooth panels? You’ll see corrosion at wide seams and oil canning. Go narrower or heavier gauge.
A client insisted on the cheapest option: 18-inch smooth panels, 26 gauge, non-symmetrical.
Works perfectly for his barn. It would look terrible on a custom home.
Match specs to application, not budget alone.
FAQs About Standing Seam Panels
What is the best standing seam panel width?
16-inch for most applications. Balances cost, performance, and appearance. 12-inch for premium projects or traditional aesthetics. 18-inch for budget-conscious commercial projects.
Is snap-lock or mechanical seam better?
Mechanical seam seals tighter and works on lower slopes, but costs 20% more. For residential roofs 3:12 or steeper, snap-lock performs excellently and saves money.
What causes oil canning in metal roofs?
Wider panels, thinner gauge, and smooth finishes all increase oil canning visibility. It’s cosmetic, not structural. Minimize it with striated finishes and appropriate gauge for panel width.
How long do standing seam panels last?
50+ years regardless of panel type. Coating quality and installation matter more than panel profile for longevity.
Can you mix panel types on one roof?
Technically yes, but don’t. Aesthetic consistency matters. Stick with one panel profile for the entire roof.
The Panel Selection Reality
Here’s what actually matters.
For standard residential roofs with 4:12+ pitch: 16-inch snap-lock striated panels with 1.75-inch seam height in 26 gauge.
That combination works for 80% of homes. Proven performance, reasonable cost, good appearance.
Adjust from there based on specific needs: mechanical seam for low slopes, 12-inch for traditional looks, 18-inch for budget constraints.
At Rainy Roofers, we walk through panel selection based on your roof’s specifics, not generic recommendations.
Your roof pitch, budget, aesthetic goals, and application all inform the right choice.
Choose panels that match your situation. Don’t over-spec. Don’t under-spec. Get it right