
How to repair hole in roof situations scared the hell out of me last fall when a tree branch punched through my garage during a storm. Standing there at 2 AM with rain pouring through a fist-sized hole, I had two choices: panic or figure it out fast.
I chose option two. And honestly? It wasn’t as complicated as I thought.
What You’re Really Dealing With
Here’s the truth nobody tells you: roof hole repair isn’t about the hole itself. It’s about stopping water before it rots your entire roof structure.
I learned this when my “small” hole turned into $3,800 of damage because I waited three weeks to fix it properly.
Water doesn’t just drip through holes. It spreads sideways along rafters, soaks insulation, and creates mold you won’t see until it’s everywhere.
Can You Actually Fix a Hole in the Roof From Inside?
Short answer: temporarily, yes. Permanently? Hell no.
Fix hole in roof from inside only works as an emergency stop-gap. I tried it first with a piece of plywood and roofing cement from below.
Guess what happened? Water still leaked around the edges for two weeks until I climbed up and did it right from the outside.
Inside patches don’t create a waterproof seal. They just redirect water to leak somewhere else. Trust me on this.
How to Patch Small Hole in Roof: The Quick Fix
If you’ve got a small hole (think baseball-sized or smaller), the repair is straightforward.
Materials you need:
- Roofing cement (one tube, $8-12)
- Fiberglass mesh or tar paper
- Putty knife or trowel
- Utility knife
- Roofing nails
- Gloves
The process takes 30 minutes:
Clean around the hole with your utility knife. Cut away loose material and make the edges clean.
Spread roofing cement about 1/8 inch thick over the hole. Extend it 6 inches past the damage in all directions.
Press fiberglass mesh into the wet cement. This reinforces the patch so it doesn’t crack later.
Cover the mesh with another layer of roofing cement. Make it smooth. Big lumps actually divert water the wrong way.
My neighbor tried this without the mesh. His patch cracked within three months. Don’t skip the reinforcement.
How to Fix Hole in Roof From Tree: The Real Deal
Tree damage usually means you’re dealing with more than just surface shingles. The impact crushes the plywood underneath.
I dealt with this exact scenario. Here’s what actually works:
Step 1: Remove damaged shingles Start above the hole and work down. Use a pry bar to lift shingles and break the adhesive seal.
Pull out the nails as you go. There are typically 8 nails per shingle. Missing even one makes the repair sloppy.
Step 2: Cut out damaged plywood Set your circular saw to 3/4 inch depth. Cut around the damaged decking in a square or rectangle.
Work in sections if the hole is big. You don’t want to accidentally cut through a rafter. Ask me how I know.
Step 3: Create backing support Cut a piece of exterior-grade plywood 2 inches larger than your hole on all sides.
From outside, screw this backing piece to the underside of the good roof sheathing. Use 3/4″ wood screws every 6 inches.
This creates solid support for your patch. Without it, the repair feels spongy and fails within a year.
Step 4: Install the patch Cut a new piece of plywood to fit the hole exactly. Apply liquid nails around the edges.
Drop it into place and screw it to the backing piece you just installed. Make it flush with the existing roof surface.
Step 5: Seal and reshingle Slide tar paper under the shingles above your patch. Overlap it on the sides and bottom.
Nail new shingles starting from the bottom row, working up. Apply roofing cement under each shingle tab to seal it.
Cover all exposed nail heads with roofing cement. Every exposed nail is a future leak waiting to happen.
Repair Hole in Roof Plywood: When the Structure is Compromised
If your roof plywood is rotted or water-damaged beyond the immediate hole, you’ve got bigger problems.
I found this out when I cut into what I thought was a simple repair. The plywood crumbled in my hands like wet cardboard.
Signs you need more than a simple patch:
- Soft spots around the visible hole
- Dark staining on surrounding plywood
- Mold growth on the underside
- Sagging or bowing decking
At this point, you’re looking at replacing an entire section. This isn’t a DIY job anymore unless you have serious carpentry skills.
The cost jumps from $100 in materials to $500-1,500 depending on how far the rot spread. But ignoring it costs way more.
Roof Hole Repair Kit: Are They Worth It?
I bought a roof hole repair kit online for $35 before tackling my project. It included a small patch, adhesive, and basic instructions.
Honestly? It worked fine for a temporary fix on my garage. But it’s not a permanent solution for anything larger than your palm.
These kits are basically fancy versions of roofing cement with a pre-cut patch. You’re paying for convenience, not quality.
For $35, you could buy better materials separately and have leftovers for future repairs. But if you need something NOW and don’t want to think, they work.
How to Patch a Large Hole in a Roof: The Full Process
Large holes (bigger than a dinner plate) require real framing work. You’re essentially rebuilding a section of roof.
What you need:
- 2×4 lumber for framing
- Exterior plywood (1/2″ thick)
- 8-penny and 10-penny nails
- Circular saw
- Drill and screws
- Tar paper
- Matching shingles
- Roofing cement
The process:
Remove all damaged shingles around the hole area. Go 12 inches past visible damage in every direction.
Cut out the compromised plywood. Make clean, straight cuts so your new piece fits properly.
Build a frame using 2x4s. Attach them to the rafters or to the underside of good plywood. The frame needs to extend at least the length of the hole on each side.
This step separates amateurs from people who know what they’re doing. Weak framing means your patch sags or collapses later.
Cut new plywood to exact dimensions. Apply liquid nails to the frame, drop the plywood in, and nail it every 6 inches.
Install tar paper over the entire patch area. It should slide under existing shingles above and overlap on the sides and bottom.
Reshingle the entire section. Match your existing shingles as closely as possible. Weathered shingles won’t match new ones perfectly, but get close.
Seal everything with roofing cement. Every seam, every nail head, every edge.
The Mistakes That Cost Me Money
I made three stupid mistakes during my first roof hole repair that added $600 to the bill:
Mistake 1: Not extending the tar paper far enough under existing shingles. Water leaked around the edges for weeks until I redid it.
Mistake 2: Using regular plywood instead of exterior grade. It started delaminating after the first rain. Had to replace it entirely.
Mistake 3: Skipping the backing support on my patch. The repair felt solid until I walked on it and it flexed. Had to redo the whole thing with proper backing.
Learn from my failures. Do it right the first time even if it takes an extra two hours.
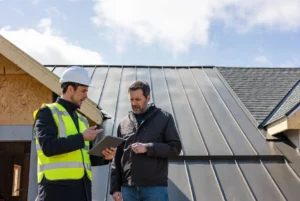
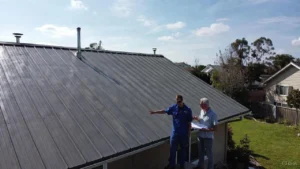
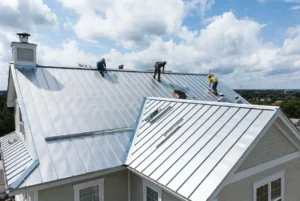
When to Call a Professional Roofing Contractor
Look, I’m all for DIY. But some situations require calling a licensed roofing contractor like Rainy Roofers:
Your roof is steep (over 6/12 pitch) – The fall risk isn’t worth saving $500 The hole is near a chimney or valley – These areas need specialized flashing You found extensive rot or structural damage – This is beyond patch-and-pray territoryYour roof is slate, tile, or metal – These materials require specific expertise
I called pros when I discovered my attic had mold growth from an old leak I didn’t know about. They found three other weak spots I would’ve missed.
Cost: $2,400. Is it worth it? Absolutely. They prevented a $15,000 roof replacement two years down the road.
Emergency Temporary Fixes That Actually Work
Storm at midnight? A tree fell at 3 AM? Here’s what stops water damage until you can do permanent repairs:
Tarp method: Get a heavy-duty tarp at least 4 feet wider than the hole on all sides. Drape it over the roof peak. Secure with 2x4s nailed or weighted down.
Aluminum flashing trick: Slide a 12″ piece of aluminum flashing under the shingles around the hole. Coat it with roofing cement. Quick and dirty but it works.
Inside patch: From the attic, screw a piece of plywood over the hole. Coat the edges with roofing cement. This stops rain but isn’t permanent.
I used the tarp method and it held for three weeks through two rainstorms. But I didn’t sleep well knowing it was temporary.
FAQs About Roof Hole Repair
How long does it take to repair a hole in a roof?
Small holes take 30-60 minutes; large holes with framing require 3-4 hours.
Can I use duct tape to fix a roof hole?
No, it won’t create a waterproof seal and fails within days.
What’s the best roofing cement for hole repairs?
Any asphalt-based roofing cement rated for all-weather use works well.
Do roof hole repair kits actually work?
Yes for palm-sized holes as temporary fixes; not for permanent large repairs.
How much does professional roof hole repair cost?
$200-800 for small holes; $1,000-3,000 for large holes with structural damage.
Can I repair a roof hole in winter?
Yes, but avoid temperatures below 40°F when shingles become brittle.
Will insurance cover tree damage to my roof?
Usually yes if it’s from a sudden storm; no for gradual damage or neglect.
How do I match shingles for a roof patch?
Take a sample to a roofing supplier or check your attic for leftover shingles from installation.
Is it safe to patch a roof myself?
For small holes on low-pitch roofs, yes; steep roofs or large damage need professionals.
How long will a DIY roof patch last?
Properly done repairs last 10-15 years; sloppy work fails within 1-2 years.
The Bottom Line on Roof Hole Repairs
How to repair hole in roof comes down to this: fix it fast, do it right, and don’t take shortcuts with materials or technique.
Small holes are manageable DIY projects. Large holes or structural damage require professional help. Emergency tarps buy time but aren’t solutions.
The $100 you spend on proper materials saves you thousands in water damage, mold remediation, and eventual roof replacement.
Stop reading and start fixing. That hole isn’t getting smaller.