How to replace a roof vent is the question I get from homeowners right after they discover a cracked vent leaking into their attic. Nobody wants this problem.
But here’s the reality. Most roofing contractors will charge you $200+ for what’s actually a 15-minute job. That’s insane.
I’m going to show you exactly how to replace a roof vent yourself. No confusing roofing terminology. Just the real steps that actually work.
Why Your Roof Vent Failed in The First Place
Most people don’t know their vent is destroyed until water starts dripping or a raccoon tears through that cheap metal thinking it found a warm attic entrance.
I read about a homeowner who discovered wildlife completely shredded his roof vent. The warm air escaping basically invited every masked mammal in the neighborhood to break in.
Common reasons vents fail:
- Flimsy construction from cheap materials
- Hail damage from severe storms
- Animal entry attempts seeking warmth
- Botched installation from day one
- Natural wear after 10-15 years
The good news? Learning how to replace a roof vent is easier than you think if you follow the process correctly.
Types of Roof Vents You Need to Understand
Before jumping into roof vent replacement, you need to know what type you’re working with. They’re not all the same.
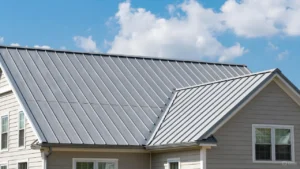
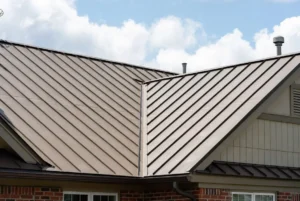
Ridge vents: These run along your roof peak and provide continuous attic ventilation. They’re the best option for airflow and keeping utility costs down year-round.
Box vents: Static vents sitting on your roof like small boxes. Simple, effective, and the most common type in older homes. Perfect for DIY projects.
Turbine vents: Those spinning metal devices powered by wind. They move significantly more air than basic box vents but can be noisy.
Powered attic fans: Electric or solar options that maximize airflow. They require power connections and regular maintenance to function properly.
For DIY roof vent installation, box vents are your safest bet. Easy to handle, hard to mess up completely.
Gathering Your Tools Before You Start
Don’t complicate this. Professional roofers show up with basic equipment. You need the same simple kit.
Essential items to grab:
- Flat bar or pry bar for leverage
- Roofing sealant (not household caulk)
- Flathead roofing nails
- Heavy duty replacement vent ($10-15)
- Sharp utility knife
- Standard hammer
- Taping knife for finesse work
Want to go pro-level? Get a Sawzall with a 10-inch blade. Makes cutting nails from underneath way easier when you replace a roof vent.
One former roofer told me the Sawzall method is unbeatable. Slide the blade between shingles, cut the fasteners holding old flashing, and everything slides right out cleanly.
How to Replace a Roof Vent: The Complete Process
This is where most guides lose people. They skip critical steps or use technical language nobody actually understands on a roof.
Let me explain this like I’m showing you in person.
Step 1: Carefully Loosen The Surrounding Shingles
You need to lift the shingles around your damaged vent without destroying them. Don’t just rip everything off aggressively.
Keep your flat bar flush against the roof surface. Slowly pry up the edges using steady pressure. Three-tab shingles crack easily, so patience matters here.
Quick tip: Keep extra shingles nearby. You’ll probably break one or two while learning. It’s normal and expected.
Step 2: Expose Every Nail and Remove Them
After loosening the edges, you’ll see nails holding the vent flashing down. Start working from the bottom shingle moving upward.
Pry each nail out slowly and deliberately. Repeat this entire process until you’ve removed enough shingles to access the complete vent structure.
This takes the most time. Rushing causes broken shingles and wasted money on replacements you didn’t need to buy.
Step 3: Cut Out The Damaged Vent
With all shingles removed, you’ll finally see the actual damage. Sometimes vents slide out easily. Other times you need to cut them free.
Using a Sawzall here makes life significantly easier. Cut remaining fasteners from underneath without damaging the roof sheeting below.
Critical mistake to avoid: Never install a new vent directly onto roof sheeting under felt paper. That creates a funnel channeling water straight into your attic.
Step 4: Create Your Waterproof Seal Properly
This step separates amateurs from professionals when you replace a roof vent. Proper sealing prevents future leaks guaranteed.
Caulk the felt down thoroughly around the hole you created. Use actual roofing sealant here, not regular caulk from your garage.
Apply a thick bead in an upside-down horseshoe pattern on your new vent flashing bottom before positioning it into place.
Step 5: Secure Your New Heavy Duty Vent
Position your replacement vent under the shingles carefully. Test the fit completely before committing to permanent installation.
Once you’ve confirmed proper alignment, nail it down securely. The two bottom holes provide the most critical holding power for stability.
Important detail: Apply roofing sealant dabs on every single nail head. This prevents water penetration through those tiny nail holes later.
Some experienced pros add extra caulk on top of flashing and under surrounding shingles. Overkill? Maybe. But cheap insurance against leaks.
Step 6: Replace All Shingles in Correct Order
Now reverse the removal process. Slide shingles back into their original positions following a stair-stepping pattern with your sealant.
Pro cutting tip: Need to cut new shingles matching old ones? Flip the shingle over, line it up with existing marks, trace with your knife, cut, then flip back over. Perfect match guaranteed.
Nail each shingle down firmly. For any old nail holes, either reinstall nails and caulk over them, or caulk holes first then nail through.
Heat from the sun will naturally flatten everything within a few days after you replace a roof vent.
Critical Mistakes That Destroy Your Work
I’ve witnessed countless botched installations costing homeowners thousands in water damage repairs. People take shortcuts that seem fine initially.
Never do these things:
- Use duct tape for ducting connections (use aluminum foil tape only)
- Skip roofing sealant thinking nails alone provide adequate hold
- Install without proper flashing positioned underneath correctly
- Nail directly through shingle faces where water penetrates easily
- Ignore wildlife protection in areas with raccoons or squirrels
One contractor charges only $50 for proper 15-minute installations. Fair pricing if ladders terrify you or you lack confidence.
But following this guide? You save that money and gain a valuable homeowner skill for life.
The Ventilation Impact Nobody Mentions
Here’s something critical most people completely miss. When you replace a roof vent, you’re not just fixing broken equipment.
Proper attic ventilation directly lowers your monthly utility bills. Better airflow means less heat buildup during summer, reduced moisture during winter months.
Ridge vents combined with soffit vents create ideal continuous airflow throughout your attic space. That’s my recommended setup during full roof replacements.
But for single damaged box vent repairs? Replace it with a heavy duty version and move on with your life.
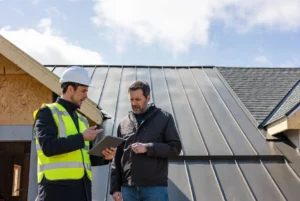
When Professional Roofers Make More Sense
Look, I support DIY completely. But certain situations absolutely require experienced roofing experts to handle the work safely.
Call professionals if:
- Your roof pitch is extremely steep or dangerously high
- You have zero ladder experience or fear heights
- Damage extends well beyond just the vent itself
- You’re dealing with complex flashing around dormers
- Weather conditions are unsafe (high winds, ice, rain)
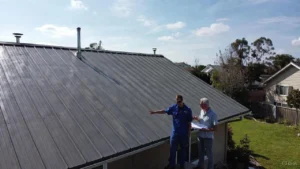
There’s zero shame in hiring qualified help. Professional installation from experienced roofers beats a DIY disaster causing thousands in damage.
Local roofing contractors in your area will provide free quotes. Compare pricing before committing to any single company’s estimate.
Making Your Vent Replacement Last Decades
The difference between a vent lasting 3 years versus 20 years? Installation quality and material choices you make today.
Spend the extra $10 for heavy duty construction. Cheap vents bend during the first moderate hail storm that rolls through.
Use proper roofing sealant at every single connection point. Create that waterproof seal correctly the first time, not the third attempt.
Worried about raccoons or wildlife? Install a vent guard now. It’s basically thick wire cage preventing animal entry while maintaining airflow.
Your roof protects everything valuable underneath it. Taking an extra hour to replace a roof vent correctly saves you from water damage, toxic mold, and expensive emergency repairs later.
FAQs
Can roof vents be replaced?
Yes, roof vents can definitely be replaced by homeowners with basic tools. The process involves removing surrounding shingles, extracting the damaged vent, installing a new one with proper flashing and sealant, then replacing shingles. Most replacements take 15-30 minutes once you understand the steps.
How to remove old roof vents?
Remove old roof vents by carefully lifting surrounding shingles with a flat bar, exposing and removing all nails, then sliding out the old vent. For stubborn installations, use a Sawzall to cut fasteners from underneath the shingles. Always work from bottom to top when removing.
How often should I replace roof vents?
Replace roof vents every 15-20 years during normal roof maintenance, or immediately if damaged by storms or wildlife. Heavy duty vents last significantly longer than cheap alternatives. Inspect vents annually for damage, especially after hail storms hit your area.
How expensive are roof vents?
Basic roof vents cost $10-15 for DIY installation materials. Professional installation ranges from $50-200 depending on complexity and your location. Ridge vents cost more ($3-7 per linear foot installed) but provide superior ventilation and longer lifespan than standard box vents.
How do roof vents not leak?
Roof vents don’t leak when properly installed with correct flashing underneath shingles, roofing sealant around all edges, and sealed nail heads. The key is creating a complete waterproof barrier while allowing the vent to sit on top of felt paper, never underneath it.
Get More Exciting Blogs at Rainy Roofers.