
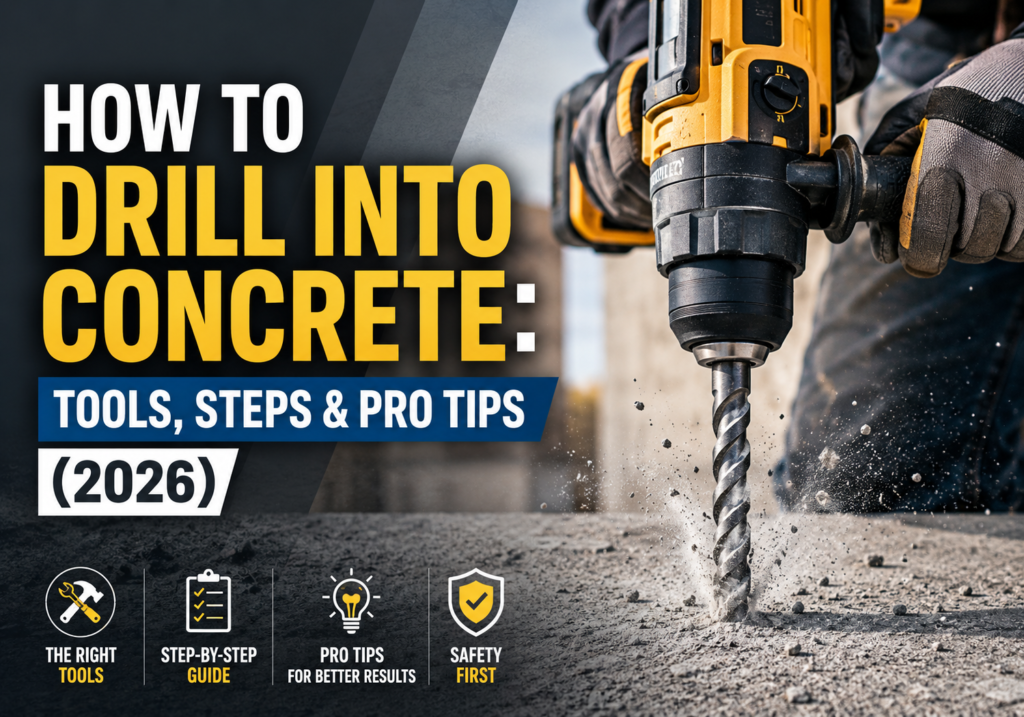
Use a hammer drill or rotary hammer with a carbide-tipped masonry bit. That is the short answer. A standard drill does not generate enough impact force to penetrate concrete the material requires both rotation and percussive blows working together. Below are the exact tools, steps, and safety rules to get a clean, accurate hole every time.
Concrete is a dense composite of Portland cement, aggregate (sand and gravel), and water. Its compressive strength typically 3,000 to 6,000 PSI (pounds per square inch / 20.7 to 41.4 MPa) in residential construction makes it highly durable but resistant to penetration. Older concrete hardens further over time, which increases difficulty. Reinforced concrete also contains steel rebar, which adds another obstacle.
Whether you are mounting a bracket to a concrete wall, anchoring a fence post to a concrete floor, or installing a roof anchor bolt to a concrete substrate, the process follows the same 8-step sequence.
Tools and Materials You Need
1. The Right Drill
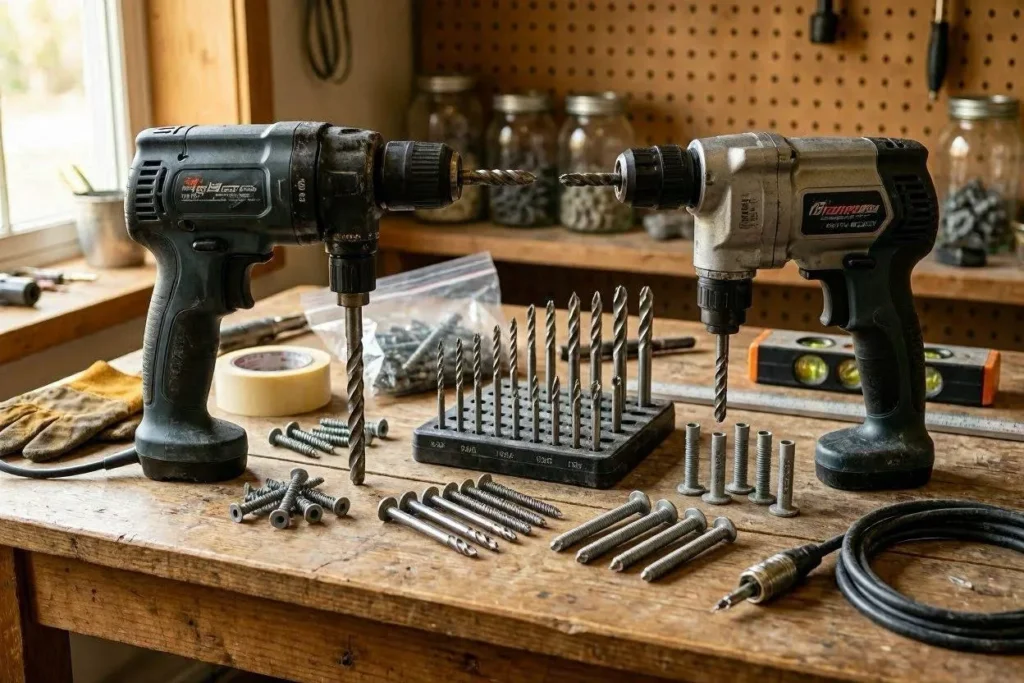
2 drill types work for concrete:
- Hammer drill — delivers rotation plus rapid forward-backward percussion. Best for holes up to 1/2 inch (12.7 mm) in standard residential concrete. Suitable for plastic anchors, concrete screws, and coaxial cable runs.
- Rotary hammer — delivers more impact energy (measured in joules) and uses SDS (Slotted Drive System) bits that lock in place. Best for holes larger than 1/2 inch (12.7 mm), reinforced concrete, and high-volume drilling. Use SDS-Plus bits for holes up to 1 inch (25.4 mm) and SDS-Max bits for holes above 1 inch.
Do not use a standard drill on concrete. Standard drills rotate without impact. Attempting to drill concrete with a standard drill burns out the motor and damages the bit without penetrating the surface.
2. Masonry Drill Bit
Use carbide-tipped masonry bits. Tungsten carbide is hard enough to grind through concrete aggregate without fracturing. Masonry bits have a blunt, chisel-shaped tip and wide spiraling flutes that channel dust up and out of the hole.
- For holes up to 1/2 inch (12.7 mm): Standard carbide-tipped masonry bit
- For SDS rotary hammers: SDS-Plus bits for 5/32 inch to 1 inch (4–25.4 mm), SDS-Max bits for larger diameters
- For holes above 4 inches (101.6 mm): Diamond core bit
Match bit diameter to your fastener. A 3/8-inch anchor needs a 3/8-inch bit. An oversized hole reduces holding strength significantly.
3. Safety Gear
Concrete drilling produces 3 hazards: flying chips, loud noise (up to 105 dB), and silica dust. Silica particles are microscopic and reach deep lung tissue. Chronic silica exposure causes silicosis, an irreversible lung disease.
- Safety glasses or goggles — mandatory, not optional
- Hearing protection — earplugs or earmuffs rated at least NRR 25
- Dust mask or respirator — minimum N95; P100 respirator for enclosed spaces
- Work gloves — protect hands from vibration and sharp debris
4. Additional Supplies
- Masking tape or drill stop collar — marks drilling depth on the bit
- Stud finder or rebar detector — scans for rebar, pipes, and electrical conduit before drilling
- Vacuum or dust extractor — keeps the hole clear and reduces airborne silica
- Compressed air — clears dust from the hole before inserting anchors
- Pencil or chalk — marks drill point precisely
How to Drill Into Concrete: 8 Steps
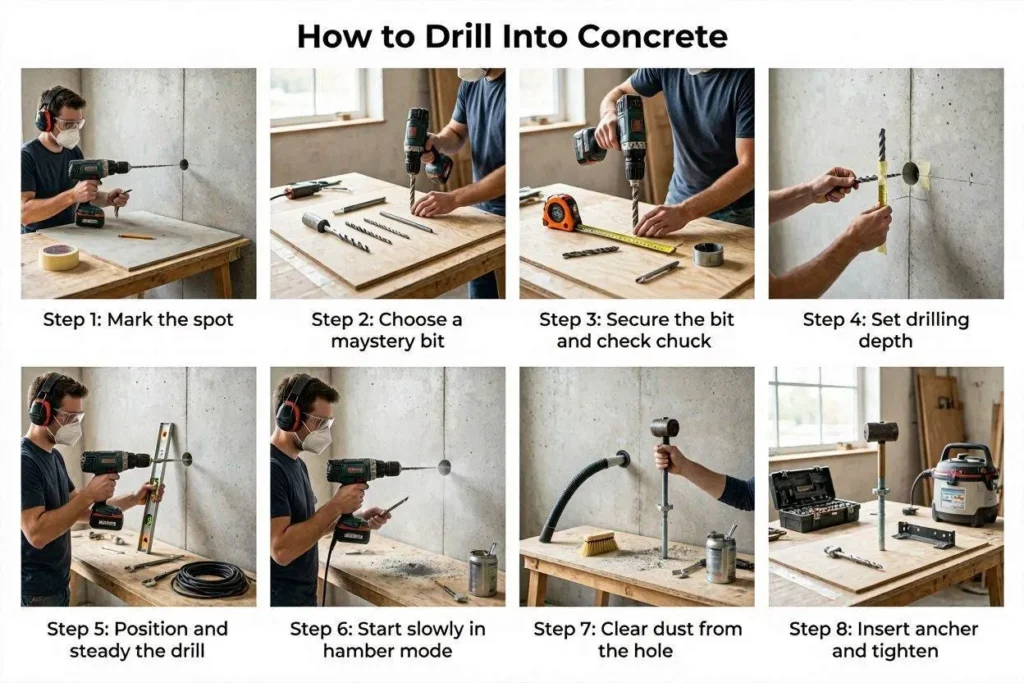
Step 1: Mark the Drill Point
Mark the exact location with a pencil or chalk. Use a level if drilling multiple holes that must align horizontally or vertically. Imprecise marking is the most common cause of misaligned anchors — concrete cannot be patched cleanly like drywall.
Step 2: Scan for Hidden Hazards
Run a rebar detector or multi-sensor scanner across the surface before drilling. Electrical conduit, water pipes, and rebar all run through concrete in both residential and commercial structures. Hitting electrical conduit causes electrocution risk. Hitting rebar dulls bits instantly and can crack surrounding concrete. Hitting a water pipe causes serious structural water damage exactly the kind of damage that leads to roof leaks and structural rot over time.
Pro tip: Rainy Roofers’ roof inspection team regularly identifies water damage caused by improper drilling near rooflines. Scanning before drilling takes 2 minutes and prevents costly repairs.
Step 3: Set Drill Depth
Measure the length of your fastener or anchor. Add 1/4 inch (6.35 mm) to that measurement to account for dust accumulation at the bottom of the hole. Mark this total depth on the bit with masking tape or a drill stop collar. Drilling too deep wastes time and weakens the surrounding material. Drilling too shallow means the anchor will not seat fully and will fail under load.
Step 4: Drill a Pilot Hole
Set the drill to its lowest speed. Place the bit tip on the mark and apply firm, steady forward pressure — approximately 10 to 15 lbs (4.5 to 6.8 kg) of force. Drill a pilot hole 1/8 inch (3.2 mm) deep before increasing speed. The pilot hole guides the bit and prevents the tip from wandering across the surface.
Keep the drill perpendicular to the surface throughout. Angled holes reduce anchor holding strength and create irregular entry points that crack over time.
Step 5: Drill to Full Depth
Increase to medium speed and continue drilling. Withdraw the bit every 30 seconds to clear dust from the flutes. Dust buildup causes friction heat, which softens the carbide tip and slows drilling speed significantly. Apply consistent pressure — not excessive force. Pushing too hard overloads the motor and increases cracking risk around the hole.
If you hit rebar: Stop immediately. Switch to a metal-cutting bit to drill through the rebar. Return to the masonry bit to complete the hole. Do not attempt to force a masonry bit through steel — it will fracture the carbide tip.
Step 6: Clear the Hole
Remove the bit and blow out the hole with compressed air or vacuum it clean. Concrete dust left in the hole creates a layer between the anchor and the concrete wall. This dust layer prevents proper mechanical contact and reduces anchor load capacity by up to 40%.
Step 7: Install the Fastener
Insert your chosen fastener concrete screw, expansion anchor, wedge anchor, or plug-and-screw system. Each fastener type has a specific insertion method:
- Concrete screws (e.g., Tapcon): Thread directly into the hole. No anchor required.
- Expansion anchors: Insert and tighten the bolt, which expands the sleeve against the concrete wall.
- Wedge anchors: Insert fully, then torque the nut to drive the wedge and lock the anchor.
- Plug anchors: Insert plastic plug first, then drive the screw into the plug.
Tighten to the manufacturer’s specified torque. Over-tightening expansion and wedge anchors cracks the concrete around the hole.
Step 8: Test the Anchor
Apply a test load before trusting the anchor with its full rated load. Pull firmly by hand. The anchor should not move, rotate, or produce cracking sounds. If the anchor feels loose, the hole is likely too large or the concrete around it has fractured remove the anchor, fill the hole with epoxy concrete filler, allow 24 hours to cure, then re-drill.
Hammer Drill vs Rotary Hammer: Which One to Use
| Factor | Hammer Drill | Rotary Hammer |
| Hole size | Up to 1/2 in (12.7 mm) | Up to 2+ in (50+ mm) |
| Bit type | Standard masonry bits | SDS-Plus / SDS-Max bits |
| Impact energy | Low–medium | High (measured in joules) |
| Best for | Plastic anchors, light DIY | Structural anchors, professional work |
| Concrete type | Standard residential | Reinforced, high-strength |
| Cost (approx.) | $50–$150 USD | $150–$600+ USD |
Drilling Different Types of Concrete
Standard Concrete Walls
Drill slowly and apply steady pressure. Standard residential concrete walls are 3,500 PSI (24.1 MPa) average. A hammer drill handles most wall anchor installations cleanly.
Concrete Floors and Slabs
Concrete slabs often run 4 inches to 6 inches thick (101.6 mm to 152.4 mm). Use a rotary hammer for floor anchors supporting structural loads. Keep the drill strictly vertical — a tilted hole in a floor slab reduces anchor holding strength and creates a stress point that cracks under repeated loading.
Reinforced Concrete
Reinforced concrete contains steel rebar mats at 6-inch (152.4 mm) to 12-inch (304.8 mm) grid intervals. Scan with a rebar detector before starting. If the drill hits rebar mid-hole, switch to a metal bit, drill through the rebar, then return to the masonry bit.
Aged or Cracked Concrete
Do not drill into cracked concrete without reinforcing the crack first. Drilling into a cracked area propagates the crack outward and weakens the surrounding structure. Fill cracks with epoxy concrete filler rated for structural repair. Allow full cure time (typically 24 to 48 hours) before drilling.
Drilling Into Concrete for Roofing Applications
Concrete drilling is a core task in several roofing and exterior construction scenarios mounting roof anchor bolts, installing concrete fascia clips, securing metal roofing brackets, and attaching guttering systems to concrete walls.
Each of these applications requires the anchor to carry specific load ratings. Incorrect drilling wrong depth, wrong bit size, or failure to clear the hole directly compromises anchor performance and creates pathways for water infiltration. Rainy Roofers’ roof maintenance services include inspection of all anchor points and concrete fasteners as part of every maintenance assessment.
If you are installing a metal roofing system on a concrete substrate common on flat commercial roofs every fastener penetration must be sealed against water entry. Unsealed or improperly drilled anchor points are one of the top causes of commercial roof leaks. For complex structural installations, professional roof installation services ensure every penetration meets load and waterproofing requirements.
6 Mistakes to Avoid When Drilling Into Concrete
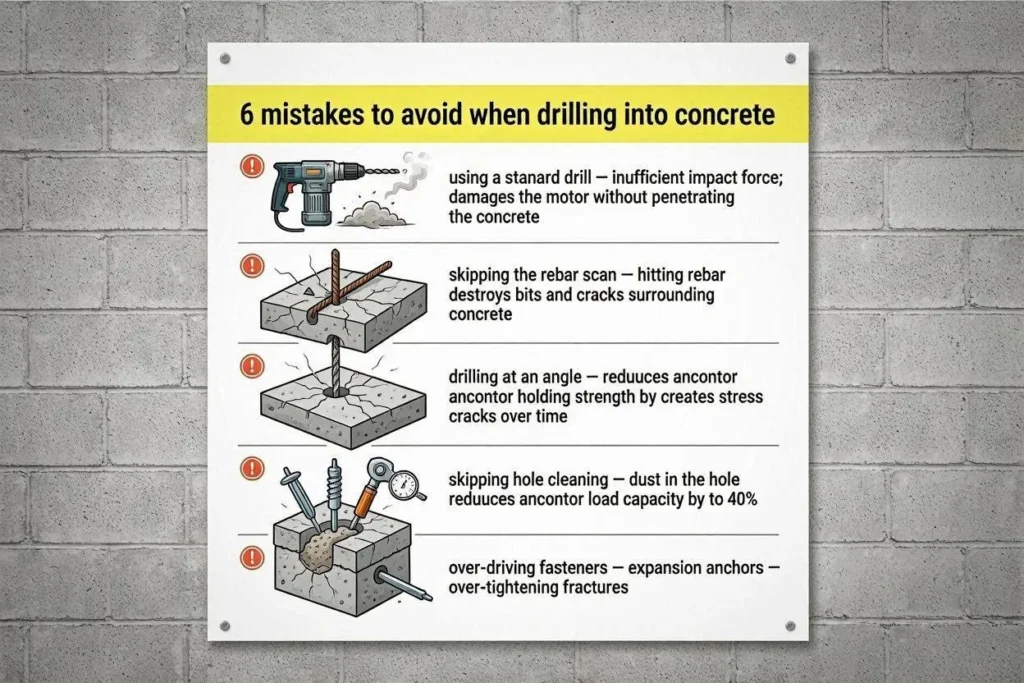
- Using a standard drill — insufficient impact force; damages the motor without penetrating the concrete.
- Skipping the rebar scan — hitting rebar destroys bits and cracks surrounding concrete.
- Drilling at an angle — reduces anchor holding strength; creates stress cracks over time.
- Skipping hole cleaning — dust in the hole reduces anchor load capacity by up to 40%.
- Overdriving fasteners — over-tightening expansion anchors fractures the concrete collar around the hole.
- Ignoring silica dust — concrete drilling without a respirator causes long-term irreversible lung damage.
FAQs
Can you drill into concrete without a hammer drill?
No — not effectively. A standard drill cannot generate the percussive impact needed to break through concrete. Using one burns the motor and produces no meaningful hole. Rent a hammer drill from a hardware store for one-off jobs.
What drill bit do I use for concrete?
Use a carbide-tipped masonry bit. Tungsten carbide is hard enough to grind through concrete aggregate. For SDS rotary hammers, use SDS-Plus bits (up to 1 inch / 25.4 mm) or SDS-Max bits for larger diameter holes. Diamond core bits handle holes above 4 inches (101.6 mm).
How deep should I drill into concrete?
Drill the length of the fastener plus 1/4 inch (6.35 mm) extra for dust accumulation at the bottom. Most plastic anchors require 1 to 1.5 inches (25.4 to 38.1 mm) depth. Structural wedge anchors require 3 to 4 inches (76.2 to 101.6 mm) minimum embedment depth.
Why does my drill keep stopping in concrete?
3 causes: rebar contact, bit overheating, or insufficient drill power. Withdraw the bit, clear dust, and allow the bit to cool. If drilling stopped suddenly with a metallic sound, switch to a metal bit and drill through the rebar. If the drill lacks power, upgrade to a rotary hammer with higher impact energy.
Is concrete dust dangerous?
Yes — concrete dust contains crystalline silica, which causes silicosis and lung cancer with repeated unprotected exposure. Wear a minimum N95 dust mask for outdoor work and a P100 respirator for any indoor or enclosed space drilling. Use a vacuum or dust extractor at the drill point to capture dust before it becomes airborne.
Conclusion
Drilling into concrete correctly comes down to 3 decisions: right tool, right bit, right technique.
Use a hammer drill for light residential work plastic anchors, small screws, one-off jobs. Use a rotary hammer with SDS bits for anything structural roof anchors, wall brackets, floor-level mounts. Always scan for rebar before drilling, always set depth before starting, always clean the hole before inserting the fastener.
Skip any of those steps and the anchor fails — or worse, the concrete around it cracks and creates a water entry point that costs far more to fix than the original job was worth.
For roofing projects that require concrete anchor installation, flashing, or any penetration work on a concrete substrate, contact Rainy Roofers for a professional assessment. Roof repair caused by failed anchors and water infiltration through concrete penetrations is among the most preventable — and most expensive — damage we see. Getting the drilling right the first time is always the cheaper option.