

To fix ceiling leak damage, stop the water at its source first, dry the cavity completely within 48 hours, then cut out and replace the ruined drywall. Skipping straight to patching is the mistake that brings homeowners back to the same brown ring three months later. Water tracks sideways along joists before it ever drops, so the stain you’re staring at often sits several feet from the actual failure. This guide walks the whole sequence: emergency triage, source diagnosis, the honest line between do-it-yourself and call-someone, real 2026 repair costs, and what your policy will and won’t pay for.
What to Do in the First 30 Minutes of a Ceiling Leak
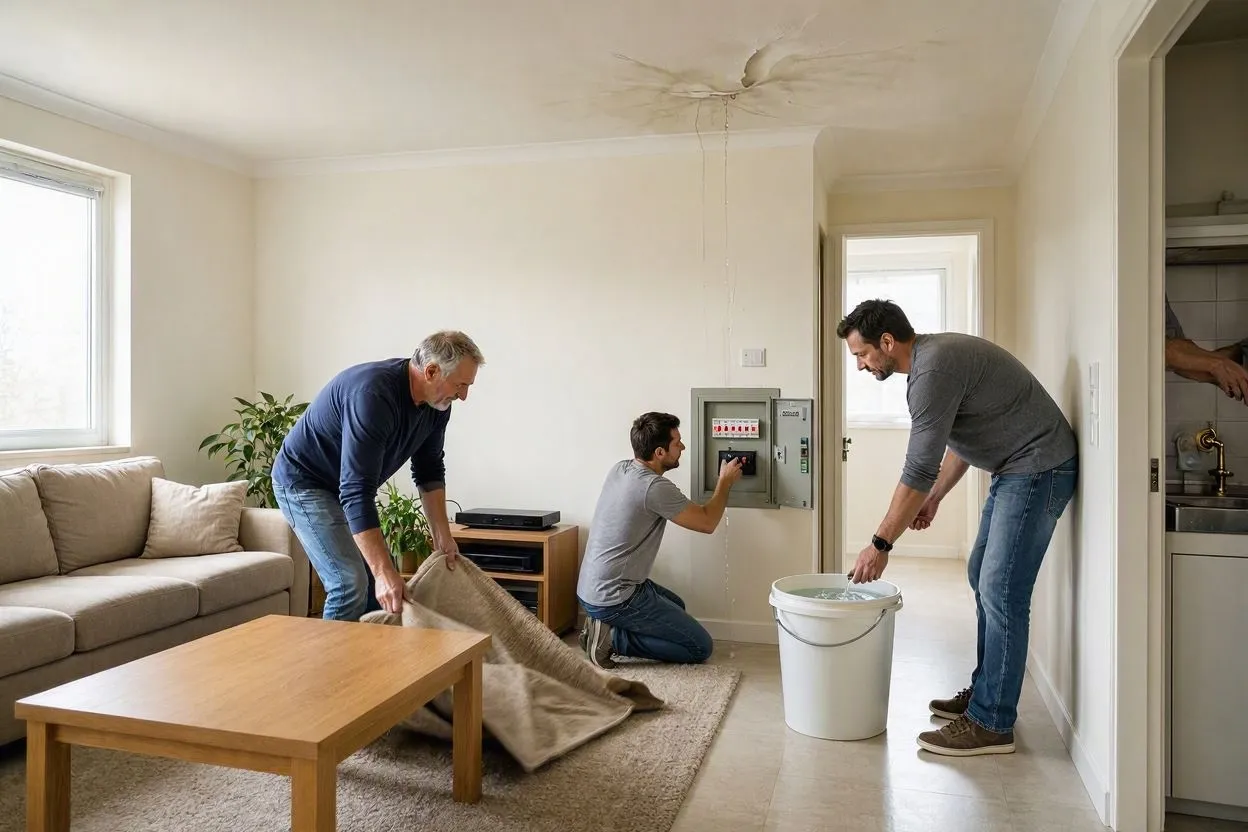
Move your belongings, kill the power, contain the water, and shut off the supply. Those four actions, done in that order, prevent most of the secondary damage that turns a $400 fix into a $4,000 one.
- Clear the room. Drag furniture, rugs, and electronics out from under the drip zone.
- Cut power to the affected circuit at the breaker panel if water is anywhere near a light fixture, ceiling fan, or recessed can.
- Catch the water with a bucket, and lay a tarp or old towels underneath to handle splash.
- Relieve the bulge. Poke a small hole at the lowest point of any sagging pocket with a screwdriver so the trapped water drains in a controlled stream instead of collapsing the panel.
- Shut off the main water valve if you suspect plumbing rather than roofing.
- Photograph everything before you clean up, because insurers reject claims constantly for lack of documentation.
That third step surprises people. A sagging pocket the size of a dinner plate can hold two to three gallons (7.5 to 11 liters), and wet drywall weighs roughly 2.5 pounds (1.1 kg) per square foot before it lets go. Draining it deliberately beats having the ceiling drop on your dining table at 2 a.m.
One warning about the power. Water pooling inside a light fixture is common, since fixtures sit at the lowest point of the ceiling plane. Never reach up to dry a wet fixture by hand. Wiring that’s been submerged longer than 24 hours, or sitting in water deeper than a foot (30 cm), gets replaced rather than dried.
How to Find the Source of a Ceiling Leak
To find the source, read the stain’s shape, note exactly when the dripping starts, then inspect the space directly above the wet area. Water rarely falls straight down from its entry point, which is why guesswork here wastes so much drywall.
Read the Stain Shape
Outline the wet area with a pencil, then look at the geometry. A roughly round stain means the source sits near the center. A cone or teardrop shape means water entered at the narrow end and fanned out as it spread across the ceiling plane.
Track When the Dripping Happens
Timing narrows the field faster than any tool. Drips that appear only during or just after rain point to the roof. Drips that show up when someone showers upstairs point to a supply line, a failing shower pan, or a bad closet flange at the toilet. Steady dripping with no rain and no fixture in use usually means a pressurized supply line, and that one needs immediate attention.
Summer leaks with clear water and no rain deserve a specific check: the air conditioning condensate drain. An attic-mounted air handler produces 5 to 20 gallons (19 to 76 liters) of condensate on a humid day, and a clogged drain line sends all of it into the ceiling below. Plenty of homeowners in Houston and Phoenix tear open drywall hunting for a pipe that was never leaking.
Check the Space Directly Above
Head into the attic or the room above with a flashlight and look for darkened sheathing, matted insulation, or rust streaks on nails. A moisture meter (roughly $25 to $60, or 21 to 51 euros) gives you a reading through the surface without cutting anything, and the highest number marks your target. Another trick: lay strips of tissue paper along joists and pipes overhead, then check them an hour later for damp spots.
Can’t find it during dry weather? Have a second person spray the roof with a garden hose, section by section, while you watch the attic. Start low and work upward so you can isolate which course of shingles fails.
7 Causes Behind Most Ceiling Leaks
Seven failures account for the large majority of residential ceiling leaks. Knowing which one you’re dealing with determines both the trade you call and the bill you pay.
| Cause | Telltale sign | Typical trade |
| Damaged or missing shingles | Leaks during rain, stain near an exterior wall | Roofer |
| Failed flashing, valleys, or vent boots | Leaks near a chimney, skylight, or roof penetration | Roofer |
| Clogged gutters and downspouts | Overflow backs up under the roof edge | Gutter contractor or handyman |
| Supply or drain line failure | Steady drip unrelated to weather | Plumber |
| Toilet wax ring or closet flange failure | Stain directly under an upstairs bathroom | Plumber |
| HVAC condensate overflow | Clear water, summer only, attic air handler above | HVAC technician |
| Condensation from poor ventilation | Widespread damp, musty smell, no single drip point | Handyman or HVAC |
That last one fools people regularly. Bathrooms and laundry rooms without working exhaust fans push warm moist air into cold ceiling cavities, and the droplets that form look exactly like a slow leak. Running a dehumidifier for two days tells you which it is. If the ceiling dries and stays dry, you had condensation, not a leak.
Ice dams belong on this list for anyone north of the Mason-Dixon line. Snow melts on a warm roof deck, refreezes at the cold eave, and the backed-up water finds its way under the shingles. Nothing on the roof is broken. The insulation is.
Is the Water Clean, Gray, or Black?
The Institute of Inspection, Cleaning and Restoration Certification (IICRC) sorts water damage into 3 categories, and the category decides whether drying in place is acceptable at all. The S500 Standard for Professional Water Damage Restoration is the document restoration contractors actually work from, and it’s the source behind the 24 to 48 hour mold window everyone quotes.
- Category 1 (clean water): Broken supply line, overflowing sink, rainwater. Drywall can often be dried in place if you catch it inside 48 hours.
- Category 2 (gray water): Dishwasher or washing machine discharge, toilet overflow without solids. Porous materials usually come out.
- Category 3 (black water): Sewage backup, flooding from outside, any water sitting long enough to grow bacteria. Everything porous gets removed, and this is not a DIY situation under any circumstances.
Here’s the part that catches people. Category 1 water degrades into Category 2 after sitting in a wall cavity for 48 to 72 hours. A clean leak you ignored over a long weekend isn’t a clean leak anymore.
What You Can Safely Fix Yourself, and What You Cannot
Containment, drying, and small cosmetic patching are reasonable homeowner tasks; anything structural, electrical, or mold-related is not. The split isn’t about skill so much as risk and equipment.
Safe to handle yourself:
- Containing the water with buckets and tarps
- Draining a sagging pocket with a screwdriver
- Shutting off the water supply or the breaker
- Drying the area with box fans and a dehumidifier
- Patching a hole smaller than 6 inches (15 cm) once everything is verifiably dry
- Priming and painting a stain with a shellac-based stain blocker
Leave to a professional:
- Sagging or cracked ceilings spanning more than 2 feet (60 cm), which signal compromised framing
- Any water contacting fixtures, fans, or wiring, where a licensed electrician assesses before anything gets re-energized
- Visible mold larger than 10 square feet (0.9 m²), per Environmental Protection Agency (EPA) guidance
- Roof work of any kind, since falls remain the leading cause of home-repair injury
- Cutting into pipes without knowing what’s behind the drywall
- Textured ceilings installed before 1980 (explained in the section on ceiling types)
Painting over a stain before the leak is fixed is the single most common mistake. The stain comes back, the moisture keeps working, and the mold you couldn’t see doubles in the meantime.
Who to Call for a Water Leak in Your Ceiling
Call the trade that owns the source first, then a finish contractor for the ceiling itself. Doing that in reverse means paying twice for the same drywall.
| Professional | Handles | Typical service call |
| Plumber | Supply lines, drain lines, water heaters, toilet flanges, hidden leak detection | $150 to $400 |
| Roofer | Shingles, flashing, vent boots, valleys, skylight seals, chimney counterflashing | $200 to $600 inspection and minor repair |
| HVAC technician | Condensate drains, overflow pans, air handler issues | $100 to $300 |
| Restoration contractor | Extraction, structural drying, mold remediation, Category 2 and 3 water | $500 to $3,000 |
| Licensed electrician | Any fixture, fan, or circuit that took on water | $150 to $350 |
| Handyman or drywall contractor | Cutting out damaged panels, hanging and finishing new drywall, texture match, paint | $200 to $900 |
A useful shortcut from the restoration trade: leaks on an upper floor usually trace to the roof, while leaks in a basement or first-floor ceiling usually trace to plumbing above. Not a rule, but a solid starting bet.
How to Fix Ceiling Leak Damage in 6 Steps
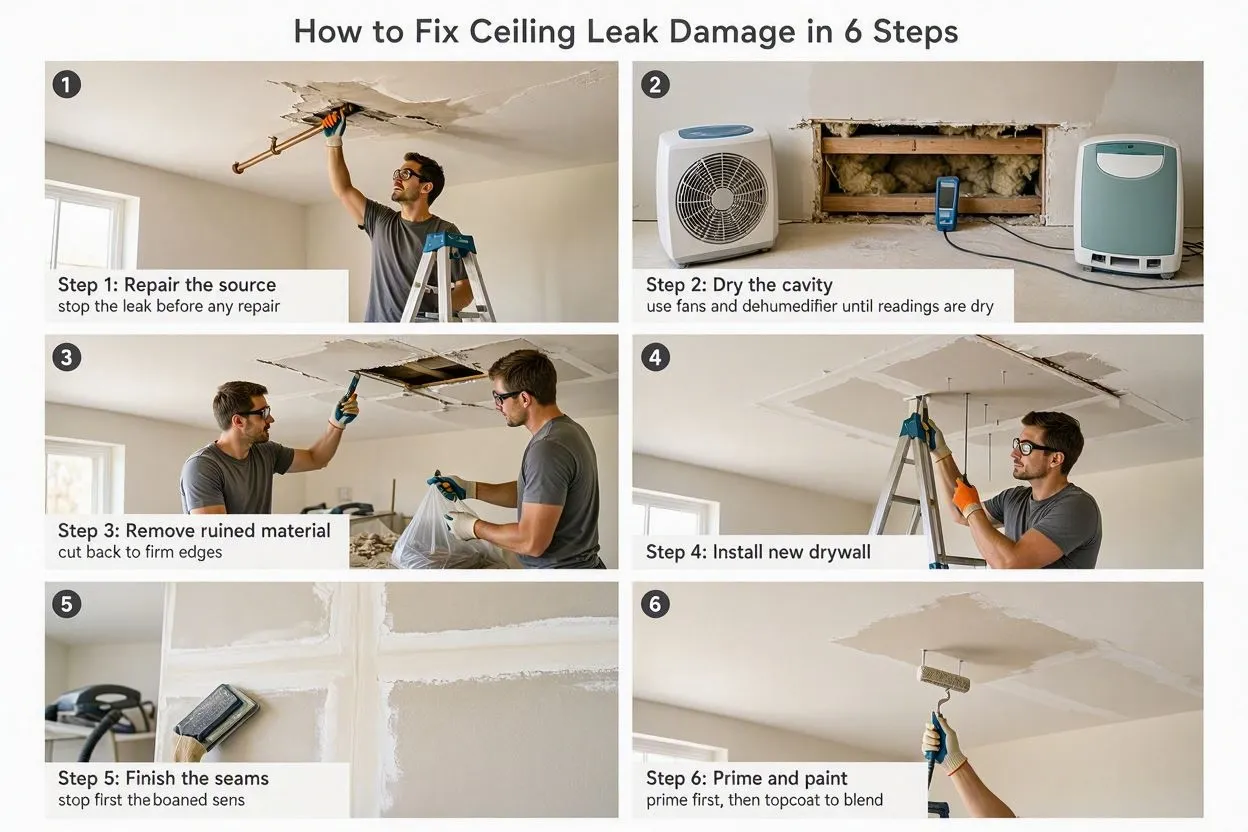
To fix ceiling leak damage properly, repair the source, dry the cavity, remove the ruined material, install new drywall, finish the seams, then prime and paint. Budget 2 to 4 hours of hands-on work for a small section, and bring a second person for anything larger than 4 square feet (0.4 m²).
- Repair the source: Nothing below this step matters until the water stops.
- Dry the cavity completely: Set up box fans and a dehumidifier, pull back wet insulation, and keep going until a moisture meter reads under 16 percent on the framing. Rented air movers move this along if the area is large.
- Cut out the damaged material: Score a clean rectangle with a drywall saw and cut back to the nearest joists on each side so you have solid nailing surface. Add 2×4 blocking along the joists if the opening leaves an unsupported edge.
- Hang the replacement panel: Match the existing thickness, which is 1/2 inch (12.7 mm) in most homes and 5/8 inch (15.9 mm) where a garage or fire-rated assembly is involved. Fasten with drywall screws every 12 inches (30 cm).
- Tape and finish: Three coats of joint compound, sanding lightly between each, with the final coat feathered 10 to 12 inches (25 to 30 cm) past the seam. Match the surrounding texture before it dries.
- Prime with a stain-blocking primer, then paint: A shellac or oil-based blocker stops residual tannins from bleeding through. Latex primer alone won’t hold back a water stain.
Wet insulation gets replaced, never dried and reused. Fiberglass batts lose their R-value permanently once compressed by water, and cellulose turns into a mold substrate.
Stop Before You Cut: 3 Ceiling Types That Change the Job
Textured, plaster, and drop ceilings each demand a different approach, and one of them carries a genuine health hazard.
Popcorn and textured ceilings installed before 1980. Asbestos was a standard additive in acoustic ceiling texture until the Consumer Product Safety Commission banned it in 1977, with existing stock applied into the early 1980s. Test before you cut, scrape, or sand. A lab sample costs $30 to $75 (26 to 64 euros) and takes a few days. Disturbing asbestos-containing texture releases fibers you cannot see and cannot filter with a dust mask. Licensed abatement runs $1,500 to $4,000 for a single room.
Plaster and lath. Common in homes built before 1950. Plaster crumbles rather than sagging, and repairs need a bonding agent plus setting-type compound instead of standard drywall mud. Patching plaster with drywall creates a visible thickness mismatch that no amount of feathering hides.
Drop and suspended ceilings. Genuinely the easiest of the three. Lift out the stained tiles, replace them for $4 to $12 (3 to 10 euros) each, and inspect the grid for rust. Check what’s above the tiles, though, since the concealed plenum hides the actual leak.
How Much Does It Cost to Fix Ceiling Leak Damage?
Expect $350 to $1,200 for a straightforward single-room drywall repair, climbing to $4,500 or more once insulation, framing, and mold enter the picture. Home Depot puts ceiling water damage repair at $45 to $55 per square foot (roughly $485 to $590 per m²), and that figure excludes fixing whatever leaked in the first place.
| Scope | Cost range (USD) | Notes |
| Stain sealing and repaint only | $150 to $400 | Only valid if the leak is confirmed fixed and dry |
| Small patch, under 4 sq ft (0.4 m²) | $250 to $600 | DIY materials run $60 to $120 |
| Single-room drywall section replacement | $400 to $1,500 | Includes tape, texture, paint |
| Structural drying and equipment | $600 to $2,500 | 3 to 5 days of air movers and dehumidifiers |
| Mold remediation | $600 to $3,500 | Scales sharply with square footage |
| Full ceiling replacement | $1,800 to $5,000 | Larger rooms, plaster, or framing damage |
| Asbestos abatement, single room | $1,500 to $4,000 | Pre-1980 textured ceilings only |
Source repair sits on top of all of those. A plumbing fix runs $200 to $800, a spot roof repair $400 to $2,000, and a condensate line clearing $100 to $300.
Two variables push quotes up more than anything else: how long the water sat, and whether it reached framing. A leak caught inside 24 hours often means drying and a patch. The same leak found after three weeks means demolition, remediation, and a rebuild.
Does Homeowners Insurance Cover a Ceiling Leak?
Yes, standard homeowners policies cover ceiling leaks that are sudden and accidental, and no, they do not cover damage from gradual leaks or deferred maintenance. That distinction decides nearly every claim.
A pipe that bursts on a January night is sudden and accidental. A roof that’s been weeping for eight months through shingles you knew were curling is a maintenance issue, and adjusters deny those routinely.
What helps a claim:
- Photographing the damage before cleanup, with timestamps
- Keeping receipts for tarps, fans, and emergency plumbing
- Reporting promptly, since most policies require notice within 30 to 60 days
- Documenting the mitigation steps you took, because failing to prevent further damage can itself void coverage
What hurts a claim:
- Repairing everything before the adjuster sees it
- Disposing of the failed component that caused the leak
- Delaying the report by months
Run the math before filing. With a $1,000 (850 euro) deductible and an $1,100 repair, a claim nets you $100 and puts a water loss on your CLUE report, which insurers price against you for five to seven years. Small repairs are usually better absorbed.
Renting, or in a condo? Damage originating in the unit above is generally that owner’s liability, while your renters or HO-6 policy covers your own belongings. Report it to the landlord or HOA in writing the same day.
How Long the Whole Repair Takes
Plan on 5 to 10 days from first drip to final coat of paint on an average single-room repair. The drying stage sets the pace, and rushing it is what causes repeat failures.
- Source repair: Same day to 3 days, depending on trade availability
- Structural drying: 3 to 5 days with equipment running continuously
- Drywall replacement and finishing: 2 to 3 days, since each compound coat needs 12 to 24 hours
- Priming and painting: 1 day
- Mold remediation, if needed: Adds 2 to 5 days
Skip ahead and paint over damp drywall and the seams will crack, the texture will flash, and the stain will ghost back through within weeks.
6 Ways to Prevent the Next Ceiling Leak
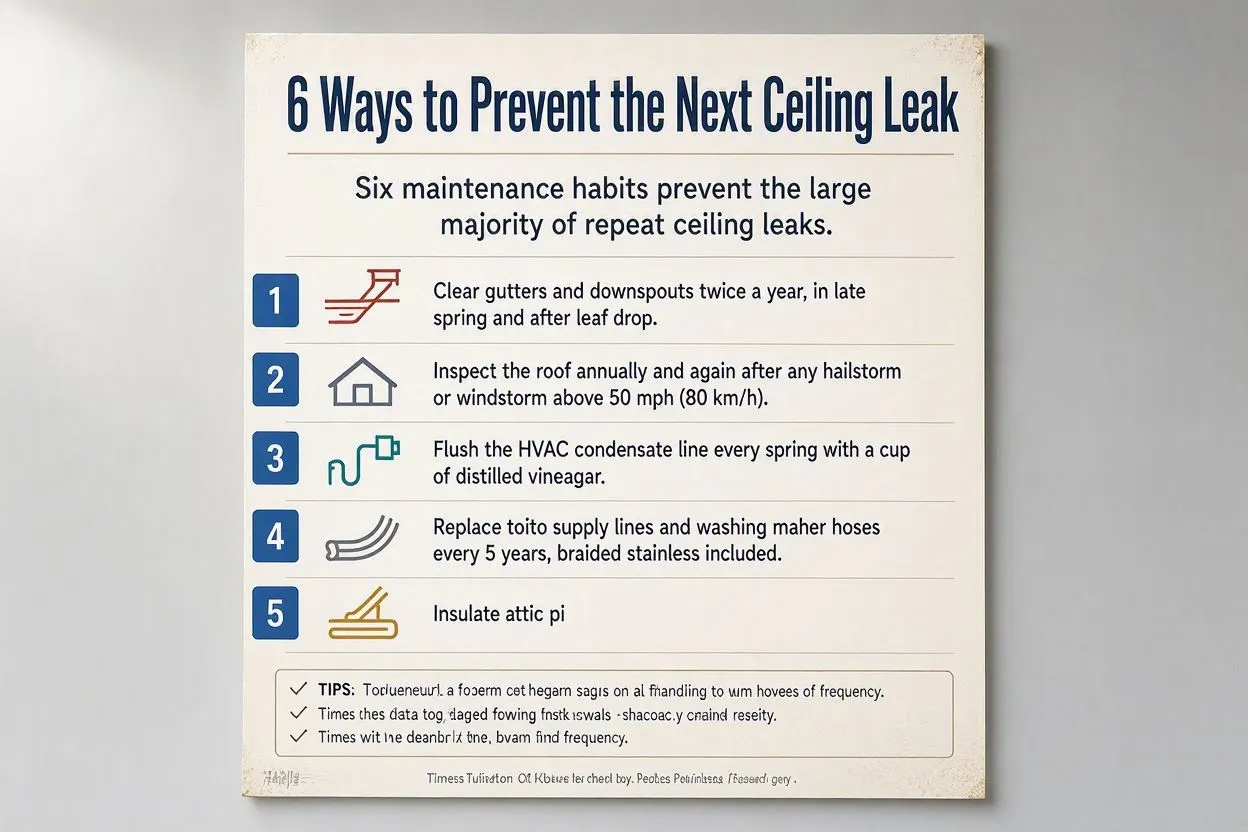
Six maintenance habits prevent the large majority of repeat ceiling leaks.
- Clear gutters and downspouts twice a year, in late spring and after leaf drop.
- Inspect the roof annually and again after any hailstorm or windstorm above 50 mph (80 km/h).
- Flush the HVAC condensate line every spring with a cup of distilled vinegar.
- Replace toilet supply lines and washing machine hoses every 5 years, braided stainless included.
- Insulate attic pipes and seal air leaks before winter to stop both freezing and ice dams.
- Install smart leak detectors near water heaters, washing machines, and any second-floor bathroom. Units start around $40 (34 euros), and several insurers discount premiums for them.
Running bathroom exhaust fans for 20 minutes after a shower handles the condensation problem that gets misdiagnosed as a leak in the first place.
Conclusion
A ceiling leak gives you a narrow window. Act inside 48 hours and you’re looking at a patch, some paint, and a weekend. Wait three weeks and you’re looking at demolition, remediation, and a four-figure invoice. The sequence never changes: stop the water, find what failed, dry the cavity until a meter proves it, then rebuild. Most homeowners can handle containment, drying, and a small patch on their own. Sagging spans, wet fixtures, spreading mold, and any pre-1980 textured ceiling belong to someone licensed and insured.
Photograph everything before you touch it. That habit costs nothing and has saved more claims than any other single step.




