

Whether you’re a first-time DIY painter or a contractor bidding for the job, the process is the same: surface prep, primer, finish coat. It’s the same house painting and finishing discipline used on walls, trim, and exteriors just applied to concrete.
This guide covers 4 paint types with real 2026 pricing, a step-by-step application process, and the 7 mistakes that cause most floors to fail.
What Is Concrete Floor Paint?
Concrete floor paint is a coating designed to bond to concrete, protect against stains and moisture, and improve appearance, with abrasion resistance built into its chemical binders. Unlike regular wall paint, it handles foot traffic, chemical spills, and abrasion without breaking down.
Standard paint sits on top of the concrete surface. Epoxy coatings chemically bond into the concrete pores instead. That difference in bonding method determines how long each product lasts and where each one belongs.
A paintbrush handles edges and corners; a roller covers open floor area faster and more evenly. Check the VOC (Volatile Organic Compound) content on the label low-VOC formulas are required indoors in many states and reduce fumes during application.
Common applications include garages, basements, patios, workshops, warehouse floors, pool decks, and driveways.
2026 Market Data: The US concrete floor coatings market is worth $472 million in 2024 and is projected to reach $629 million by 2030, driven by DIY homeowners and contractors choosing coated concrete over full replacement.
4 Types of Concrete Floor Paint (With Real 2026 Costs)
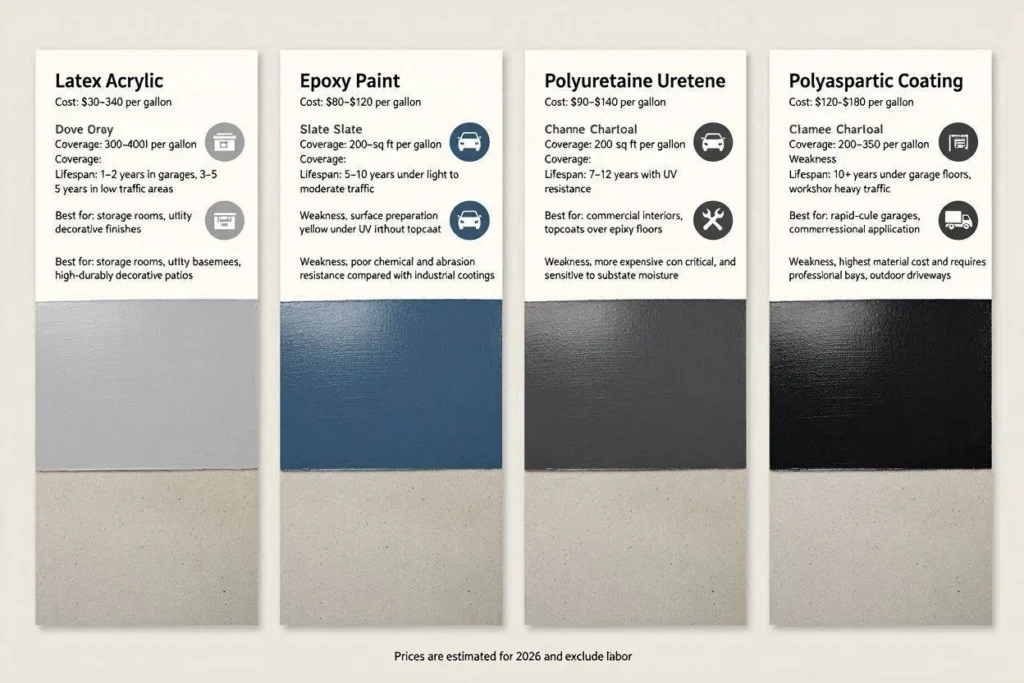
1. Latex Acrylic Paint
The easiest and cheapest option. It dries fast, cleans up with water, and works well on basement floors or storage areas with light foot traffic but it won’t hold up to vehicle traffic or chemical exposure.
- Cost: $30–$40 per gallon
- Coverage: 300–400 sq ft per gallon
- Lifespan: 1–2 years in garages, 3–5 years in low-traffic areas
- Best for: Storage rooms, utility basements, decorative patios
- Weakness: Peels under hot tires and chemical spills
2. One-Part Epoxy Paint
A latex base with a small amount of epoxy resin mixed in. Stronger than plain latex and more resistant to oil and grease. Home improvement stores sell this most commonly as “garage floor paint.”
- Cost: $45–$65 per gallon
- Coverage: 250–350 sq ft per gallon
- Lifespan: 3–4 years with proper prep
- Best for: Light-use garages, workshops with minimal vehicle traffic
- Weakness: Not a true chemical bond — still susceptible to hot tire pickup
3. Two-Part Epoxy Coating
Resin combined with a polyamine hardener. The two components chemically cure and bond into the concrete pores, not just onto the surface. That chemical bond makes it the hardest, most durable floor finish available for DIY application, and it’s what most professionals use.
- Cost: $100–$500 per DIY kit (covers 400–500 sq ft)
- Coverage: 150–200 sq ft per gallon
- Lifespan: 10–20 years with a urethane topcoat
- Best for: Garages, commercial floors, workshops, warehouses
- Weakness: Harder to apply; fails if applied to damp or improperly prepped concrete
4. Polyaspartic Coating
A professional-grade coating that cures in under an hour, compared to 24 hours for epoxy. It’s UV-stable, so it won’t yellow outdoors — making it the top choice for exterior floors and sunlit garages.
- Cost: $8–$15 per sq ft installed (professional application)
- Coverage: 200–250 sq ft per gallon
- Lifespan: 15–20 years
- Best for: Exterior patios, sunlit garages, commercial floors needing fast return to service
- Weakness: Cures so fast that DIY application is very difficult
All 4 Types at a Glance
| Type | Cost/Gallon | Lifespan | DIY Friendly | Best Location |
| Latex Acrylic | $30–$40 | 1–2 yrs | Yes | Basement / Storage |
| 1-Part Epoxy | $45–$65 | 3–4 yrs | Yes | Light-use Garage |
| 2-Part Epoxy | $100–$500 kit | 10–20 yrs | Yes (with prep) | Garage / Workshop |
| Polyaspartic | $8–$15/sq ft | 15–20 yrs | No | Exterior / Commercial |
Concrete Floor Paint vs. Epoxy vs. Stain vs. Sealer
These four products get confused often, but the differences determine both the result and how long it lasts.
| Product | What It Does | Lifespan | Best Use | Cost (DIY) |
| Floor Paint | Sits on surface, adds color | 1–4 yrs | Light traffic floors | $30–$65/gal |
| Epoxy Coating | Bonds chemically into concrete | 10–20 yrs | Garages, workshops | $100–$500/kit |
| Concrete Stain | Penetrates and colors concrete | 5–10 yrs | Decorative patios | $25–$50/gal |
| Concrete Sealer | Protects without color change | 3–5 yrs | Driveways, patios | $20–$40/gal |
Key distinction: Paint and stain add color. Sealer adds protection. Epoxy does both and it’s the only product engineered for vehicle traffic.
How to Choose the Right Concrete Floor Paint
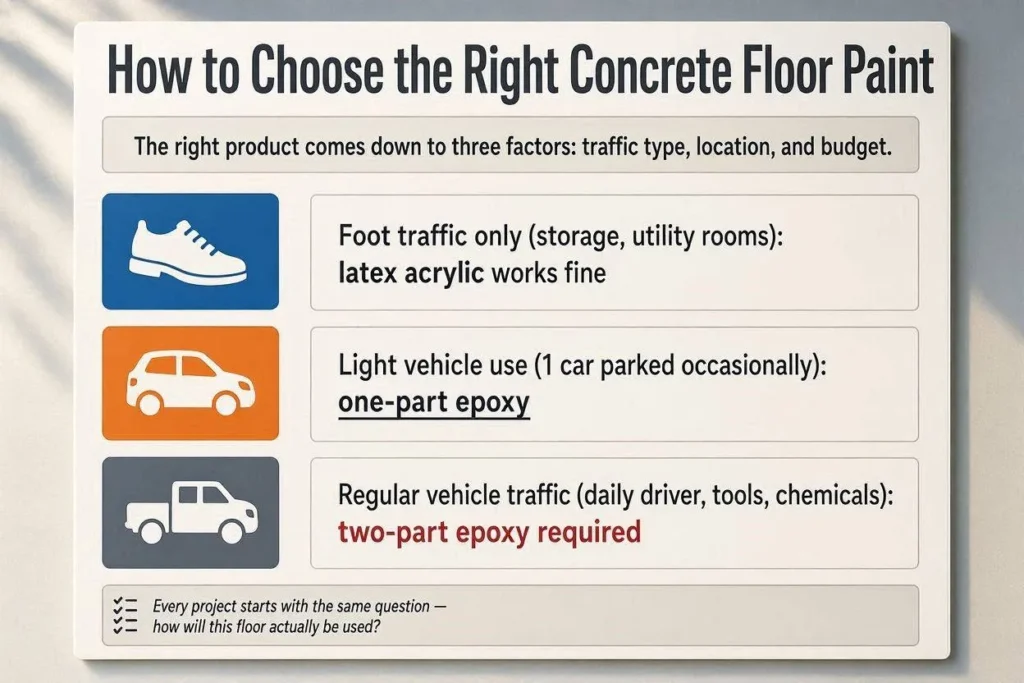
The right product comes down to three factors: traffic type, location, and budget. Every project starts with the same question, how will this floor actually be used?
Match Paint to Traffic Level
- Foot traffic only (storage, utility rooms): latex acrylic works fine
- Light vehicle use (1 car parked occasionally): one-part epoxy
- Regular vehicle traffic (daily driver, tools, chemicals): two-part epoxy required
- Commercial or exterior floor: polyaspartic or two-part epoxy with a urethane topcoat
Consider Your Location in the USA
Climate changes which product performs best. The US breaks into four distinct challenge zones:
- Southeast (FL, GA, LA): High humidity causes paint to bubble if moisture isn’t blocked. Use a moisture-blocking primer before any coating.
- Northeast (NY, MA): Freeze-thaw cycles crack surfaces. Use flexible, freeze-resistant coatings rated for 0–100°F swings.
- Southwest (AZ, NV): UV exposure yellows standard epoxy. Use UV-stable polyaspartic for outdoor and garage floors.
- Midwest (IL, OH): Road salt and de-icing chemicals destroy latex paint fast. Two-part epoxy with chemical resistance is the only durable option.
7 Steps to Paint a Concrete Floor Correctly
Complete all seven steps in order skipping surface prep causes 90% of all paint failures.
Step 1: Clear and Clean the Floor
Remove everything from the floor, then sweep and vacuum. Scrub oil stains with a concrete degreaser, since oil contamination prevents paint from bonding. Rinse thoroughly and let the floor dry for 24 hours.
Step 2: Run a Moisture Test
Tape a 2-foot-square piece of plastic sheeting to the floor, sealing all four edges. Wait 24 hours — condensation under the plastic means moisture is present. Efflorescence (the white, chalky mineral deposit left by moisture moving through concrete) is a visible warning sign the test will likely fail. Don’t paint until moisture levels drop, or use a moisture-blocking primer.
Step 3: Etch or Grind the Surface
Drip water on the floor, if it beads up, the surface is too smooth for paint to grip. Acid etching opens the concrete pores for better adhesion; use a 10% muriatic acid solution or a phosphoric acid etcher. Rinse fully, neutralize with a baking soda solution, and let the floor dry another 24 hours.
Step 4: Fill Cracks and Repair Damage
Fill cracks with concrete filler, let it cure fully, then sand smooth. Never paint over a crack paint bridges it temporarily but fails at that point first.
Step 5: Apply a Bonding Primer
Cut in edges with a brush, then roll primer across the full floor. Use a moisture-blocking primer for basements or humid areas, and allow 6–8 hours of drying time (longer in high humidity). Don’t rush this step.
Step 6: Apply Paint in 2 Coats
Apply the first coat thin and even using a 3/8-inch nap roller, avoiding pooling in corners. Let each coat dry fully before the next typically 8–12 hours for epoxy, 4–6 hours for latex. Two coats minimum for full coverage and durability.
Step 7: Apply a Sealer or Topcoat
A clear sealer or urethane topcoat extends paint life by 3–5 years and adds stain resistance. Add a non-slip grit additive (1 lb per gallon) in wet areas, garages, or commercial spaces. Wait the full cure time before allowing vehicle traffic this final step is what separates an amateur finish from a professional one.
2026 Cost Breakdown: What You’ll Actually Spend
Total cost depends on floor area, paint type, and whether you DIY or hire a contractor.
DIY Cost Per Square Foot
| Paint Type | Materials Only | 2-Car Garage (500 sq ft) | Basement (400 sq ft) |
| Latex Acrylic | $0.50–$0.80/sq ft | $250–$400 | $200–$320 |
| 1-Part Epoxy | $0.80–$1.30/sq ft | $400–$650 | $320–$520 |
| 2-Part Epoxy Kit | $1.40–$2.60/sq ft | $700–$1,300 | $560–$1,040 |
| Polyaspartic (DIY kit) | $2.00–$4.00/sq ft | $1,000–$2,000 | $800–$1,600 |
Professional Installation Cost
| Service | Cost Per Sq Ft | 2-Car Garage Total |
| Latex / Acrylic Paint | $1.50–$3.00 | $750–$1,500 |
| Epoxy Coating | $3.00–$7.00 | $1,500–$3,500 |
| Polyaspartic Coating | $8.00–$15.00 | $4,000–$7,500 |
Budget tip: Two-part epoxy costs 3x more than latex upfront, but over 12 years it costs less. Latex needs 6–8 recoats at $250–$400 each; epoxy needs zero.
7 Mistakes That Cause Concrete Floor Paint to Fail
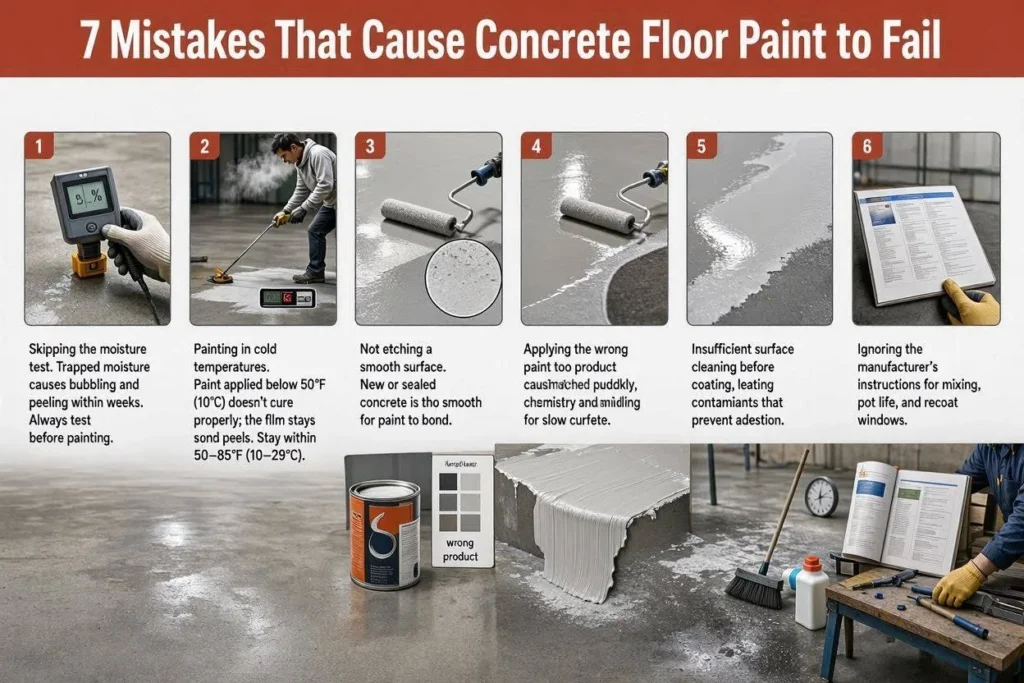
These seven errors not product quality cause roughly 95% of all concrete floor paint failures.
- Skipping the moisture test. Trapped moisture causes bubbling and peeling within weeks. Always test before painting.
- Painting in cold temperatures. Paint applied below 50°F (10°C) doesn’t cure properly; the film stays soft and peels. Stay within 50–85°F (10–29°C).
- Not etching a smooth surface. New or sealed concrete is too smooth for paint to grip. Etching creates the texture it needs.
- Applying one thin coat. A single coat gives uneven coverage and fails faster. Apply two coats minimum, letting each dry completely.
- Driving on the floor before full cure. Walking is safe after 24 hours, but vehicle traffic needs 72 hours minimum 7 days for full chemical cure. Early driving leaves tire marks and pulls up the coating.
- Using latex paint in a working garage. Latex softens under hot tires, bonds to them, and peels off when the vehicle moves. Use two-part epoxy for any garage with vehicles.
- Painting over old, peeling paint. New paint can’t bond to failing paint underneath. Strip all loose paint first, or you’ll accelerate the failure.
USA Climate Guide: Best Concrete Floor Paint by Region
Climate differences change which paint performs best. Match your state to the right product below.
| US Region | Main Challenge | Recommended Paint | Key Feature Needed |
| Southeast (FL, GA, LA, SC) | High humidity, moisture vapor | 2-Part Epoxy + Moisture Primer | Moisture-blocking primer layer |
| Northeast (NY, MA, PA, CT) | Freeze-thaw cycles, road salt | 2-Part Epoxy with Chemical Resistance | Flexible, salt-resistant formula |
| Southwest (AZ, NV, CA, NM) | UV exposure, heat | Polyaspartic or UV-Stable Epoxy | UV stability rating required |
| Midwest (IL, OH, MI, WI) | Road salt, de-icers, cold | 2-Part Epoxy + Urethane Topcoat | Chemical resistance to chlorides |
| Pacific Northwest (WA, OR) | Constant moisture, mold risk | 2-Part Epoxy + Anti-Microbial Additive | Breathable or moisture-blocking |
| Mountain States (CO, UT, MT) | Temperature swings 0–90°F | Flexible Epoxy Coating | Temperature-rated flexibility |
Painting Technique Tips for a Professional Finish
Technique matters as much as product choice, whether this is your first DIY project or you’ve hired a professional.
- Load the roller correctly. Dip it, then remove excess paint on the tray’s textured ridge before touching the floor. Overloading causes drips and an uneven finish.
- Cut in edges first, always. Brush along walls, baseboards, and corners before rolling the open floor — standard practice in both interior and exterior painting that keeps roller marks off adjacent surfaces.
- Work in sections, not the whole floor at once. Divide the floor into 4-foot squares and finish each one (cut in, roll, smooth) before moving on. This keeps wet edges from drying before you can blend them, which is what causes visible lap marks.
- Follow the sequence, don’t skip steps. Contractors lose callbacks over shortcuts, not bad paint stick to the full prep-to-topcoat process every time.
- Keep a wet edge. Never let one section dry completely before starting the next; a broken wet edge is the most common cause of visible seams.
Paint Finishes and Tools Every House Painter Should Know
The right paint finish and tools matter as much for a bedroom wall as for a garage floor. Here’s a quick reference for any project, interior or exterior.
Paint Finish Guide
| Finish | Sheen Level | Best Use | Cleanability |
| Flat / Matte | None | Ceilings, low-traffic walls | Low — hard to scrub |
| Eggshell | Low | Living rooms, bedrooms | Moderate |
| Satin | Medium | Hallways, kids’ rooms, kitchens | Good |
| Semi-Gloss | High | Trim, doors, bathrooms, cabinets | Very good |
| High-Gloss | Very high | Front doors, furniture, accent trim | Excellent |
Essential House Painting Tools
- Angled sash paintbrush (2–2.5 in): cutting in trim, corners, window frames
- Rollers with interchangeable nap: 3/8-inch for smooth walls, 3/4-inch for stucco or textured surfaces
- Extension pole: reaches ceilings and stairwells without a ladder
- Painter’s tape and drop cloths: protect trim, floors, and fixtures
- Paint sprayer: fastest option for large exterior siding jobs or cabinetry
- 5-in-1 tool: scraping, puttying, and opening paint cans in one handheld tool
How Much Paint You’ll Need
One gallon of interior wall paint covers roughly 350–400 sq ft with one coat. A typical 12×12 bedroom needs about 1 gallon for two coats on the walls. For exterior siding, budget 1 gallon per 250–300 sq ft, since textured surfaces absorb more paint. Always buy 10% extra for touch-ups after the job is done.
How Concrete Floor Coating Fits Into a Full House Painting Project
Concrete floor coating is one piece of a larger house painting and finishing job. Most homeowners tackle floors alongside walls, trim, doors, and cabinetry and the same prep-first, quality-materials approach applies across every surface.
Interior Painting & Finishing
Interior painting covers walls, ceilings, trim, doors, and cabinetry. A finished job includes caulking gaps, filling nail holes, sanding trim smooth, and priming before topcoat — the same discipline that makes a concrete floor coating last.
- Walls: 2 coats of interior latex or acrylic, cut in with a brush, rolled with the nap matched to the wall texture
- Trim and doors: sanded, primed, and finished in a semi-gloss or satin enamel for durability and easy cleaning
- Cabinetry: degreased, deglossed or sanded, primed with a bonding primer, finished in a hard-cure enamel
- Ceilings: flat finish to hide imperfections, applied after walls and trim are complete
Exterior Painting & Finishing
Exterior house painting protects siding, trim, fascia, and doors from sun, rain, and temperature swings the same weather factors that determine which concrete floor coating to use outdoors.
- Siding: pressure-washed, scraped, primed on bare wood, finished with 2 coats of exterior-grade paint
- Trim, fascia, and soffits: caulked and finished separately from siding for a crisp, professional line
- Exterior doors and shutters: sanded, primed, finished with a UV-resistant enamel to prevent fading
- Decks and porches: cleaned, sanded, finished with a penetrating stain or exterior-rated floor paint
Hiring a House Painting Contractor
For a whole-house project spanning interior walls, exterior siding, trim, and concrete floors, a licensed contractor can sequence the work, match products across surfaces, and warranty the finish. Before signing, ask for proof of insurance, a written scope of work, and a materials list.
- Get 3 written estimates that separate labor and materials costs
- Confirm how many coats are included and which brand of paint or coating will be used
- Ask about surface prep specifically — it’s what separates a 2-year paint job from a 15-year one
- Request a finish-work punch list before final payment to catch missed trim, touch-ups, or uneven coats
Conclusion
Concrete floor paint isn’t a one-size-fits-all product the right choice depends on where the floor is, how it’s used, and what your climate throws at it. Latex acrylic covers a basement storage room for a few years at a low price. Two-part epoxy is the only real option for a garage that sees daily vehicle traffic. Polyaspartic earns its higher cost outdoors, where UV exposure would yellow anything else.
What separates a floor that lasts 20 years from one that fails in months isn’t the brand on the can — it’s the prep work underneath it. Skipping the moisture test, painting over a smooth or damp surface, or rushing the cure time causes the vast majority of failures covered in this guide. Follow the 7-step process in order, match the product to your traffic level and region, and the floor will hold up the way it’s supposed to.




