
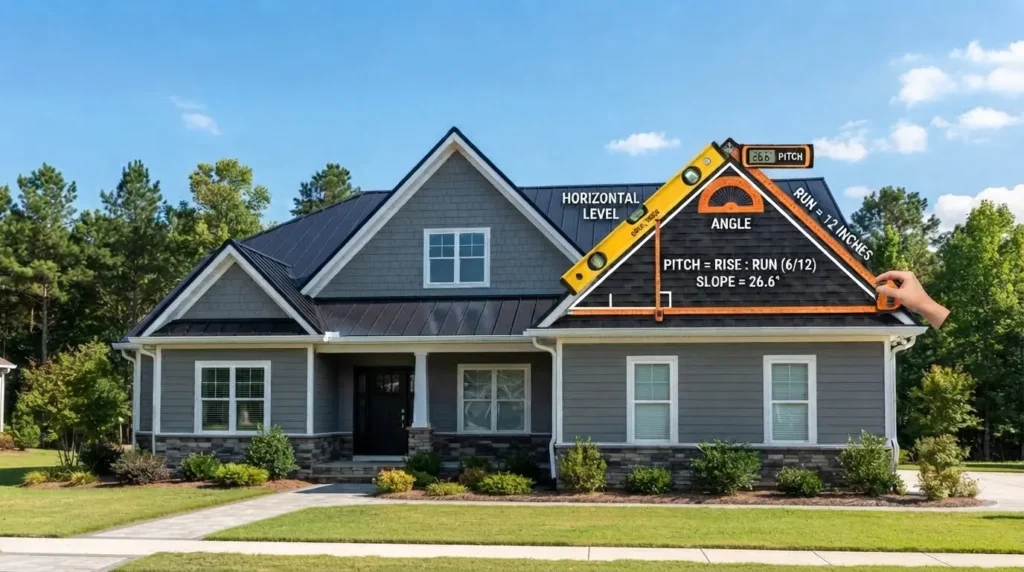
How to determine your roof pitch is a fundamental skill every homeowner and contractor needs when planning roofing projects, selecting materials, or calculating installation costs. After twenty-five years in the construction industry, measuring thousands of roof pitches across residential and commercial projects reveals seven reliable methods: measuring from the attic, measuring directly on the roof surface, estimating from the ground with trigonometry, visual estimation by experience, calculating a standard pitch ratio, converting that ratio to degrees, and converting it to a percentage or gradient. Each measures the same underlying relationship: vertical rise over a horizontal run, typically expressed as a ratio like 6/12, meaning 6 inches of rise for every 12 inches of horizontal distance.
Understanding how to calculate roof pitch in degrees becomes essential when working with engineering specifications, building codes, or advanced roofing materials. Each of the seven methods below requires basic tools, proper safety precautions, and accurate calculations to ensure correct material selection and installation planning. Whether you’re replacing shingles, installing metal roofing, or planning a renovation, knowing your exact roof pitch, and how to express it in degrees, determines everything from drainage performance to material compatibility and installation complexity.
Understanding Roof Pitch Basics
Pitch vs. Slope Terminology
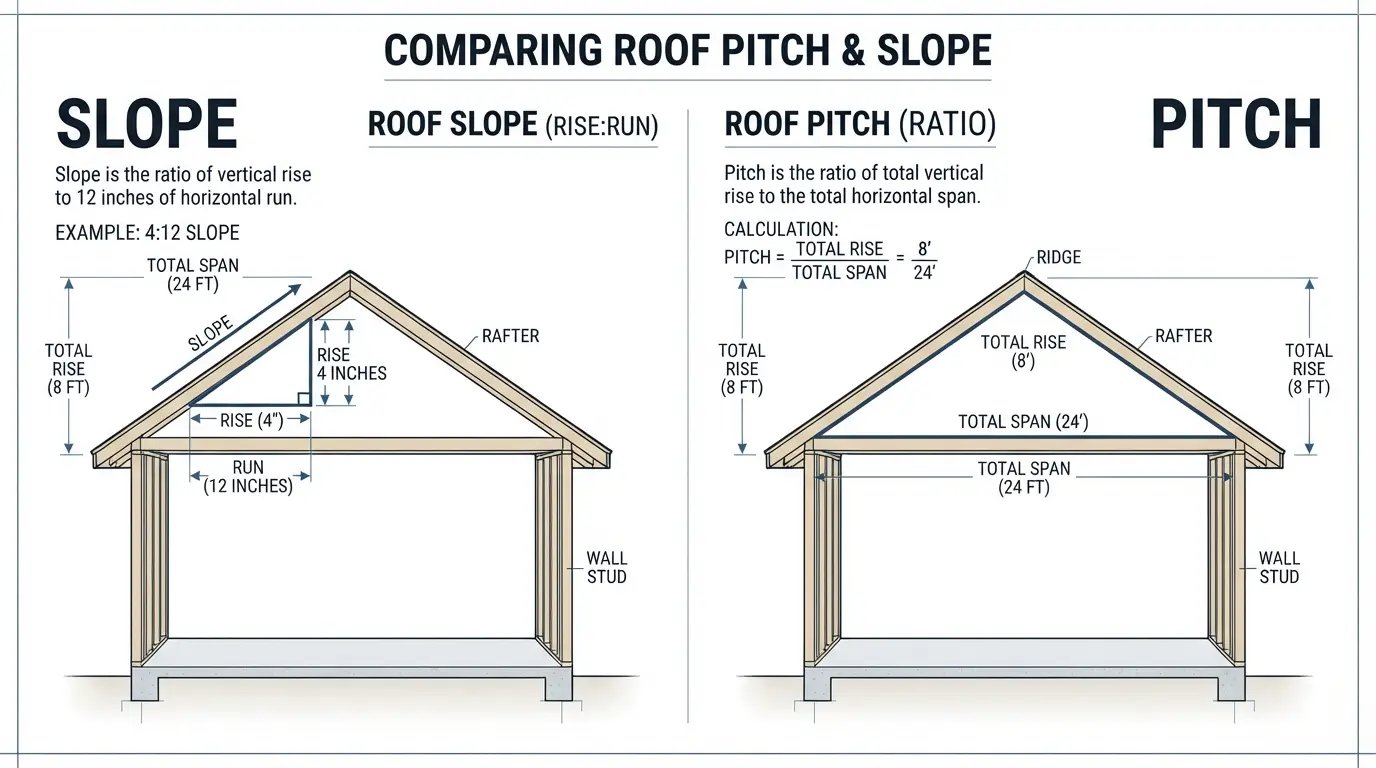
Roof pitch and slope represent different measurement systems for describing roof steepness. Pitch traditionally refers to the ratio system using inches of rise per 12 inches of horizontal run, while slope can describe the same relationship using degrees, percentages, or ratios. Understanding these distinctions helps communicate effectively with contractors, suppliers, and building officials.
The roofing industry standardizes how to determine roof pitch measurements using the 12-inch base system for consistency across all projects. This approach simplifies material calculations, installation planning, and code compliance verification. Slope measurements expressed in degrees provide engineering precision for structural calculations and specialized applications.
Common misconceptions include confusing pitch ratios with actual angles or assuming steeper roofs always perform better. Pitch selection depends on climate conditions, architectural style, material requirements, and local building codes rather than simply maximizing steepness.
Standard Pitch Classifications
Roof pitches fall into distinct categories that determine material suitability, installation methods, and performance characteristics. Low-slope roofing includes pitches from 1/12 to 2/12, typically found on commercial buildings and modern residential designs. These applications require specialized waterproofing systems and drainage considerations.
Standard residential pitches range from 4/12 to 8/12, accommodating most conventional roofing materials including asphalt shingles, metal panels . and clay tiles. These pitches provide adequate water shedding while maintaining reasonable installation costs and complexity.
Steep-slope applications exceed 8/12 pitch and create dramatic architectural statements while requiring specialized installation techniques, enhanced safety measures, and premium materials. Very steep pitches above 12/12 demand expert installation and may limit material choices.
Table 1: Roof Pitch Classifications and Applications
| Pitch Range | Classification | Common Applications | Material Suitability |
| 1/12 – 2/12 | Low Slope | Commercial, Modern | Modified bitumen, TPO |
| 3/12 – 6/12 | Standard | Residential | Asphalt shingles, Metal |
| 7/12 – 12/12 | Steep | Traditional homes | All materials |
| 12/12+ | Very Steep | Specialty designs | Premium materials |
Roof Gradient: Another Way to Say It
“Roof gradient” is a term you’ll often hear used interchangeably with pitch and slope, particularly in engineering, surveying, and international contexts. Gradient describes the same rise-over-run relationship but is most commonly expressed as a percentage rather than a 12-inch-based fraction. A roof with a 6/12 pitch, for instance, has a gradient of 50%.
Knowing this terminology matters when reading manufacturer specifications, engineering reports, or international building codes, since gradient percentages appear frequently outside standard US residential contexts. Converting between pitch, slope, and gradient is straightforward once you have a single rise-and-run measurement, since all three describe the same physical steepness expressed in different units.
Essential Tools and Equipment
Basic Measurement Tools
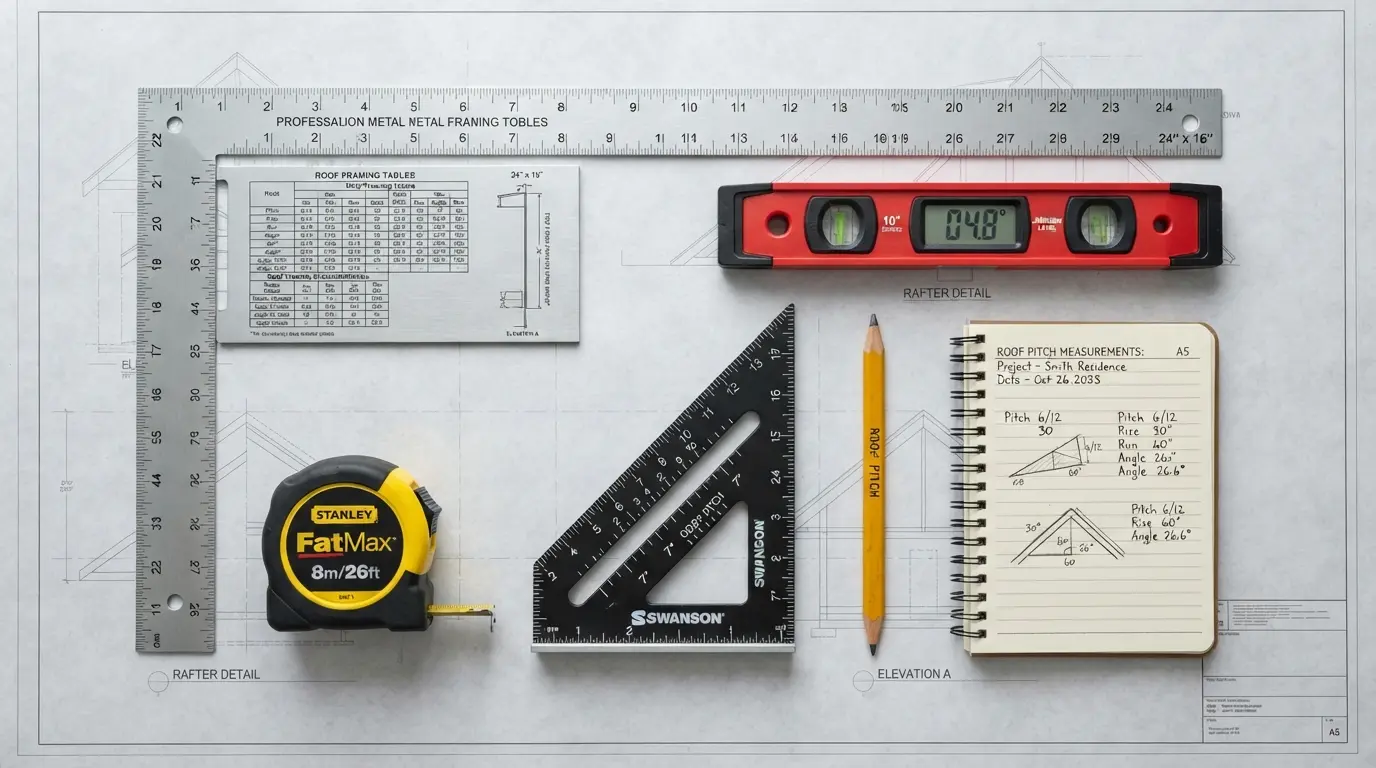
A carpenter’s level serves as the primary tool for determining roof pitch measurement, with 24-inch lengths providing optimal accuracy and stability. Quality levels feature precise bubble indicators and durable construction for reliable readings across various roof conditions. Digital levels offer enhanced accuracy with numerical displays eliminating interpretation errors.
Measuring tapes with clear, easy-to-read markings ensure accurate distance measurements for both horizontal runs and vertical rises. Professional-grade tapes resist stretching and provide consistent readings under field conditions. Metal tapes perform better than fabric versions for precision work.
Calculators become essential for converting measurements into standard pitch ratios and degree calculations. Smartphone apps can supplement basic calculators with specialized roofing functions, but understanding manual calculations prevents dependency on technology during field work.
Essential measurement tools:
- 24-inch carpenter’s level with accurate bubble indicators
- 25-foot measuring tape with clear fraction markings
- Calculator for ratio and degree conversions
- Notepad for recording measurements and calculations
- Safety equipment including non-slip footwear and fall protection
Advanced Measurement Equipment
Digital angle finders provide precise degree measurements for engineering applications and complex calculations. These instruments eliminate manual conversion steps while offering enhanced accuracy for professional installations. Battery-powered models ensure consistent performance across extended measurement sessions.
Smartphone applications with inclinometer functions offer convenient measurement capabilities, though accuracy varies between devices and applications. Professional contractors often use specialized apps designed specifically for roofing calculations and pitch determination.
Laser levels create perfectly horizontal reference lines for accurate measurements across long distances and irregular surfaces. These tools prove invaluable for complex roof geometries and multi-section measurements requiring consistent reference points.
Pitch gauges provide quick field measurements for experienced professionals but require practice for accurate readings. These specialized tools work well for confirmation measurements and rapid assessments during initial project evaluations.
Step-by-Step Measurement Methods
Attic/Interior Measurement Method
Accessing roof rafters from inside provides the safest and most accurate method for pitch determination. Position yourself safely in the attic space with adequate lighting and ventilation. Locate exposed roof rafters or ceiling joists that follow the roof slope directly.
Place the carpenter’s level against the bottom edge of a roof rafter, ensuring complete contact along the level’s length. Check that the bubble indicates perfect horizontal positioning before proceeding with measurements. Mark the 12-inch point on the level using a pencil or removable tape.
Measure the vertical distance from the 12-inch mark straight up to the bottom edge of the rafter above. This measurement represents the rise portion of your pitch calculation. Record both the 12-inch run and the vertical rise measurement for calculation purposes.
Step-by-step attic measurement process:
- Position level against roof rafter with bubble centered
- Mark 12-inch point on level from starting edge
- Measure vertical distance to rafter at 12-inch mark
- Record measurements immediately for accuracy
- Repeat process at multiple locations for verification
- Calculate average if measurements vary slightly
Roof Surface Measurement Technique
Direct roof surface measurement requires enhanced safety precautions including proper footwear, fall protection equipment, and ideal weather conditions. Never attempt roof access during wet, icy, or windy conditions that compromise safety. Plan measurement activities during calm, dry weather with good visibility.
Position the carpenter’s level on a flat section of roof surface, avoiding areas near edges, penetrations, or damaged materials. Ensure the level reads horizontal before taking measurements. Use the same 12-inch base measurement and vertical rise technique as interior methods.
Weather conditions significantly affect measurement accuracy and safety. Morning dew, temperature variations, and wind can impact both tool performance and personal safety. Schedule measurement activities during optimal conditions for best results.
Roof surface safety considerations:
- Wear appropriate non-slip footwear designed for roof work
- Use fall protection equipment on steep or high roofs
- Avoid wet, icy, or excessively hot surface conditions
- Work with a partner for enhanced safety and accuracy
- Plan escape routes and emergency procedures before starting
Ground-Based Estimation Methods
Ground-based measurements provide approximate pitch calculations when roof access proves impossible or unsafe. These methods sacrifice some accuracy for enhanced safety and convenience. Use ground-based estimates for preliminary planning while confirming with direct measurements when possible.
Measure the total roof height from the eave to the ridge using appropriate techniques for your specific building configuration. Calculate the horizontal distance from the exterior wall to the roof center line. Apply basic trigonometry to determine approximate pitch ratios.
Visual estimation techniques help experienced professionals quickly assess roof pitches for initial project evaluation. These methods require significant experience and should be confirmed with direct measurements for final calculations.
Ground-based estimation limitations:
- Reduced accuracy compared to direct measurement methods
- Difficulty accounting for complex roof geometries
- Challenges measuring multi-level or irregular roofs
- Weather and visibility restrictions affecting measurements
- Need for confirmation through direct measurement methods
Calculation and Conversion Techniques
Converting Measurements to Pitch Ratios
The standard 12-inch base measurement system simplifies pitch calculations and ensures industry compatibility. Divide your rise measurement by the run measurement, then multiply by 12 to establish the pitch ratio. For example, 8 inches of rise over 16 inches of run equals 6/12 pitch.
Converting decimal measurements to fractions maintains industry standards and improves communication with contractors and suppliers. Round measurements to the nearest quarter-inch for practical applications while maintaining adequate precision for material selection and installation planning.
Simplifying complex ratios improves understanding and reduces calculation errors. Always reduce ratios to their simplest form using common denominators. Double-check calculations by working backward from the final ratio to verify accuracy.
Common calculation errors:
- Confusing rise and run measurements in ratio calculations
- Failing to use 12-inch base for standard pitch expressions
- Rounding measurements too aggressively, losing necessary precision
- Mixing measurement systems without proper conversions
- Neglecting to verify calculations through alternative methods
Alternative Measurement Systems for Figuring Roof Angles
Converting pitch ratios to degree measurements requires trigonometric calculations using the arctangent function. Divide the rise by the run, then calculate the arctangent of this decimal to determine the angle in degrees. Most scientific calculators and smartphone apps provide arctangent functions for these conversions.
Percentage slope calculations multiply the decimal slope by 100 to express steepness as a percentage. A 6/12 pitch equals 50% slope, while a 4/12 pitch represents 33.3% slope. This percentage figure is exactly what’s meant by roof gradient, so percentage expressions help communicate with engineering professionals and international contacts who use gradient terminology.
Metric system conversions accommodate international projects and engineering specifications. Convert inch measurements to millimeters or centimeters while maintaining the same ratio relationships. European standards often express pitch in degrees rather than fractional ratios.
Table 2: Pitch Conversion Reference Chart
| Pitch Ratio | Degrees | Percentage | Common Description |
| 4/12 | 18.4° | 33.3% | Standard residential |
| 6/12 | 26.6° | 50% | Moderate slope |
| 8/12 | 33.7° | 66.7% | Steep residential |
| 12/12 | 45° | 100% | 45-degree angle |
Common Measurement Challenges
Complex Roof Geometries
Multiple pitch sections on single buildings require individual measurements for each distinct slope. Hip roofs, dormers, and additions create measurement challenges that demand systematic approaches and careful documentation. Measure each section independently while noting transitions and intersections.
Hip and valley intersections complicate measurements due to compound angles and irregular geometries. Focus on measuring main roof sections first, then address specialty areas with appropriate techniques. Consider professional consultation for complex geometries requiring precise calculations.
Dormers and roof additions often feature different pitches than main roof sections. These variations affect material selection, installation methods, and overall project complexity. Document all pitch variations for comprehensive project planning.
Complex geometry challenges:
- Multiple pitch sections requiring individual measurements
- Hip and valley intersections with compound angles
- Dormer and addition integration with existing structures
- Curved or irregular surfaces defying standard measurement techniques
- Transitions between different roof materials and systems
Access and Safety Issues
High or steep roof limitations may prevent safe direct measurement access. Prioritize safety over measurement convenience by using alternative methods or professional services when conditions exceed safe working parameters. No measurement justifies risking personal injury through unsafe practices.
Weather-related restrictions include precipitation, high winds, extreme temperatures, and poor visibility conditions. Plan measurement activities during optimal weather windows while maintaining flexible scheduling for safety considerations.
Equipment limitations affect measurement accuracy and safety in challenging conditions. Invest in quality tools appropriate for your specific measurement requirements and safety conditions. Consider renting specialized equipment for occasional use rather than compromising with inadequate tools.
Professional consultation becomes necessary when:
- Roof access exceeds safe working conditions for homeowners
- Complex geometries require specialized expertise
- Precision requirements exceed typical accuracy needs
- Insurance or permit applications demand professional verification
- Multiple measurement attempts yield inconsistent results
Pitch Impact on Roofing Decisions
Material Selection Considerations
Minimum pitch requirements vary significantly between roofing materials, affecting both performance and warranty coverage. Asphalt shingles typically require 2/12 minimum pitch, while metal roofing systems may accommodate 1/12 pitches with appropriate installation modifications.
Drainage and water shedding capabilities improve with increased pitch, reducing risks of ice dams, standing water, and premature material failure. Understanding how to determine your roof pitch helps select materials that perform optimally under your specific conditions.
Installation complexity increases with steepness, affecting labor costs, safety requirements, and project duration. Steep pitches require specialized techniques, enhanced safety measures, and experienced installation crews for optimal results.
Long-term performance implications include material longevity, maintenance requirements, and weather resistance characteristics. Proper pitch selection based on accurate measurements ensures materials perform as designed throughout their expected service life.
Critical pitch thresholds for common materials:
- 2/12 minimum for standard asphalt shingles
- 3/12 recommended for metal roofing systems
- 4/12 standard for most conventional applications
- 8/12 threshold requiring specialized installation techniques
- 12/12+ demanding expert installation and premium materials
Cost and Installation Factors
Labor complexity increases exponentially with roof steepness, affecting both installation time and crew safety requirements. Steep pitches require additional safety equipment, slower work pace, and specialized techniques that increase overall project costs.
Safety equipment requirements scale with pitch steepness and roof height, adding both cost and complexity to installation projects. Fall protection systems, specialized footwear, and safety training become increasingly important as pitch increases.
Material waste considerations include cutting requirements, handling difficulties, and breakage risks associated with steep installations. Factor additional material allowances for complex pitches and challenging installation conditions.
Professional installation recommendations vary based on pitch measurements, with steeper roofs typically requiring experienced crews and specialized equipment. Understanding when to tackle DIY projects versus hiring professionals prevents costly mistakes and safety incidents.
Professional vs DIY Considerations
When to Measure Yourself
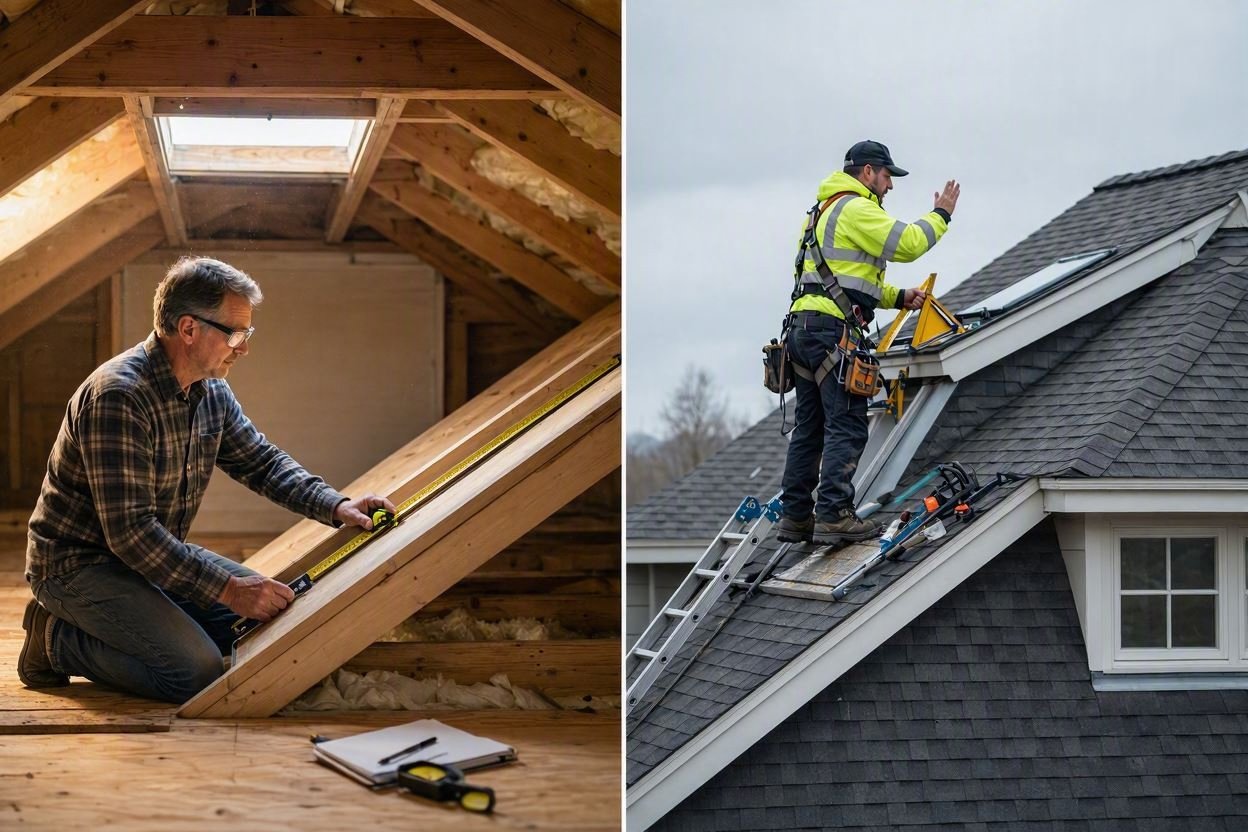
Simple roof geometries with safe access conditions allow homeowners to perform accurate pitch measurements using basic tools and techniques. Single-plane roofs with accessible attic spaces provide ideal conditions for DIY measurement projects.
Accessible attic spaces offer the safest measurement environment for homeowners without professional roofing experience. Interior measurements eliminate many safety risks while providing accurate results for material selection and project planning.
Basic renovation planning benefits from homeowner measurements when precision requirements remain modest and safety conditions allow proper access. Understanding your roof pitch helps evaluate project scope and material options before consulting professionals.
Initial cost estimation improves with accurate pitch measurements, helping homeowners budget appropriately for roofing projects. Preliminary measurements support informed discussions with contractors and suppliers during project development phases.
Professional Measurement Services
Complex architectural features including multiple pitch sections, irregular geometries, and specialty roofing systems often require professional expertise for accurate measurement and interpretation. Professional services ensure precise calculations for challenging applications.
Insurance claim requirements frequently demand professional documentation and verification of roof conditions and measurements. Professional reports provide the credibility and accuracy needed for successful claim processing and dispute resolution.
Permit application needs may require professional stamped drawings and calculations based on precise pitch measurements. Building departments often require professional verification for complex projects or non-standard applications.
Precision installation planning for premium materials or challenging conditions benefits from professional measurement services that ensure optimal material selection and installation techniques.
Conclusion
Understanding how to determine your roof pitch accurately empowers informed decisions about roofing materials, installation methods, and project costs while ensuring proper drainage and long-term performance. Whether measuring from the attic, roof surface, or using ground-based estimation methods, the fundamental 12-inch base system provides industry-standard calculations that contractors and suppliers universally recognize. The ability to convert pitch measurements to degrees enhances communication with engineering professionals and supports compliance with building codes and manufacturer specifications.




