

Installing roof tiles involves seven steps: inspecting the deck, laying underlayment, marking the layout, fitting battens, setting tiles row by row, capping the ridges and hips, then sealing the flashing. Get any one of those wrong, and the two most common failure points, ridges and flashing, start leaking within a few years. A licensed roofer usually finishes an average home in 5 to 7 days. DIY installation is technically possible but rarely advisable given the weight of the material and the wind-rating rules involved.
A tile never stops water on its own; the underlayment beneath it does that work, while the tile just sheds what lands on it, so this guide covers the full sequence a contractor actually follows: deck inspection, underlayment overlap, battens, the five attachment methods (mortar, double-nail, screw-down, foam adhesive, hybrid), ridge and hip capping, and flashing, alongside the clay, concrete, slate, and composite weight and lifespan differences, US code (IRC, NRCA) versus UK code (BS 5534), real per-square costs, and the fastening mistakes that turn into a leak two or three years down the line. None of that tends to show up in a sales quote, so treat this as the version a working roofer would hand a homeowner, not a pitch.
What You Need Before You Install Roof Tiles
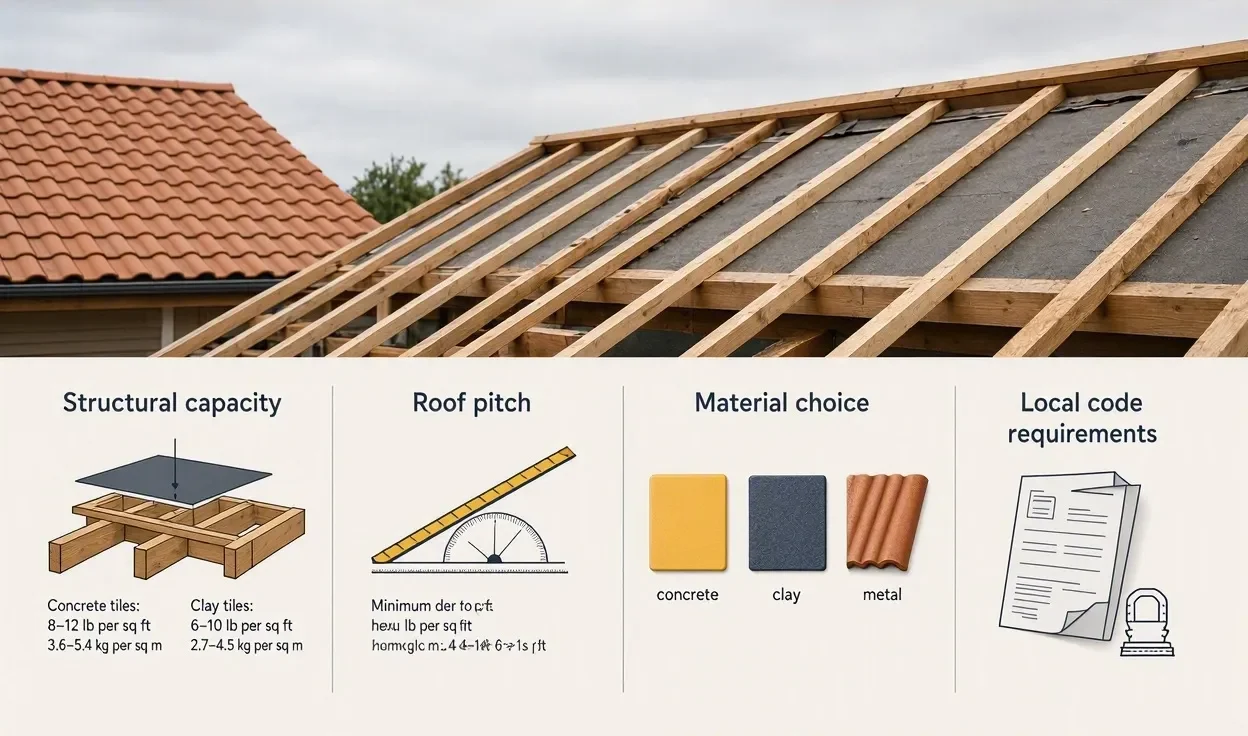
Before any tile goes down, four things need to be confirmed: structural capacity, roof pitch, material choice, and local code requirements.
Structural capacity matters first. Concrete tiles add 8 to 12 pounds per square foot (3.6 to 5.4 kg/m²), and clay tiles add 6 to 10 pounds per square foot (2.7 to 4.5 kg/m²). A roof framed for asphalt shingles, which weigh roughly 2 to 4 pounds per square foot (0.9 to 1.8 kg/m²), often can’t carry that load without reinforcement. A structural engineer, not a roofer, should confirm this on any retrofit.
Roof pitch comes next. Most tile manufacturers require a minimum slope of 4:12 (about 18 degrees), though some interlocking profiles allow slopes as low as 2.5:12 with modified underlayment. Anything flatter than that isn’t a candidate for tile at all; water simply sits too long between the overlaps.
Tools and materials for the job include:
- Chalk line
- Tile cutter or wet saw
- Roofing nailer or screw gun
- Tin snips for flashing
- Tape measure
- Safety harness and roof anchors
- Synthetic or felt underlayment
- Battens, timber or metal
- Corrosion-resistant fasteners
- Ridge and hip tiles
- Flashing material, usually galvanized steel or lead
How to Install Roof Tiles: The 7-Step Process
Roof tile installation follows a fixed sequence, and skipping ahead, say, laying tiles before the underlayment cures or before flashing is cut, is where most failures start.
Step 1: Inspect and Prepare the Roof Deck
The deck must be clean, dry, and structurally sound before anything else happens. Any rot, soft spots, or delamination in the plywood or OSB sheathing gets replaced now, because a weak deck under tile is far more dangerous than the same weak spot under shingles. Contractors typically use a 4-foot level or straightedge to check for dips exceeding a quarter inch (6 mm) over that span. Once repairs are done, the deck gets swept clean of debris and nail heads.
Step 2: Install the Underlayment
Underlayment goes down starting at the eaves and working upward, with each course overlapping the one below by at least 6 inches (15 cm). This overlap is non-negotiable in high-wind or heavy-rain regions, where a double layer of self-adhered membrane is often specified along the first 3 feet (0.9 m) from the eave. Synthetic underlayment has mostly replaced 30-pound felt on new installs, since it resists tearing during the walking and stapling that follows over the next several days. Skip this layer, or install it poorly, and the tile above becomes decorative rather than functional.
Step 3: Mark and Plan the Tile Layout
Chalk lines get snapped across the underlayment to guide straight, evenly spaced tile rows before a single tile is set. Layout accounts for roof dimensions, tile exposure length, valleys, hips, and any penetrations like vent stacks or skylights. Get this step wrong and you end up cutting tiles awkwardly at the ridge, which looks unfinished and creates extra seams for water to find.
Step 4: Install Battens (US and UK Methods)
Do battens go under roof tiles? Yes, in the vast majority of tile roofs, horizontal battens are fixed over the underlayment to give each tile row a mechanical fixing point. UK and European installations almost universally use timber battens, typically 25 x 38 mm or 25 x 50 mm, spaced according to the tile manufacturer’s gauge, a requirement written directly into British Standard 5534 (BS 5534), the governing code for slating and tiling in the UK. US installations vary more. Some regions batten every course; others, particularly in the Southwest and Florida, fasten tiles directly to the deck or to counter-battens depending on wind zone. Counter-battens, run vertically beneath the horizontal battens, also create a drainage channel that keeps water moving off the deck instead of pooling against it.
Step 5: Lay the Tiles Row by Row
Tiles are set starting at the lowest course and worked upward, with each row overlapping the one beneath it to shed water down the slope. Starter tiles anchor the first row along the eave. From there, installers work in a straight line using the chalk marks from Step 3, checking spacing every few rows to catch drift before it compounds. Cut tiles at valleys and hips get trimmed with a wet saw to avoid cracking the material, since a dry cut on clay or concrete tends to chip the edge.
Step 6: Fit Ridge and Hip Caps
Ridge and hip caps get custom-fitted over the peaks where roof planes meet, then mechanically fastened and sealed, because this is where most tile roof leaks originate. Water naturally funnels toward these high points during heavy rain, so the caps need continuous bedding, either mortar, foam adhesive, or a mechanical clip system, along their full run. A gap of even half an inch (1.3 cm) at a ridge joint gives wind-driven rain a direct path into the structure below.
Step 7: Seal Flashing and Complete a Final Inspection
Flashing gets cut and shaped around every penetration, chimneys, vent pipes, skylights, then sealed with roofing cement to create a watertight barrier. Metal flashing, usually galvanized steel or lead, gets tucked under the surrounding tiles rather than laid on top of them, which lets water run over the seam instead of pooling against it. Once flashing is set, a final walk of the roof checks tile alignment, fastener security, and cap seals before the crew calls the job complete. Poor flashing work causes the majority of tile roof leaks reported to roofing contractors, more than any other single defect.
Roof Tile Attachment Methods Compared
Five attachment methods dominate the tile roofing industry: mortar-set, double-nail, screw-down, foam adhesive, and hybrid screw-and-foam systems.
| Method | How It Works | Best Suited For |
| Mortar-set | Tiles bedded in a sand-and-cement mix | Largely phased out; poor performance in high wind |
| Double-nail | Two ring-shank nails per tile | Older installs; less common on new builds |
| Screw-down | One or two corrosion-resistant screws per tile, upgradeable to stainless steel | The most widely used method today |
| Foam adhesive | Single- or two-component polyurethane foam | Lower stress on underlayment; growing in popularity |
| Hybrid (screw + foam) | Combines mechanical and adhesive fixing | High-wind zones needing both flexibility and holding strength |
Mortar-set installation fell out of favor largely because of Hurricane Andrew in 1992, after which inspectors found widespread tile loss on mortar-bedded roofs and building codes tightened uplift requirements across hurricane-prone states. Screw-down remains the industry default because it balances cost, labor time, and wind performance, while foam adhesive continues gaining ground since it distributes stress across a wider surface instead of concentrating it at a few fastener points.
Roof Tile Materials, Weight, and Lifespan
| Tile Type | Weight per Sq Ft | Weight per m² | Typical Lifespan | Best Climate |
| Clay | 6 to 10 lbs | 2.7 to 4.5 kg | 50 to 100 years | Hot, dry |
| Concrete | 8 to 12 lbs | 3.6 to 5.4 kg | 40 to 75 years | Variable |
| Slate | 8 to 20 lbs | 3.6 to 9 kg | 75 to 100+ years | Cold, wet |
| Composite | 4 to 8 lbs | 1.8 to 3.6 kg | 30 to 50 years | Most climates |
| Metal tile | 1 to 3 lbs | 0.4 to 1.4 kg | 40 to 70 years | High wind, low structural capacity |
Clay outlasts concrete in nearly every climate comparison, and some manufacturers back that gap with warranties running 75 years or longer. Slate carries the heaviest average load of the group, which is exactly why older buildings with slate roofs were framed with heavier structural timbers than a comparable asphalt-shingle home. Composite and metal tile exist specifically for structures that can’t carry clay or concrete without reinforcement, trading some longevity for a fraction of the weight.
Terracotta deserves a separate mention here, mostly because the term confuses buyers. Terracotta simply means fired clay, so a terracotta tile and a clay tile are the same product under two different names, occasionally sold under a third label, ceramic, depending on the manufacturer’s marketing preference. None of that changes the installation process; the fastening method and underlayment requirements stay identical regardless of what the brochure calls the tile.
Building Codes for Roof Tile Installation in the US and UK
Do the US and UK follow the same tile roofing codes? No, they don’t, and treating them as interchangeable is a common mistake among contractors working across both markets.
In the United States, tile installation falls under the International Residential Code (IRC), supplemented by ASTM wind-uplift testing standards and, in hurricane zones, Florida’s Testing Application Standard (TAS) protocols. The National Roofing Contractors Association (NRCA) publishes additional technical guidance that most licensed installers reference for fastening schedules and underlayment specs.
In the United Kingdom, British Standard 5534 governs slating and tiling almost completely, specifying batten gauge, fixing requirements based on location and exposure category, and minimum headlap for every tile profile. Unlike the more fragmented US approach, BS 5534 applies uniformly across the country, with exposure zone (based on wind speed and height above sea level) determining how many fixings each tile needs. A roof in coastal Cornwall, for instance, requires a fixing specification that would be excessive, and needlessly expensive, on an inland roof in the Midlands.
How Much Does It Cost to Install Roof Tiles?
Roof tile installation typically costs between $800 and $1,800 per square (100 square feet, or 9.3 m²) in the US, and between £70 and £120 per square meter in the UK, depending on material. Clay and slate sit at the top of that range because of material cost and the specialized labor required to cut and set them without cracking. Concrete and composite tiles run cheaper, both in material and installation time, since composite in particular can be cut with standard power tools rather than a wet saw. Total project cost also swings on roof complexity: a simple gable roof costs meaningfully less per square than one with multiple valleys, dormers, and hip lines, since each of those features adds cutting time and flashing work.
Can You Install Roof Tiles Yourself?
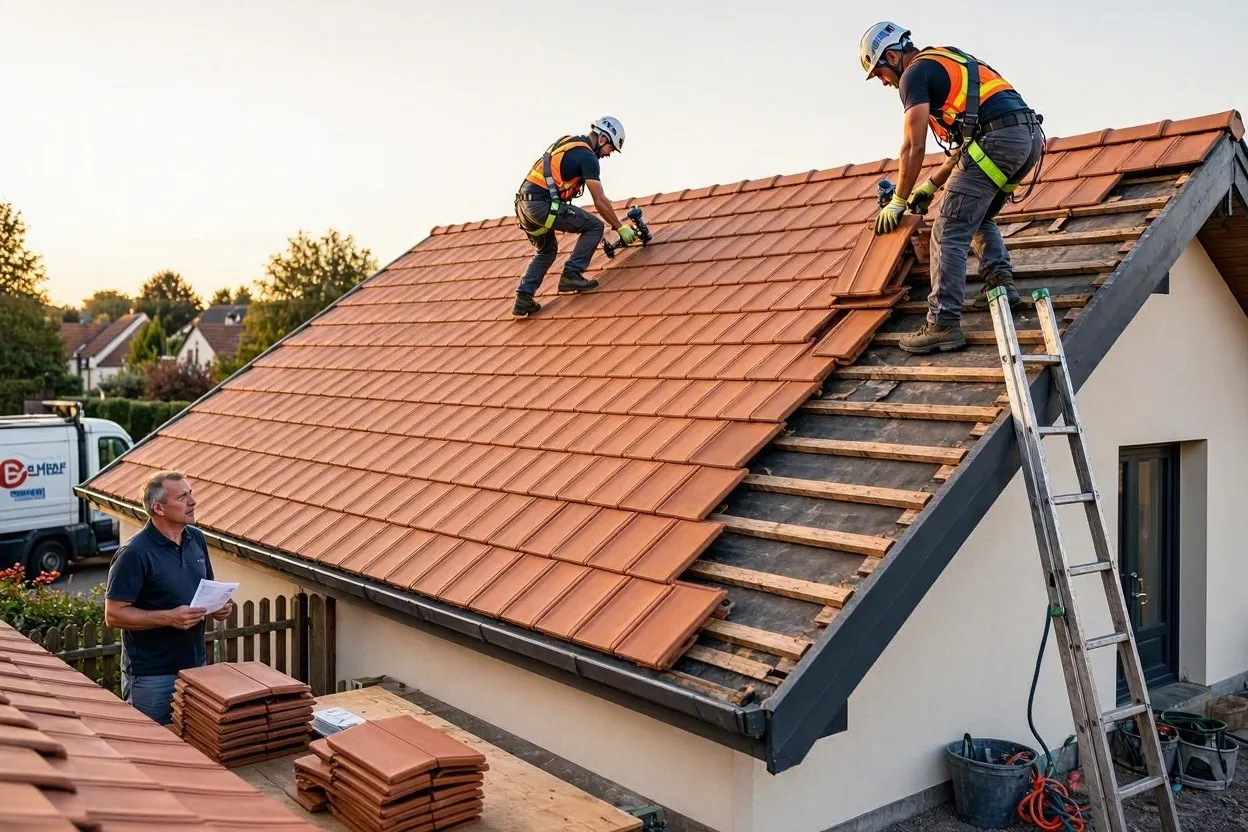
No, most homeowners should not attempt full tile roof installation themselves. The combination of material weight, cutting precision, and code-mandated fastening schedules makes this one of the more technical roofing jobs available, and mistakes here don’t show up as a leak next week; they show up as a leak in year three, buried under tiles nobody wants to remove and reset. Professional installers carry liability insurance that protects the homeowner if something goes wrong mid-project, and most manufacturers void material warranties on tiles installed by unlicensed labor. A homeowner with genuine roofing experience might reasonably handle a small, simple section, a shed roof or a garage, but a full residential tile roof sits well outside typical DIY scope.
How to Maintain a Tile Roof After Installation
A newly installed tile roof needs an annual inspection, prompt debris removal, and immediate attention to any cracked or shifted tile. Moss and algae growth, common in shaded or humid regions, should get cleared with a soft wash rather than a pressure washer, since high-pressure water forces its way under tile laps and can dislodge the underlayment beneath. Never walk directly on tile without stepping near the overlap areas closest to the batten line, where the tile is fully supported; stepping mid-span on an unsupported section is the single most common cause of cracked tiles on an otherwise sound roof. With that kind of care, a well-installed tile roof reaches the upper end of its material’s lifespan range rather than falling short of it.
Common Mistakes That Shorten a Tile Roof’s Lifespan
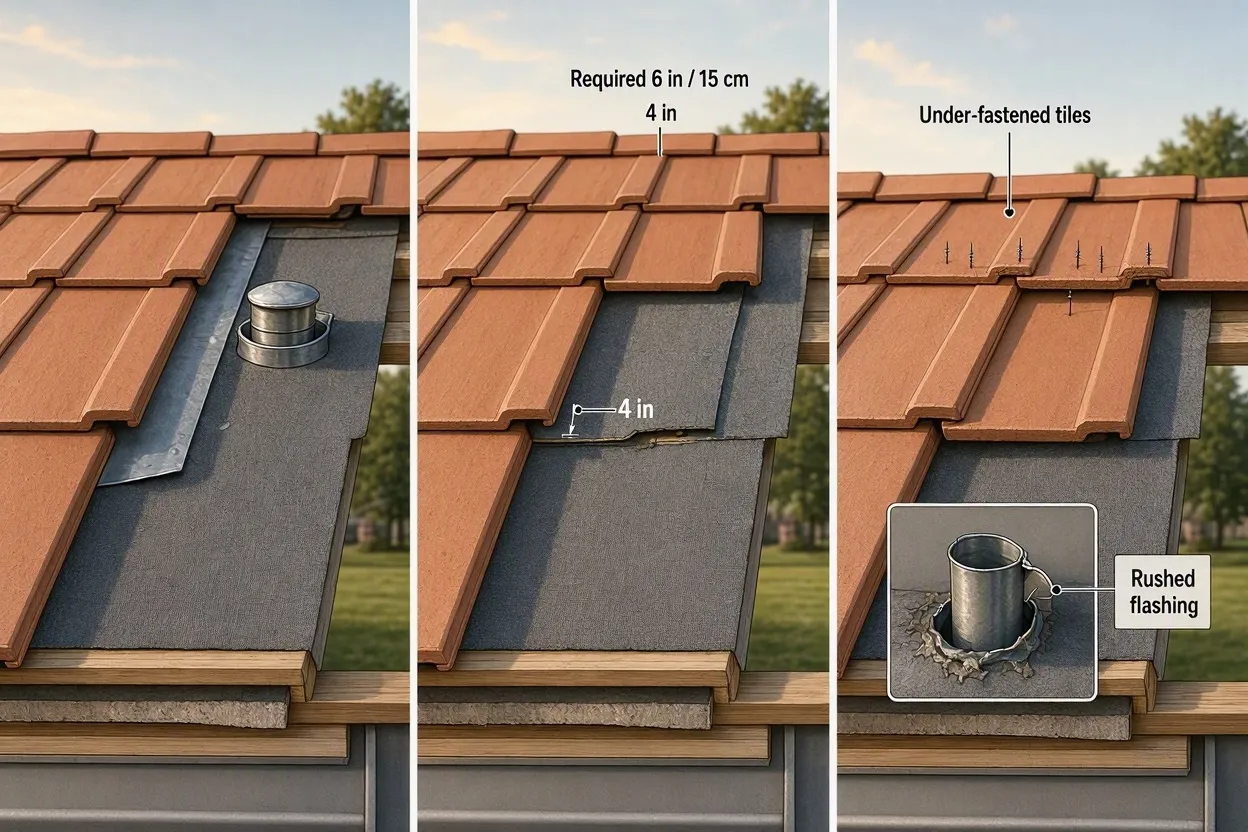
The most common installation mistakes are skipping underlayment overlap, under-fastening in high-wind zones, and rushing flashing around penetrations. None of these show up on day one. A roof with 4 inches of underlayment overlap instead of the required 6 inches (15 cm) looks identical to a correctly built one until the first sideways rainstorm pushes water past the shortfall. Under-fastened tiles behave the same way, holding fine through a mild season, then lifting in the first storm that actually tests the wind rating the installer skipped.
Four mistakes account for most tile roof failures reported by roofing contractors:
- Insufficient underlayment overlap at eaves and valleys
- Fasteners that don’t match the specified wind-uplift rating for the site
- Flashing tucked over tiles instead of under them, reversing the intended water path
- Walking on unsupported tile spans during installation or later maintenance, which cracks tiles nobody notices until a leak appears
A contractor who explains why each step matters, not just what step comes next, is usually the one who catches these before they become a warranty claim.
Conclusion
Installing roof tiles rewards patience far more than speed. Every layer, deck, underlayment, battens, tile, ridge cap, flashing, exists to protect the one above it, and rushing any single step tends to surface as a leak years later rather than immediately. Get the sequence right, match the fastening method to your wind zone, and follow the code that actually applies to your location, IRC and NRCA guidance in the US, BS 5534 in the UK, and a tile roof will comfortably outlast the mortgage on the house underneath it.




