
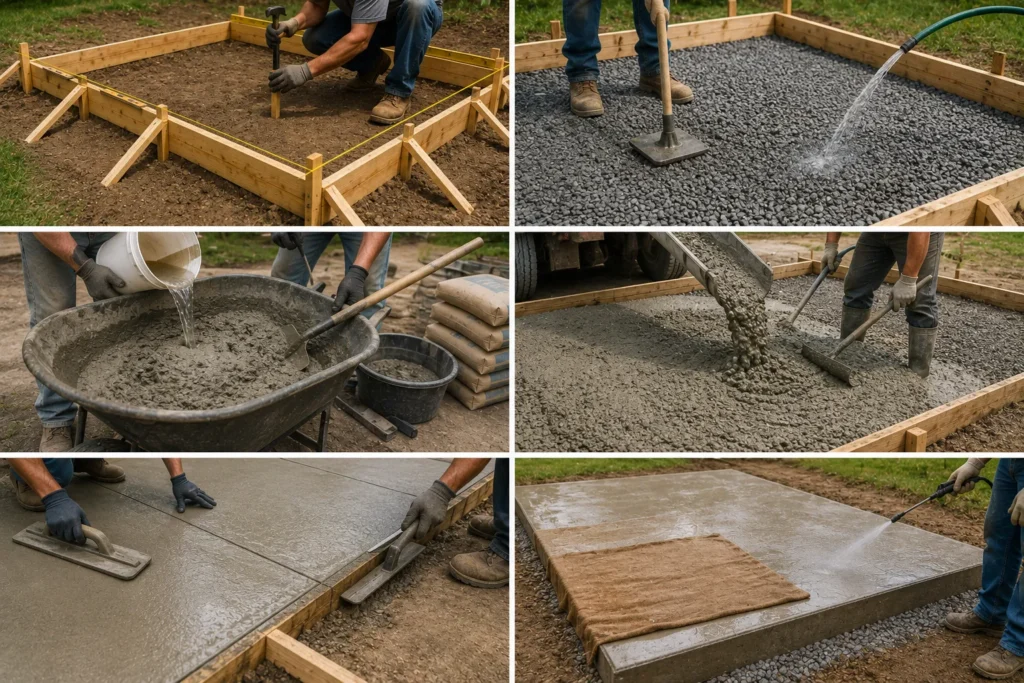
Pouring concrete requires six steps: building forms, laying a gravel base, mixing or ordering concrete supplies, pouring the mix, finishing the surface, and curing it for at least seven days. Skip any step, and the slab cracks, sinks, or fails early. This guide breaks down each phase with exact measurements, current 2026 material pricing, and the mistakes that cause most DIY pours to fail.
What Pouring Concrete Actually Involves
Pouring concrete means placing a wet mix of cement, sand, gravel, and water into a prepared form, then shaping and hardening it into a solid slab. The process splits into two halves: everything you do before the truck arrives (or before you mix the bags), and everything you do in the two hours after. Most failures happen in the prep half — not the pour itself.
A concrete slab needs three layers underneath it to survive Michigan winters or Texas summers: compacted soil, a gravel base 4 to 6 inches (10 to 15 cm) thick, and rebar or wire mesh for reinforcement on any slab over 6 feet (1.8 m) wide. Miss the gravel layer, and water pools under the slab, freezes, and cracks it within a year.
Building Materials and Supplies You Need
Gather these building materials and hardware supplies before you order concrete, not after:
- 2×4 or 2×6 lumber for forms
- Wood stakes and deck screws
- A level and mason’s line
- A wheelbarrow or mixing tub
- A concrete hoe or shovel
- A screed board (straight 2×4)
- A bull float for large slabs, a wood float for small ones
- An edging tool and a groover for control joints
- A magnesium float for the final smooth pass
- A stiff-bristle broom for slip-resistant texture
- Concrete mix (bagged or ready-mix) and gravel for the base
- A cure-and-seal product or plastic sheeting for curing
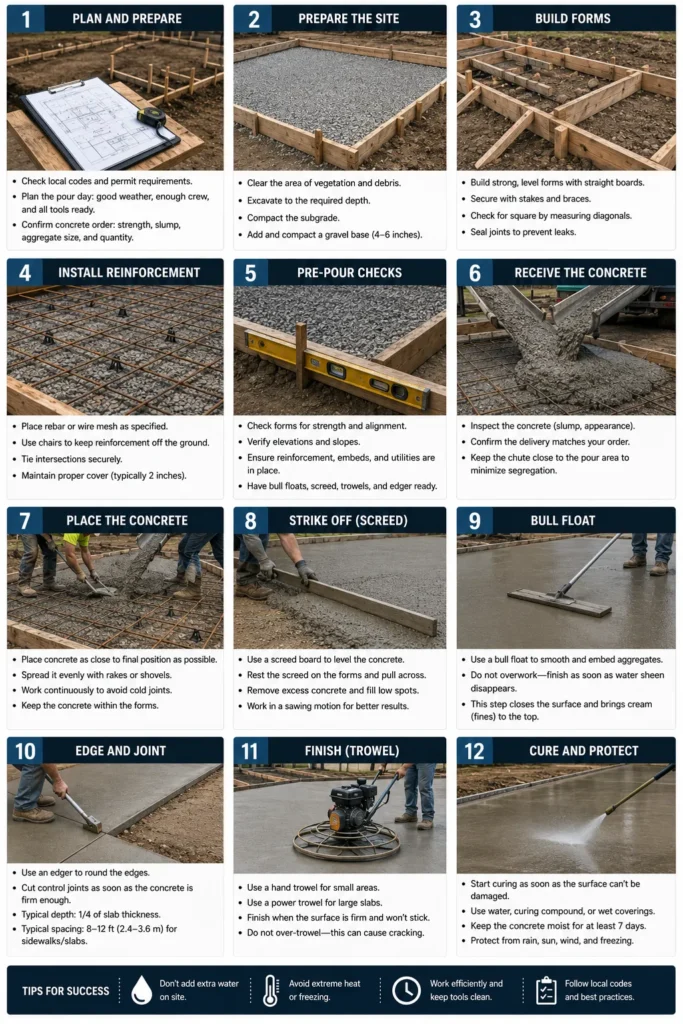
How to Pour Concrete: 6 Steps
Step 1: Build the Forms
Mark the slab perimeter with stakes, then string a level line between them to check the slope. Cut 2×4 or 2×6 boards to size and nail them to the stakes, keeping every edge level and square. Brace each form board every 2 feet (60 cm) with diagonal stakes so the wet concrete doesn’t push the forms outward during the pour.
Step 2: Prep the Base
Excavate the site to a depth that accounts for both the gravel base and the concrete: for a standard 4-inch (10 cm) slab, dig down 7 to 8 inches (18 to 20 cm) total. Spread 3 to 4 inches (7.5 to 10 cm) of gravel, compact it with a tamper, and dampen it with a hose. A dry, uncompacted base causes 60% of DIY slab failures within the first two years, according to contractor surveys cited across major concrete manufacturer guides.
Step 3: Mix or Order Concrete Supplies
Bagged concrete mix works for small jobs under 1 cubic yard (0.76 cubic meters); anything larger needs ready-mix delivery from a building materials supplier. If mixing bagged supplies, add three-quarters of the water first, then the dry mix, then the remaining water — mix for 3 minutes until it holds together when packed but crumbles when released. If ordering ready-mix, give the supplier your square footage and slab thickness; they calculate the yardage and deliver the material.
Step 4: Pour and Screed
Pour the concrete into the forms in evenly spaced sections, filling from the far end back toward the access point. Use a hoe to spread it and knock down air pockets. Once the forms are full and slightly mounded, drag a straight screed board across the top in a side-to-side sawing motion to level the surface flush with the form edges.
Step 5: Float, Edge, and Finish
Run a bull float or wood float across the surface right after screeding to push down gravel and bring a thin layer of paste to the top. Wait until the bleed water evaporates and the surface passes the thumbprint test — you should press in about a quarter inch (6 mm) and no further. Then run an edging tool along the form boards, cut control joints every 8 to 12 feet (2.4 to 3.6 m) with a groover, and apply the final finish: a magnesium float for smooth concrete, or a broom dragged in one direction for slip resistance.
Step 6: Cure the Slab
Curing determines final strength more than any other step. Keep the slab damp for a minimum of 7 days using wet burlap, a fine mist, or a cure-and-seal spray applied right after finishing. Concrete cured properly for 7 days reaches roughly double the strength of concrete left to dry in open air.
How Much Concrete You Need
Multiply length by width by thickness, then divide by 27 to convert cubic feet to cubic yards. A faster shortcut for a standard 4-inch slab: divide the square footage by 81 to get cubic yards.
| Application | Standard Thickness | Cubic Yards per 100 sq ft |
| Walkway or sidewalk | 4 inches (10 cm) | 1.24 yards |
| Patio | 4 inches (10 cm) | 1.24 yards |
| Standard driveway | 5 inches (12.7 cm) | 1.55 yards |
| Heavy-duty driveway or garage floor | 6 inches (15 cm) | 1.85 yards |
| Commercial slab | 6 to 8 inches (15 to 20 cm) | 1.85 to 2.47 yards |
Always order 5 to 10% more than the calculated amount. A slab that comes up short mid-pour creates a visible cold joint where the two pours meet; a slab with leftover concrete just needs one extra spot to dump it.
Cost to Pour Concrete in 2026
Concrete costs between $6.50 and $10.50 per square foot installed, covering building materials and labor for a standard plain slab. Decorative finishes — stamped, stained, or colored concrete — push the material cost to $12 to $18 per square foot. A 400-square-foot driveway costs $2,600 to $4,200 with a contractor; the same job using bagged concrete supplies alone runs $700 to $1,000 in materials, with the rest going to labor and equipment.
5 Mistakes That Ruin a Concrete Pour
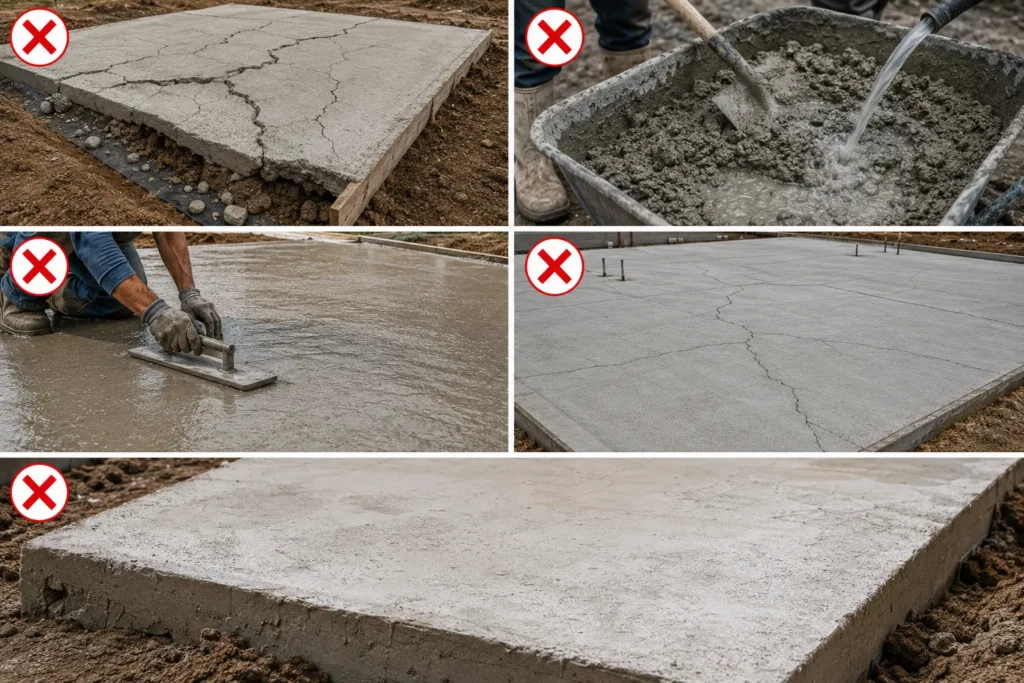
- Skipping the gravel base — causes settling and cracking within the first freeze-thaw cycle.
- Adding too much water to the mix — weakens the concrete and increases shrinkage cracking.
- Over-floating the surface — draws excess water up, creating a soft, dusty top layer.
- Pouring without control joints — forces random cracks instead of clean, planned lines.
- Skipping the curing step — cuts final compressive strength nearly in half.
Best Weather and Season to Pour Concrete
Concrete cures best between 50°F and 90°F (10°C to 32°C). Below 50°F (10°C), the curing reaction slows down and can stop entirely if the mix freezes within the first 24 hours. Above 90°F (32°C), the surface dries too fast, causing shrinkage cracks before the slab gains strength. Spring and early fall offer the most stable temperatures across most of the United States. In hot southern states like Texas, Florida, and Arizona, pour early in the morning to avoid rapid surface drying. In colder northern states like Minnesota or Michigan, wait until nighttime lows stay above 40°F (4°C) for at least a week after the pour.
DIY vs. Hiring a Contractor
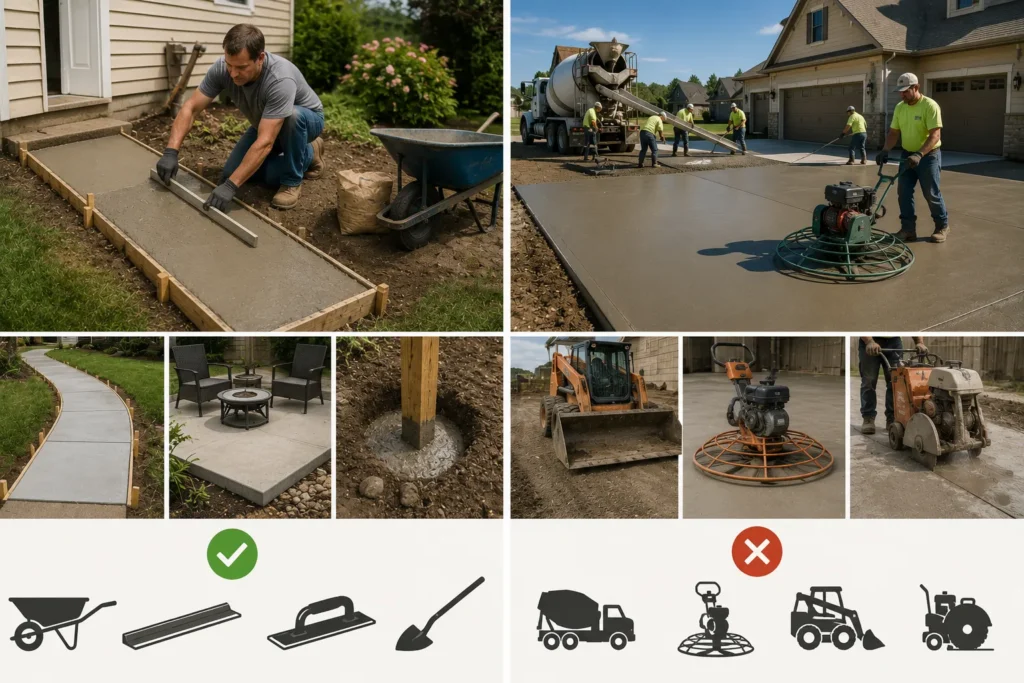
DIY concrete pouring works for small, flat projects under 100 square feet — walkways, small patios, fence post footings. Larger slabs, driveways, or anything requiring precise grading and drainage planning need a licensed contractor. A contractor carries insurance for structural failure, brings power tools like a walk-behind trowel machine, and finishes a driveway in one day instead of a full weekend. Hire a contractor if the slab exceeds 200 square feet or sits within 10 feet of a building foundation, since drainage mistakes there risk water damage to the structure.
Conclusion
Pouring concrete comes down to six steps done in the right order: forms, base, materials, pour, finish, cure. The base and curing stages cause most failures, not the pour itself, so give both the time they need — a compacted gravel base before you pour and 7 full days of moisture after. Match the slab thickness to its job, order 5 to 10% extra material from your building supplies dealer, and check the weather before you start. Follow these steps, and a small walkway or a full driveway both hold up for decades instead of cracking within a year.




