
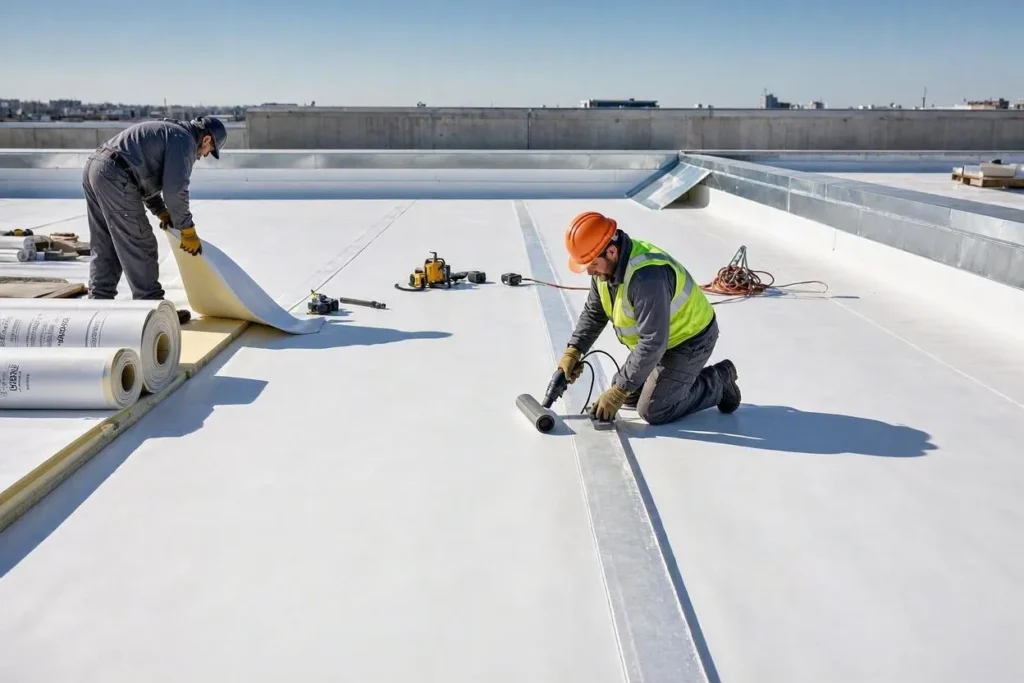
TPO roofing installation details follow a fixed sequence: deck inspection, insulation and cover board attachment, membrane rollout, heat-welded seams, flashing at penetrations, and edge termination. Each stage carries its own tolerances. Welders run at 1000°F to 1100°F (538°C to 593°C). Seam overlaps range from 1.5 to 6 inches (3.8 to 15.2 cm) depending on the sheet type. Skip a step, or rush the deck prep, and the membrane fails early, regardless of how good the weld looks on day one.
This guide walks through every phase a licensed commercial roofer follows, with the exact specs manufacturers publish and the code references an architect will ask for.
What Is TPO Roofing?
Thermoplastic polyolefin (TPO) is a single-ply membrane made from a blend of polypropylene and ethylene-propylene rubber, reinforced with polyester fabric. Manufacturers extrude it in white, gray, or tan sheets, most commonly 45, 60, or 80 mil thick. Rolls ship in a few standard widths, typically 10 to 12 feet (3 to 3.7 meters), and run up to 100 feet (30.5 meters) long.
TPO earned its market share for a simple reason: the seams weld together chemically rather than relying on tape or glue alone. A properly welded seam becomes stronger than the membrane surrounding it. Add high solar reflectance, decent puncture resistance, and no need for plasticizers that degrade over time, and it’s easy to see why TPO now covers more low-slope commercial roofs than any other single-ply system in the United States.
Three attachment methods exist: mechanically fastened, fully adhered, and ballasted. Each one changes the fastening details, the crew size, and the wind uplift rating. We’ll cover the differences later in this guide.
What Tools and Equipment Do TPO Installers Need?
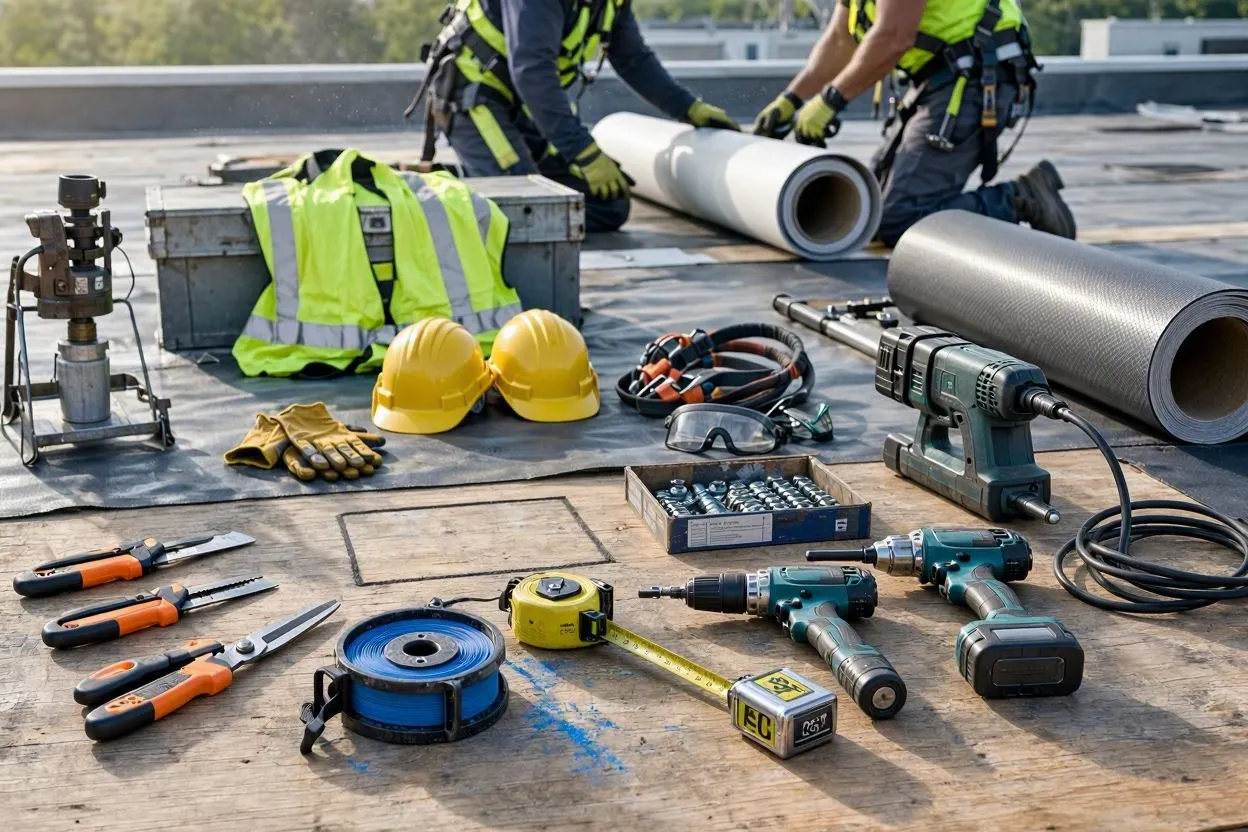
A TPO crew needs hand tools, welding equipment, and safety gear before the first sheet touches the deck. Missing even one piece stalls the job mid-roll.
Basic handling tools:
- Utility knives and scissors for cutting membrane
- 100-foot and 20-foot tape measures
- Chalk line with blue chalk (avoid red, it can stain the membrane)
- Variable-speed drills or hammer drills for fastening
- Torque-adjusting screw guns matched to the fastener type
- Approved solvents such as acetone or methyl ethyl ketone (MEK) for seam cleaning
- Clean white cotton rags, never colored or synthetic
Welding equipment:
- Automatic hot-air welder (Leister or equivalent) rated at 4,500 watts
- Hand welder for detail work around penetrations
- Silicone or neoprene seam roller
- Seam probe for weld testing
- Infrared thermometer to confirm nozzle output
A generator rated at 220 volts, 30 amps, and 7,500 watts minimum keeps the welder running without voltage drops that cause cold welds. Skimping on generator capacity is a mistake crews make more often than manufacturers would like.
How to Prepare a Roof Deck for TPO Installation
To prepare a roof deck for TPO installation, remove all debris, confirm structural soundness, and test for trapped moisture before any membrane goes down. Deck prep decides whether the warranty holds, and most manufacturers will not honor a claim if it was skipped.
Start with inspection and cleaning:
- Strip the deck to bare structure. Pull loose fasteners, old roofing, and debris.
- Sweep or blow the surface. Dust prevents adhesive bonds.
- Grind down protruding nails, screws, or sharp metal edges.
- Replace rotted wood decking or corroded metal panels.
Moisture is the deck killer nobody sees until the blisters show up. Use a moisture meter or infrared scan to confirm dryness across the whole field, not just a few spot checks. Concrete decks need a full cure, generally 28 days or more, before the membrane goes over them. Rushing that timeline traps vapor that later blisters through the finished roof.
If the substrate calls for a primer, apply it with a roller or sprayer and let it flash off completely first. On recover projects, over an existing roof, the old surface has to be smooth and compatible. Most manufacturers approve TPO over fully adhered EPDM or smooth modified bitumen. Loose gravel or aggregate is never acceptable underneath.
Cold-weather jobs add another constraint. Adhesive and weld application generally stop below 40°F (4°C) ambient temperature unless the manufacturer approves low-temperature additives. Self-adhered TPO-SA membrane is the exception, bonding down to 20°F (-6.7°C) without extra prep, which makes it a common choice for late-season projects.
How to Install Insulation and Cover Board Under TPO
Roof insulation and cover board go down mechanically fastened, fully adhered, or ballasted, matched to the deck type and wind zone. The membrane never sits directly on bare insulation. It needs a dense, stable surface between it and the substrate.
Gypsum-based boards, DensDeck and Securock among the common names, provide fire resistance and a smooth welding surface. High-density polyiso or fiberboard also work, but check the manufacturer’s spec sheet first.
| Attachment Method | How It Works | Best For |
| Mechanically Fastened | Plates and screws driven through insulation into the deck | Steel and wood decks, moderate wind zones |
| Fully Adhered | Low-VOC adhesive bonds board to deck or insulation | Concrete decks, high wind zones |
| Ballasted | Loose-laid board held by stone or pavers | Large open roofs with parapet walls |
Install boards in a staggered pattern so seams don’t align with the insulation layer below. Fastener penetration into the deck should hit at least 3/4 inch (19 mm). Gaps between boards can’t exceed 1/4 inch (6 mm); anything wider needs filler. If more than 3 inches (7.6 cm) of rigid insulation is specified, install it in two or more layers rather than one thick board.
A needle-punched polyester slip sheet sometimes separates the membrane from an incompatible insulation facer in mechanically fastened assemblies. It’s a small detail most installers skip until a chemical incompatibility shows up as membrane discoloration months later.
How to Lay Out TPO Membrane Rolls
TPO membrane rolls out perpendicular to metal deck flutes, or parallel to the longest roof dimension on other substrates, with three crew members minimum for safe handling. Rolls run 10 to 12 feet wide (3 to 3.7 meters) and weigh between 150 and 308 pounds (68 to 140 kg) depending on width and mil thickness.
Measure the field first, then pre-cut rolls to length on a clean staging area. Leave extra length for flashing up walls and parapets, since trimming later costs more time than cutting short in the field.
After a sheet rolls out, let it relax for 15 to 30 minutes before fastening or adhering. TPO carries internal stress from manufacturing, and skipping the relaxation period causes wrinkles and fishmouths at the seams once it’s under load. Avoid positioning a seam directly over an expansion joint or a deck splice; that’s asking for a stress point that eventually cracks.
For fully adhered systems, fold half the sheet back, apply adhesive to both the board and the membrane backing, wait for tack, then roll the sheet back into place. Repeat for the second half. A 75-pound (34 kg) membrane roller presses out wrinkles and confirms full contact with the substrate.
How to Heat Weld TPO Roofing Seams
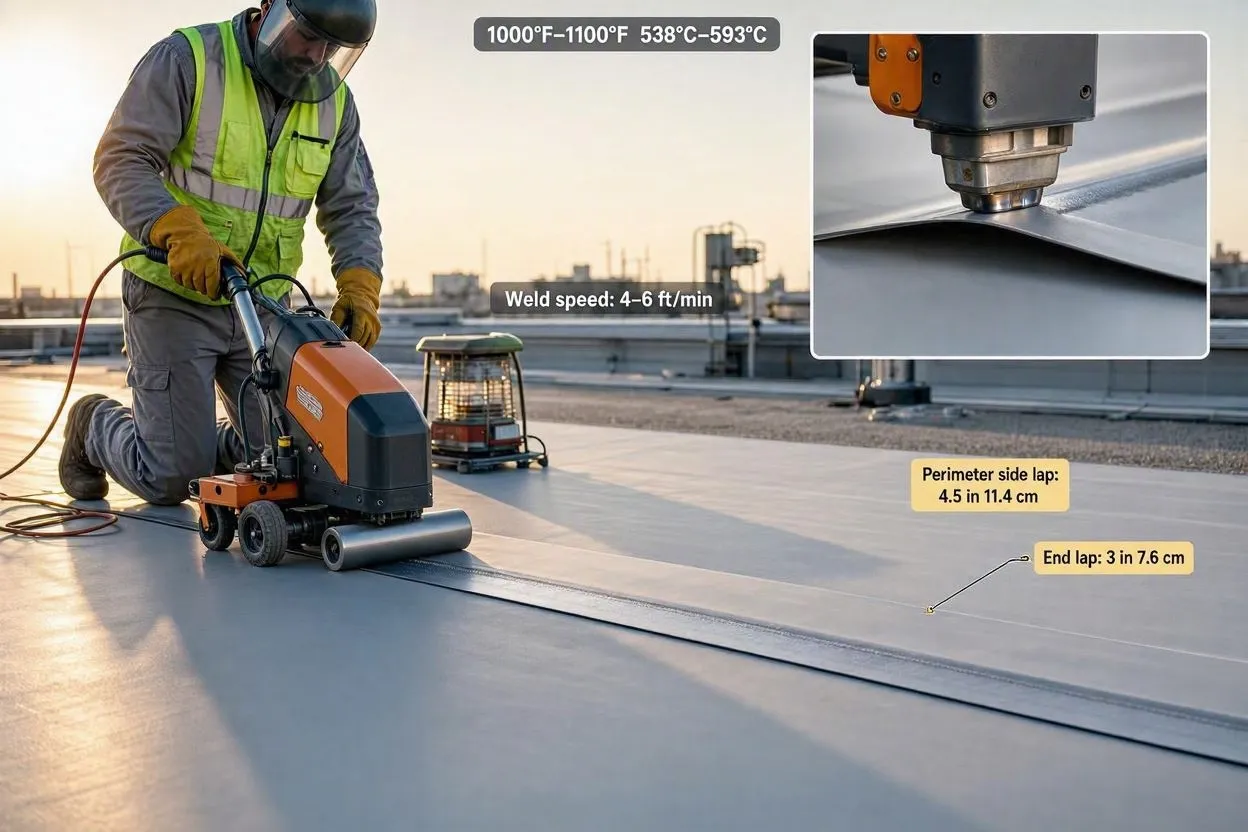
TPO seams weld using hot air at 1000°F to 1100°F (538°C to 593°C), with the automatic welder moving at roughly 4 to 6 feet per minute along the lap. Heat welding is what separates TPO from taped or glued membranes; a correctly welded seam fuses into one continuous sheet rather than two overlapping layers.
Overlap requirements vary by sheet position:
- Perimeter sheet side lap: 4.5 inches (11.4 cm) minimum
- End lap: 3 inches (7.6 cm) minimum
- Field sheet overlap: 6 inches (15.2 cm) minimum
- Minimum welded lap width: 1.5 inches (3.8 cm)
Clean the seam area with an approved TPO cleaner first, removing dust, oil, and factory release agent. Skip this step and the weld looks fine on the surface while failing underneath. Insert the lap edge into the welder, walk it at a steady pace, and watch for a slight color change with no scorching. Immediately roll the fused seam with a silicone roller for full contact.
Field seams over 10 feet (3 meters) require an automatic welder rather than a hand unit; hand welders are reserved for detail work at corners and penetrations. Test every completed seam with a probe. If the membrane separates cleanly without tearing the reinforcing scrim, the weld failed and needs redoing.
Wind and ambient temperature both affect weld quality. Slow the welder on cold days. On hot, windy days, a wind screen protects the weld zone from cooling too fast. Wet seams are never acceptable; moisture trapped in a weld turns to steam and blows bubbles straight through it.
How to Choose a TPO Attachment Method
Attachment method depends on deck type, wind uplift requirements, and whether the project is new construction or a recovery, with mechanically fastened suiting steel decks and fully adhered suiting concrete.
Mechanically fastened systems use stress plates, roughly 2 3/8 inches (60 mm) in diameter, spaced at 6 inches (15.2 cm) on center along the lap. This method works fastest and costs less in labor, though the exposed fastener pattern makes it less forgiving on complex rooflines.
Fully adhered systems bond the membrane to the substrate with low-VOC adhesive across the full surface. Concrete decks and high-wind coastal zones favor this method because there’s no penetration through the deck at all.
Ballasted systems rely on loose-laid membrane held down by stone, using ASTM D448-98 No. 4 gradation, 3/4 to 1 1/2 inches (19 to 38 mm), at a minimum coverage of 1,000 pounds per square (100 sq ft), which converts to roughly 454 kg per 9.3 square meters. Perimeter areas still need mechanical attachment or adhesion, even on a ballasted field.
Warranty length tracks attachment method and thickness. A 45-mil mechanically fastened system typically carries a 10-year warranty, while an 80-mil fully adhered system can reach 20 years. That spread alone often decides which method a spec calls for.
How to Flash Penetrations, Drains, and Parapets
Every pipe, vent, curb, and drain gets flashed with pre-molded TPO boots or field-fabricated membrane, heat-welded to the field sheet and terminated with a bar and sealant. Penetrations cause more roof leaks than open field seams, mostly because they’re easy to rush.
For round penetrations, slide a pre-molded boot over the pipe, weld the base to the field membrane, weld the collar up the pipe, and secure it with a stainless steel band. Odd-shaped penetrations need custom fabrication: cut a TPO sheet larger than the base, weld it to the field, add relief cuts at the corners, then weld the vertical face and install a termination bar at the top.
Drains follow a different sequence. Cut the membrane to fit snugly inside the drain ring, weld it to the flange, and bolt the compression ring down without stretching the material over the bowl. A field weld should never pass under the clamping ring itself.
Parapet and wall flashing extends the membrane at least 8 inches (20 cm) above the roof deck, secured with a termination bar or pressure-treated nailer. Vertical terminations beyond 30 inches (76 cm) need an added horizontal row of termination bar, spaced no more than 24 inches (61 cm) apart, to keep wind from working the flashing loose.
How to Terminate TPO at Roof Edges and Perimeters
TPO terminates at roof edges using a metal drip edge or gravel stop, with the membrane run over the metal and secured by a termination bar spaced every 6 inches (15.2 cm) with stainless steel screws. Edge failure is the fastest way to lose an entire field of membrane in a wind event.
The metal edge should extend at least 2 inches (5 cm) below the deck to direct water away from the wall face. After running the membrane over the metal, attach the termination bar, trim excess material, and apply a bead of TPO-compatible caulk over every screw head.
Perimeter zone width isn’t arbitrary; FM 1-29 sets it at 10% of the building’s narrowest width, or 40% of the eave height, whichever number is smaller. Buildings in high-wind regions often need two full-width perimeter sheets rather than one, since the added attachment density resists uplift better at the edge where wind pressure concentrates.
What Codes and Standards Govern TPO Installation
The International Building Code (IBC), ASTM standards, and Factory Mutual (FM) approvals govern TPO roofing installation details, covering wind uplift, fire classification, and material performance. IBC Chapter 15 addresses roof assembly requirements, including attachment and fire rating for low-slope membranes.
ASTM A653 sets the galvanizing standard (G90 coating minimum) for wood nailer fasteners. ASTM D448-98 governs ballast stone gradation. FM Global testing determines wind uplift ratings and drives the perimeter-width calculation covered above.
Reflective white TPO typically meets ENERGY STAR cool roof criteria, with initial solar reflectance around 0.80 and thermal emittance near 0.90. California Title 24 references those same reflectance and emittance thresholds for compliance in that state, and several other states have adopted comparable energy codes since. A high Solar Reflectance Index (SRI) rating lowers rooftop surface temperature and can reduce cooling load on the building below.
How Much Does TPO Roofing Installation Cost
TPO roofing installation typically runs $5.50 to $9.00 per square foot ($550 to $900 per square) installed, with thickness, attachment method, and roof complexity driving the range. A 45-mil mechanically fastened system on a simple rectangular roof sits at the low end. An 80-mil fully adhered system with heavy penetration count and tapered insulation sits at the high end.
Labor accounts for a large share of that cost, particularly on jobs with extensive flashing or a high penetration count. Material cost scales fairly linearly with mil thickness, but labor doesn’t; a roof with 40 pipe penetrations costs meaningfully more per square foot than an identical field with four.
Recover projects, installing over an existing roof rather than tearing it off, generally cost less than a full tear-off and replacement, assuming the existing surface qualifies as an approved substrate.
What Are the Most Common TPO Installation Mistakes

Cold welds cause more TPO roof failures than any other single mistake, followed by dirt trapped under the membrane and improper fastener length. A cold weld looks sealed on the surface but separates cleanly under a probe test, which is exactly why every seam gets tested rather than trusted on sight.
| Mistake | Consequence | Prevention |
| Cold welds | Seam separation, leaks | Probe test every seam; adjust welder temperature daily |
| Dirt under the membrane | Blisters, poor adhesion | Sweep and clean before membrane placement |
| Stretching membrane | Wrinkles, fishmouths at seams | Let sheets relax before fastening |
| Wrong fastener length | Blow-offs in high wind | Penetrate the deck by 3/4 inch (19 mm) minimum |
| Welding over wet substrate | Steam bubbles, weld failure | Wait for dry conditions before welding |
| Ignoring cover board gaps | Indentations, puncture risk | Fill gaps wider than 1/4 inch (6 mm) |
Fishmouths, small open folds at a seam edge, form when the membrane gets pulled too tight before welding. The fix is straightforward: cut a slit, flatten the fold, and weld a patch over the repaired area. Blisters under an inch (2.5 cm) can be cut and patched; larger ones require removing and replacing the affected section entirely.
How to Get Certified for TPO Roofing Installation
Manufacturer certification through Carlisle, GAF, or Elevate combines online coursework, hands-on training, a written exam, and a practical welding test, with annual recertification required to stay current. Certification isn’t paperwork for its own sake; it determines what warranty a building owner actually gets.
An uncertified crew, or one installing outside its certification, typically qualifies only for a material-only warranty. That covers the membrane itself, not the labor to fix or replace a failed installation. A certified crew documenting the job with photos and probe-test records unlocks the full system warranty, sometimes reaching 20 years on fully adhered 80-mil systems.
Beyond manufacturer programs, the National Roofing Contractors Association (NRCA) runs a Commercial Roofing Certificate Program with TPO-specific modules. The International Institute of Building Enclosure Consultants (IIBEC) offers separate education on roof system design and inspection, useful for architects and building owners who want to verify a contractor’s work rather than just take a bid at face value.
Conclusion
TPO roofing installation details come down to sequence and tolerance, not guesswork. Deck prep sets the foundation, insulation and cover board give the membrane a stable surface, and heat-welded seams hold everything together at exact temperatures and overlap widths. Flashing and edge termination close out the assembly, while codes like the IBC and FM 1-29 dictate the numbers a crew has to hit along the way.
Get those TPO roofing installation details right, at every stage, and the system performs to its full warranty term. Cut corners on deck moisture testing or seam probing, and even premium 80-mil membrane fails years ahead of schedule. The specs exist because roofs that follow them last, and roofs that skip them don’t.




