
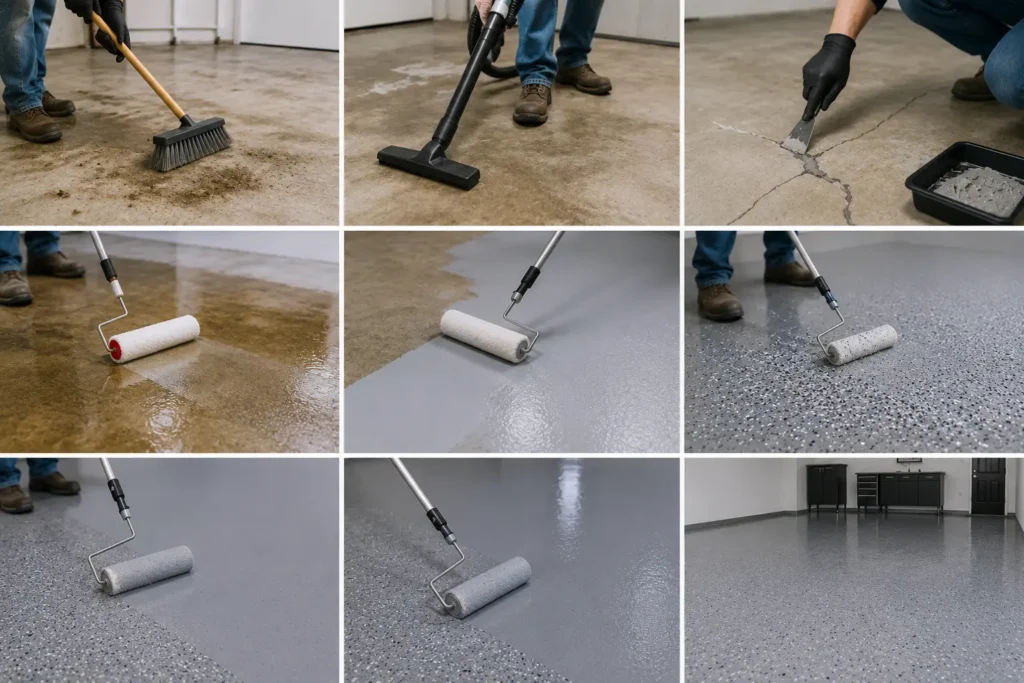
Clean the concrete, etch the surface, apply primer, then roll 2 coats of concrete-specific paint. That is the correct sequence. Skip any step especially etching and the paint peels within months.
Every painted concrete floor that fails within the first year fails for the same reason: poor surface prep. This guide covers the full process in the correct order, with exact products, dry times, and cost estimates for garage, basement, and outdoor concrete.
Step 1: Choose the Right Paint for Your Concrete Floor
The paint type determines how long the finish lasts. Regular house paint fails on concrete within weeks. Concrete absorbs moisture, expands in heat, and endures heavy traffic — standard interior paint handles none of those conditions.
4 main paint types work on concrete floors. Each suits a different location and traffic level:
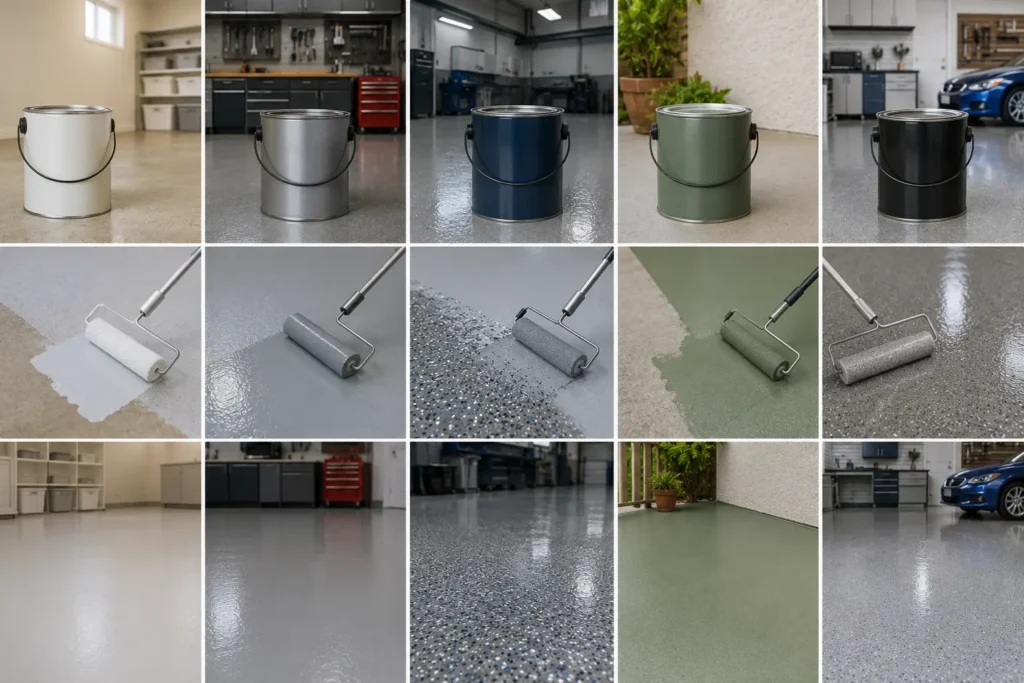
| Paint Type | Durability | Best Location | Cost / Gallon (3.8L) |
| Water-based acrylic latex | 3–5 years | Basement, patio, indoor | $25–$45 |
| 1-part epoxy paint | 5–7 years | Garage, basement, workshop | $40–$70 |
| 2-part epoxy coating | 7–10 years | Garage, commercial floors | $80–$150 |
| Masonry / elastomeric paint | 5–8 years | Outdoor walls, patios | $35–$65 |
| Polyurethane floor coating | 8–12 years | High-traffic, UV exposure | $60–$120 |
Epoxy paint is the best choice for garage floors — it resists oil, chemicals, tire marks, and heavy foot traffic better than any other option. For basements, acrylic latex is easier to apply and tolerates moisture fluctuations well. For patios exposed to UV light, polyurethane coating resists yellowing that epoxy develops over time.
Step 2: Tools and Materials You Need
Gather everything before starting. Running out of materials mid-project means stopping on wet paint — that causes lap marks and uneven coverage.
Surface prep tools:
- Stiff-bristle push broom — sweeps loose debris and dust
- Wet-dry vacuum — removes fine dust that brooms miss
- Concrete degreaser or TSP (trisodium phosphate) — removes oil and grease before etching
- Muriatic acid or phosphoric acid etching solution — opens concrete pores for paint adhesion
- Concrete crack filler or hydraulic cement — fills cracks wider than 1/8 inch (3 mm) before painting
- Plastic sheeting (12 x 12 inch / 30 x 30 cm) + tape — for the 24-hour moisture test
Painting tools:
- 5-inch (63 mm) angled paintbrush — cuts in edges and corners
- 3/8-inch (10 mm) nap paint roller + extension pole — rolls paint on flat surfaces efficiently
- Roller tray — holds paint for roller loading
- Painter’s tape — masks baseboards, walls, and posts
- Safety gear: gloves, eye protection, respirator mask for acid etching and epoxy fumes
Step 3: Run the 24-Hour Moisture Test
Moisture is the single biggest cause of paint failure on concrete. Paint applied over a damp floor traps water underneath — the trapped moisture builds pressure and pushes the paint off the surface, causing bubbling and peeling within weeks.
To test: tape a 12 x 12 inch (30 x 30 cm) piece of plastic sheeting flat to the concrete floor, sealing all 4 edges with tape. Wait 24 hours. Remove the plastic:
- Floor side is dry → safe to proceed with painting
- Floor side is damp → use a dehumidifier and fan for 24–48 hours, then retest before proceeding
- Heavy condensation → apply a moisture-blocking primer before painting; consider a vapor barrier for chronically damp basements
Basement moisture frequently originates from poor roof drainage. Water that overflows from clogged or damaged gutters saturates the ground near the foundation and seeps into basements. Roof maintenance services address the drainage issue at the source — before it repeatedly wets the floor you are trying to paint.
Step 4: Prepare the Surface The Most Important Step
Paint bonds to a clean, open-pored concrete surface. It does not bond to dust, oil, old paint residue, or a surface with sealed or smooth pores. Every step below is required — not optional.
4a. Clean the Floor Completely
- Sweep the entire floor with a stiff push broom. Remove all loose dirt, grit, and dust.
- Vacuum with a wet-dry vacuum to capture fine particles the broom misses.
- Degrease oil and grease stains with a concrete degreaser or TSP solution (1/2 cup / 120 ml per gallon / 3.8 L of water). Apply, scrub with a stiff brush, and rinse thoroughly. Let the floor dry completely.
4b. Repair All Cracks
Fill every crack wider than 1/8 inch (3 mm) with concrete crack filler or hydraulic cement before painting. Paint does not bridge structural cracks — it cracks with the concrete underneath.
- Clean loose material from inside the crack using a stiff brush or vacuum.
- Fill with hydraulic cement or concrete crack filler. Smooth flush with the floor surface using a putty knife.
- Allow the filler to cure fully — minimum 24 hours for most products before the next step.
4c. Etch the Concrete Surface
Etching roughens the concrete surface so paint grips it mechanically. Smooth or previously sealed concrete has closed pores — paint applied directly slides off. Etching opens those pores.
2 etching methods:
- Muriatic acid (hydrochloric acid) etch — dilute 1 part acid to 10 parts water. Apply to damp concrete, let it fizz for 3–5 minutes, then rinse thoroughly with clean water. Neutralize with a baking soda solution (1 cup / 240 ml per gallon / 3.8 L of water). Wear gloves, eye protection, and a respirator. Ventilate the space completely.
- Phosphoric acid etch — safer than muriatic acid, less fume. Apply per product label, scrub with a stiff brush, rinse thoroughly. Suitable for indoor use with moderate ventilation.
After etching: the surface should feel like medium-grit sandpaper (60–80 grit). If it still feels smooth, etch a second time. Rinse completely and let the floor dry for a minimum of 24 hours before applying primer.
Skip etching if: the concrete already has a rough texture (aged, worn concrete) or if the manufacturer’s product instructions specifically state no etch required.
Step 5: Apply Concrete Bonding Primer
Primer improves paint adhesion by 40–60% compared to painting directly on bare concrete. It seals surface pores, evens out color variation, and acts as a foundation coat. Most professional concrete paint jobs use primer — skipping it cuts years off the finish life.
3 primer types for concrete:
- Bonding primer — general use for garage floors and dry basements. Best for standard acrylic and epoxy paints
- Moisture-blocking primer — blocks vapor transmission in damp basements and crawl spaces
- Tinted primer — improves coverage when topcoating with lighter colors over dark concrete
To apply primer:
- Mask off baseboards, walls, and posts with painter’s tape.
- Cut in the edges using a 2.5-inch (63 mm) angled brush along all walls, corners, and around any posts.
- Roll the main surface with a 3/8-inch (10 mm) nap roller. Work in 3 x 4 foot (0.9 x 1.2 m) sections. Start at the corner farthest from the exit door and work toward the exit.
- Do not overwork the primer — excess rolling lifts the primer and reduces adhesion. One even pass per section.
- Dry time: 6–8 hours at 70°F (21°C). In humid conditions, use a fan and dehumidifier. Primer must feel completely dry before paint application.
Step 6: Apply the First Coat of Paint
Apply paint in the same sequence as primer: cut edges first with a brush, then roll the main surface in sections. Start at the corner farthest from the door and work toward the exit — never paint yourself into a corner.
For Acrylic Latex Paint
- Stir the paint thoroughly with a mixing stick for 2–3 minutes before use.
- Cut in all edges with the angled brush.
- Pour paint directly onto a 3–4 foot (0.9–1.2 m) section of floor instead of using a tray — this keeps the paint wet longer and reduces tray refills.
- Roll evenly in overlapping rows, each row overlapping the previous by 3–4 inches (75–100 mm) to eliminate lap marks.
- Dry time between coats: 2–4 hours at 70°F (21°C). The surface must be dry to the touch before the second coat.
For 2-Part Epoxy Paint
Mix Part A (pigmented base) and Part B (hardener) according to the manufacturer’s ratio — typically 1:1 or 2:1 by volume. Mix thoroughly for 3–5 minutes. The pot life (working time) of most 2-part epoxy is 2–4 hours at 70°F (21°C). Once mixed, apply the entire batch before the pot life expires — mixed epoxy that hardens in the can cannot be reused.
- Cut in all edges with a brush.
- Roll epoxy in 3-foot (0.9 m) sections. Epoxy is thicker than acrylic — spread it evenly without pooling.
- Dry time between coats: 8–24 hours. Check the product label — some 2-part epoxies require a specific recoat window. Applying the second coat too late reduces inter-coat adhesion.
Step 7: Apply the Second Coat
Apply the second coat in the opposite direction to the first coat, if the first coat rolled north-south, roll the second coat east-west. This cross-rolling fills any gaps the first coat missed and builds a uniform film thickness.
2 coats provide full opacity and the correct film thickness for durability. A single thick coat is not a substitute for 2 thin coats a thick single coat traps solvents and causes wrinkling or slow cure.
Step 8: Apply a Clear Topcoat (Optional but Recommended)
A clear polyurethane or acrylic sealer topcoat extends the painted floor’s life by 2–3 years by protecting the color coat from abrasion and UV degradation. Apply after the final paint coat has cured fully — not just dried.
Topcoat options:
- Clear polyurethane — resists UV yellowing; best for outdoor patios and driveways with sun exposure
- Water-based acrylic sealer — low odor; best for indoor garage and basement floors
- Anti-skid additive — mix fine sand (shark grip) into the final topcoat for slip resistance on patios, pool decks, and stairs
Dry Time vs. Cure Time — Know the Difference
Dry time and cure time are not the same thing. Dry time means the surface no longer feels tacky. Cure time means the paint has reached full hardness and chemical bond strength.
| Paint Type | Dry Between Coats | Foot Traffic | Full Cure |
| Acrylic latex | 2–4 hours | 24 hours | 7 days |
| 1-part epoxy | 4–8 hours | 24–48 hours | 7 days |
| 2-part epoxy | 8–24 hours | 48–72 hours | 7 days |
| Polyurethane | 4–6 hours | 24 hours | 7–14 days |
Do not park vehicles on a painted garage floor until the full 7-day cure is complete — hot tires on partially cured epoxy pull the coating off the surface.
Location-Specific Tips
Painting a Concrete Garage Floor
2-part epoxy is the best paint for garage floors — it handles vehicle weight, oil drips, road salt, and temperature swings from -20°F (-29°C) to 120°F (49°C) better than any other concrete paint.
- Etch the floor — garage concrete is often smooth from trowel finishing and needs etching for adhesion.
- Fill floor-to-wall joints with hydraulic cement — water enters garages from the base of the walls after heavy rain.
- Apply anti-skid additive to the final coat — garage floors get wet and painted surfaces are slippery.
- Water pooling in front of the garage or seeping under the door often comes from improper roof drainage. Roof installation professionals can redirect gutters and downspouts away from the garage apron.
Painting a Basement Concrete Floor
Moisture control is the top priority in basements. Run the 24-hour moisture test before every painting project even if the floor was painted before. Seasons change moisture levels.
- Use a moisture-blocking primer for any basement that shows condensation in the moisture test.
- Apply acrylic latex or 1-part epoxy — both tolerate minor moisture movement better than 2-part epoxy.
- Lighter paint colors — off-white, light gray, pale tan — visually increase basement space and improve light reflection.
- Persistent basement moisture that returns after painting often traces back to roof drainage problems. A professional roof inspection identifies gutter overflows and downspout positioning that directs water toward the foundation.
Painting an Outdoor Concrete Patio or Driveway
Use masonry paint or polyurethane coating for outdoor concrete — both resist UV degradation, freeze-thaw cycles, and the wet-dry cycles outdoor surfaces experience year-round.
- Do not paint new concrete — wait at least 28 days (1 month) for full curing before painting. Painting green concrete traps bleed water and causes immediate peeling.
- Check the weather forecast — paint requires minimum 50°F (10°C) air and surface temperature for proper application. Do not apply paint if rain is forecast within 24 hours.
- Power wash outdoor concrete at 2,500–3,000 PSI (172–207 bar) before etching — outdoor concrete carries more contamination than indoor floors.
5 Common Problems and How to Fix Them
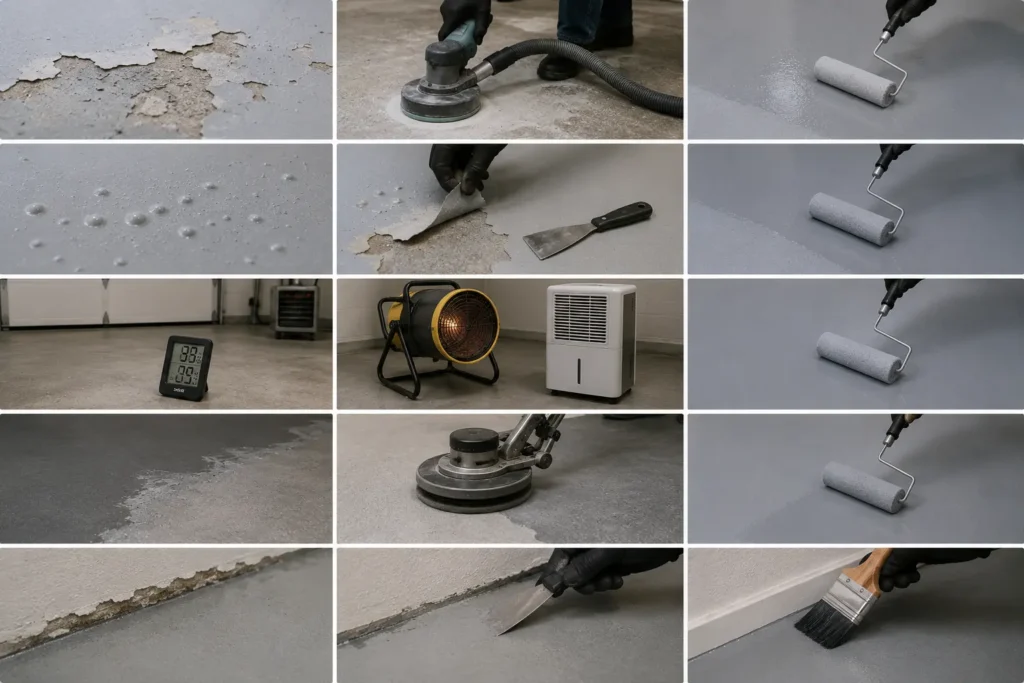
| Problem | Cause | Fix |
| Paint peeling | Moisture under paint or skipped etching | Strip paint, etch properly, reapply with moisture-blocking primer |
| Bubbling paint | Moisture vapor pushing through floor | Strip affected area, run moisture test, use vapor-barrier primer |
| Paint not drying | Temperature below 50°F (10°C) or high humidity | Heat space to 65°F+ (18°C+), run dehumidifier |
| Uneven color / lap marks | Rolling too slowly or reloading unevenly | Sand lightly, apply a full second coat in the opposite direction |
| Paint flaking at edges | Missed cutting in or paint too thin at edges | Scrape loose edges, feather in touch-up coat with a brush |
Total Project Cost Estimate
Painting a concrete floor costs $0.50–$2.50 per square foot ($5.40–$26.90 per m²) in materials for a DIY project. A 400 sq ft (37 m²) garage floor runs $200–$1,000 depending on paint type. Professional installation adds $1.50–$4.00 per sq ft ($16.15–$43.05 per m²) in labor.
| Item | DIY Cost | Coverage |
| Acrylic latex paint | $25–$45 / gallon (3.8 L) | 300–400 sq ft (27.9–37.2 m²) per gallon |
| 1-part epoxy | $40–$70 / gallon (3.8 L) | 250–350 sq ft (23.2–32.5 m²) per gallon |
| 2-part epoxy kit | $80–$150 / kit | 250 sq ft (23.2 m²) per kit |
| Concrete bonding primer | $20–$40 / gallon (3.8 L) | 200–300 sq ft (18.6–27.9 m²) per gallon |
| Muriatic acid etch | $10–$20 / gallon (3.8 L) | 150–200 sq ft (13.9–18.6 m²) per gallon |
| Crack filler | $8–$15 / tube | Spot repairs — 1 tube per 3–5 cracks |
| Clear topcoat sealer | $25–$60 / gallon (3.8 L) | 300–400 sq ft (27.9–37.2 m²) per gallon |
Conclusion
Painting concrete floors is a 1–2 day project that transforms a worn surface for a fraction of the cost of replacement. The preparation sequence is what matters most: clean, moisture test, etch, prime, then paint in 2 coats.
Choose the paint based on location and traffic. Use 2-part epoxy for garages. Acrylic latex for basements and patios. Add a clear topcoat for maximum durability. Follow the dry times and cure times exactly rushing either step causes the failures most people blame on the paint.




