

Polished concrete floors start with a concrete grinder and end with a diamond pad finer than 1,500 grit. Every step in between determines whether the floor looks like a showroom or a parking garage. Skip a grit, rush the densifier, or skip surface prep and the finish fails within 12 months.
This guide covers the full 9-step process used by professional floor polishers on residential, commercial, and industrial slabs. It includes exact grit sequences, densifier timing, equipment costs, and the 4 finish levels so you know what result to expect before you start.
This process applies to new concrete slabs, existing floors with old coatings, garage floors, basement slabs, and commercial warehouse floors.
4 Concrete Polish Finish Levels: Choose Before You Start
The finish level determines the grit sequence, the number of passes, and the equipment you need. Choosing the wrong level mid-job wastes time and damages the surface.
| Finish Level | Final Grit | Appearance | Best Use | Maintenance |
| Level 1 — Flat | 400 grit | Matte, no shine | Garages, warehouses, utility floors | Low |
| Level 2 — Satin | 800 grit | Low gloss, slight reflection | Retail, light commercial, basements | Medium |
| Level 3 — Semi-Gloss | 1500 grit | Clear reflection, moderate shine | Offices, showrooms, restaurants | Medium-High |
| Level 4 — High-Gloss | 3000 grit | Mirror-like, high-definition reflection | Luxury retail, hotels, residential | High |
Level 4 gloss requires 3,000-grit pads plus a guard coat application. Level 1 finish stops at 400 grit with densifier only. Most residential floors target Level 2 or Level 3.
Equipment and Materials Needed
Grinding and Polishing Machines
A planetary floor grinder is the standard machine for concrete polishing. Planetary grinders use 3–4 rotating satellite heads that orbit a central drive — this produces a flat, consistent grind pattern that single-disc grinders cannot match. Rental cost runs $150–$300 per day. Purchase cost for a professional-grade planetary grinder starts at $4,000.
| Machine | Purpose | Cost |
| Planetary Floor Grinder | Main grinding and polishing passes | $150–$300/day rental | $4,000+ purchase |
| Edge Grinder | Areas within 2–4 in (50–100 mm) of walls | $50–$100/day rental |
| Vacuum/Dust Extractor | Dry grinding dust collection | $80–$150/day rental |
| Burnisher (1500+ RPM) | Final gloss enhancement and guard application | $60–$120/day rental |
| Propane Floor Buffer | Large commercial floors, final burnishing | $100–$200/day rental |
Diamond Tooling: Metal Bond vs Resin Bond
Metal bond diamond tooling cuts and grinds. Resin bond diamond tooling polishes and refines. Switching from metal bond to resin bond happens at the transition grit — typically 100 or 200 grit depending on concrete hardness.
| Diamond Pad | Function | Process Stage |
| 16 grit — Metal Bond | Remove thick coatings, level uneven slabs | Coarse grinding pass 1 |
| 30/40 grit — Metal Bond | Remove thin coatings, open surface pores | Coarse grinding pass 2 |
| 70/80 grit — Metal Bond | Flatten surface, reduce deep scratches | Coarse grinding pass 3 |
| 100/120 grit — Transition | Final metal bond pass, surface refinement | Apply densifier after this step |
| 200 grit — Resin Bond | Begin polishing sequence | Polishing pass 1 |
| 400 grit — Resin Bond | Level 1 finish / pre-polish refinement | Polishing pass 2 |
| 800 grit — Resin Bond | Level 2 satin finish | Polishing pass 3 |
| 1500 grit — Resin Bond | Level 3 semi-gloss finish | Polishing pass 4 |
| 3000 grit — Resin Bond | Level 4 high-gloss finish | Final polishing pass |
Never skip a grit step. Each grit removes the scratches left by the previous grit. Jumping from 80 grit to 400 grit leaves deep scratch marks visible under the final gloss — irreversible without re-grinding.
Chemical Products Needed
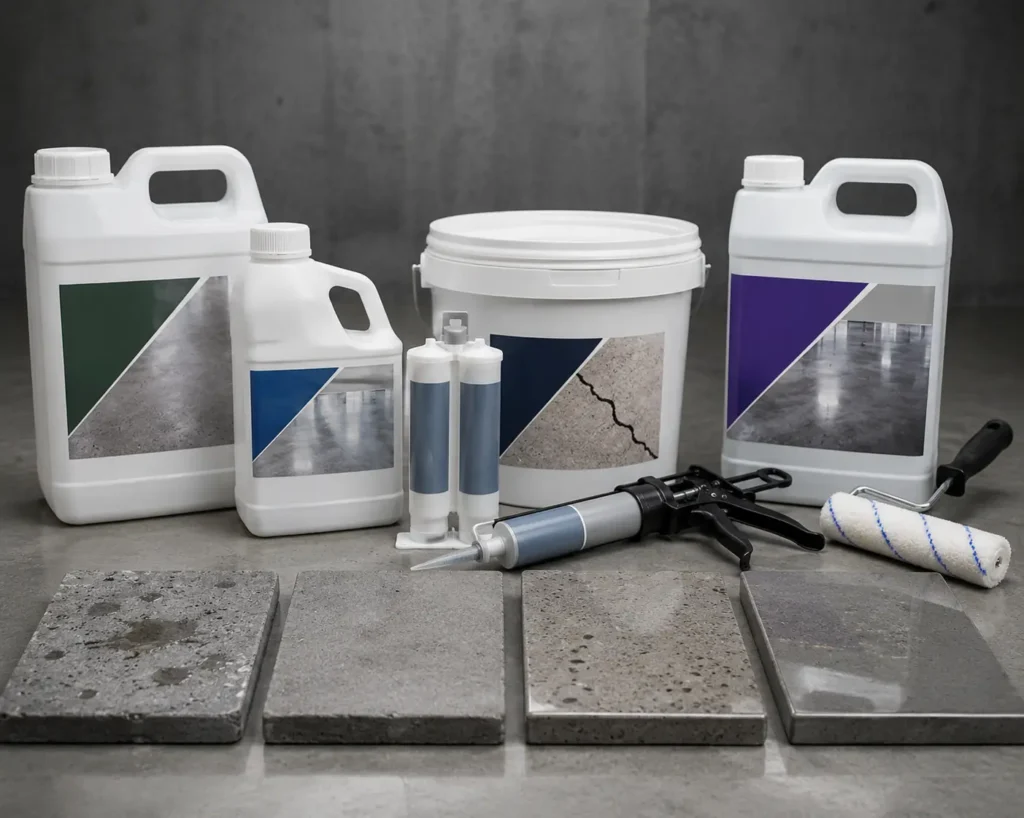
- Concrete densifier — lithium silicate or sodium silicate. Penetrates the concrete surface and forms calcium silicate hydrate crystals that harden and densify the slab. Apply between the 100-grit and 200-grit passes.
- Concrete degreaser — pH-neutral or alkaline degreaser for surface prep. Required before any grinding on floors with oil, grease, or tire marks.
- Crack filler / epoxy grout — semi-rigid polyurea or epoxy for cracks and spalls. Hard fills grind flush with the surface; flexible fills prevent re-cracking under movement.
- Guard coat / sealer — polyurethane or penetrating siliconate guard applied as the final step. Protects the finish, improves stain resistance, and extends gloss life by 3–5 years.
Concrete floors adjacent to rooflines, parapets, or interior drainage channels require waterproof transitions at wall bases. Proper roof installation ensures concrete floor perimeters near exterior walls stay dry moisture infiltration from above is one of the 3 main causes of polish delamination on ground-floor slabs.
Step 1 — Test Concrete Hardness
Concrete hardness determines which metal bond diamond to start with. Soft concrete needs a hard metal bond (fewer diamonds, more aggressive cut). Hard concrete needs a soft metal bond (more diamonds, gentler release).
Test hardness with a Mohs (MOHS) concrete hardness test kit — scratch the surface with descending hardness tips from 9 downward. Stop when the tip no longer scratches. Most residential concrete rates 4–6 on the Mohs scale. Commercial high-strength concrete rates 6–8. Test at 3 separate locations and use the average.
| Concrete Hardness | Metal Bond Specification | Starting Grit |
| Soft (Mohs 1–3) | Hard metal bond — 6/8 bond | 30/40 grit start |
| Medium (Mohs 4–6) | Medium metal bond — 10/12 bond | 40/50 grit start |
| Hard (Mohs 7–9) | Soft metal bond — 14/16 bond | 16/20 grit start |
Step 2 — Remove Existing Coatings and Adhesives
Grind existing epoxy coatings, paint, adhesive residue, and surface sealers with 16–30 grit metal bond tooling before any polishing sequence begins. Polishing over an existing coating traps the coating under the new finish — it delaminates within 6–18 months.
Use a floor scraper or shot blaster for thick coatings above 30 mils (0.76 mm). Shot blasting opens the surface profile and removes coatings faster than grinding alone — rental cost runs $200–$400 per day.
Step 3 — Repair Cracks, Spalls, and Surface Defects
Fill all cracks wider than 1/16 inch (1.6 mm) before grinding. Use semi-rigid polyurea filler for moving cracks — polyurea cures in 30 minutes and grinds flush. Use rigid epoxy grout for static cracks and large spalls — epoxy takes 4–8 hours to cure but bonds harder than the surrounding concrete.
Apply filler slightly proud of the surface. After curing, grind flush with a 30–40 grit metal bond pass. A filled crack ground flush is invisible under a high-gloss finish. An unfilled crack shows as a dark line under Level 3 and Level 4 finishes.
Step 4 — Coarse Grinding (Metal Bond Sequence)
Start with the coarsest grit required for your concrete hardness and coating condition. Work in consistent, overlapping passes — 50% overlap on each pass covers the floor evenly and prevents grinding lines.
Grind in 2 directions: first diagonally across the floor at 45 degrees, then diagonally in the opposite direction. This cross-hatch pattern removes high spots and levels the slab more effectively than parallel passes. Vacuum the floor completely between each grit change.
Progress through the coarse metal bond sequence: 16 → 30/40 → 70/80 → 100/120 grit. Each pass removes the scratch pattern of the previous grit. Inspect each pass under a work light held at a low angle — visible scratches mean the current grit pass is incomplete.
Concrete floors in commercial buildings often run beneath roofing structures. If the roof above leaks during polishing prep, moisture enters the slab and prevents densifier penetration. Address any commercial roof repair before starting concrete floor work — a damp slab rejects densifier and produces a cloudy, uneven finish.
Step 5 — Apply Concrete Densifier
Apply a lithium silicate densifier after the final metal bond pass (100–120 grit) and before any resin bond polishing. This is the most critical chemical step in the process. Densifier penetrates the open concrete pores and reacts with free calcium hydroxide to form calcium silicate hydrate (CSH) crystals inside the slab.
CSH crystals increase surface hardness by 30–40%, reduce dusting, and improve diamond pad cutting efficiency on the subsequent resin bond passes. A floor without densifier polishes slowly, wears faster, and cannot achieve Level 3 or Level 4 gloss consistently.
How to Apply Densifier Correctly
- Apply densifier with a low-pressure pump sprayer at 200–300 sq ft per gallon (18.6–27.9 m² per 3.8 L).
- Spread evenly with a microfiber mop or squeegee — eliminate puddles and dry spots.
- Allow the densifier to penetrate for 20–30 minutes. The surface will appear wet.
- Buff the surface dry with a high-speed burnisher before the densifier dries to a haze.
- Wait a minimum of 2 hours before starting resin bond polishing. Allow 24 hours for maximum hardness development.
Applying densifier too early before the 100-grit pass wastes product because the surface pores are still closed. Applying too late after 400-grit reduces penetration depth because fine grit passes close the surface pores.
Step 6 — Resin Bond Polishing Sequence
Switch from metal bond to resin bond tooling at 200 grit. Resin bond pads flex slightly with the floor surface — this produces a consistent scratch pattern and builds gloss incrementally.
Progress through: 200 → 400 → 800 → 1500 → 3000 grit for a Level 4 finish. Stop at 400 grit for Level 1, 800 for Level 2, and 1500 for Level 3. Run each grit pad wet — water acts as a lubricant, extends pad life by 2–3x, and reduces heat buildup that causes resin bond pads to glaze over.
Each resin bond pass takes 2–3 times longer than the metal bond passes on the same floor area. Level 4 finish on a 500 sq ft (46.5 m²) floor requires approximately 8–12 hours of total machine time across all grit stages.
Step 7 — Edge Work
Planetary grinders cannot reach within 2–4 inches (50–100 mm) of walls and columns. An edge grinder with matching diamond tooling handles these areas. Always complete edge work at the same grit as the main floor before advancing to the next grit matching grit sequences ensures consistent finish across the full floor.
Edge work adds 20–40% to total job time on floors with many columns, curbs, or wall transitions. Budget the extra time before quoting or planning the project.
Step 8 — Apply Guard Coat
A guard coat protects the polished surface and extends gloss life. Apply guard coat after the final polishing pass and before burnishing.
Use a polyurethane guard for maximum stain resistance on commercial floors — chemical resistance to oils, acids, and cleaning agents. Use a penetrating siliconate guard for residential floors — easier maintenance and no film buildup. Apply 2 thin coats with a microfiber applicator, allowing full dry time between coats per the manufacturer specification.
Exterior concrete slabs, pool decks, and covered patios near the building roofline need guard coats rated for UV exposure. Routine roof maintenance checks the roofline above exterior slabs for overhang leaks — water running off an unmaintained roof edge onto a freshly polished slab strips guard coat within one season.
Step 9 — Final Burnishing
Burnishing with a 1,500–3,000 RPM high-speed burnisher compresses the surface microscopically and builds the final gloss level. Run the burnisher in overlapping circular passes across the full floor. Use a white or cream burnishing pad for final gloss never use black or brown stripping pads, which remove guard coat.
A single burnishing pass on a Level 4 floor adds 10–15 gloss units (GU) above the baseline 3000-grit reading. Professional polished concrete targets 70–100 GU at 60 degrees for a mirror-grade finish.
Aggregate Exposure Levels: Cream, Salt-and-Pepper, or Full Aggregate
Aggregate exposure is determined by how deep the coarse grinding removes concrete paste. Deeper grinding exposes more stone aggregate and creates a different visual character.
| Exposure Level | Grinding Depth | Appearance | Cost |
| Cream Finish | Minimal — paste surface only | Smooth, uniform, no stone visible | Lowest |
| Salt-and-Pepper | Light — 1/16 in (1.6 mm) paste removal | Fine aggregate dots visible | Medium |
| Medium Aggregate | Moderate — 1/8 in (3 mm) paste removal | Clear stone aggregate patterns | Medium-High |
| Full Aggregate | Heavy — 3/16 in+ (4.8 mm+) paste removal | Large stones fully exposed | Highest |
Cream finish is the fastest and cheapest no deep grinding required. Full aggregate exposure requires multiple coarse grinding passes and more diamond tooling consumption. Choose the exposure level before starting; you cannot add aggregate back once removed.
Polished Concrete Floor Cost: DIY vs Professional
| Project Type | Cost Range | Notes |
| DIY — Level 1 Satin | $2–$4 per sq ft ($21–$43/m²) | Equipment rental + materials |
| DIY — Level 3 Semi-Gloss | $4–$7 per sq ft ($43–$75/m²) | Higher material cost, more rental days |
| Professional — Level 1–2 | $3–$7 per sq ft ($32–$75/m²) | Labour + materials included |
| Professional — Level 3–4 | $7–$15 per sq ft ($75–$161/m²) | Full grit sequence, guard coat, burnish |
| Professional — Decorative/Stained | $12–$25 per sq ft ($129–$269/m²) | Custom colours, patterns, aggregate exposure |
DIY polished concrete saves 40–60% on labour but requires equipment rental skills and 2–4 days for a 500 sq ft (46.5 m²) floor. Professional crews complete the same floor in 1–2 days with better tooling and more consistent results.
Polished Concrete Floor Maintenance: 4 Ongoing Tasks
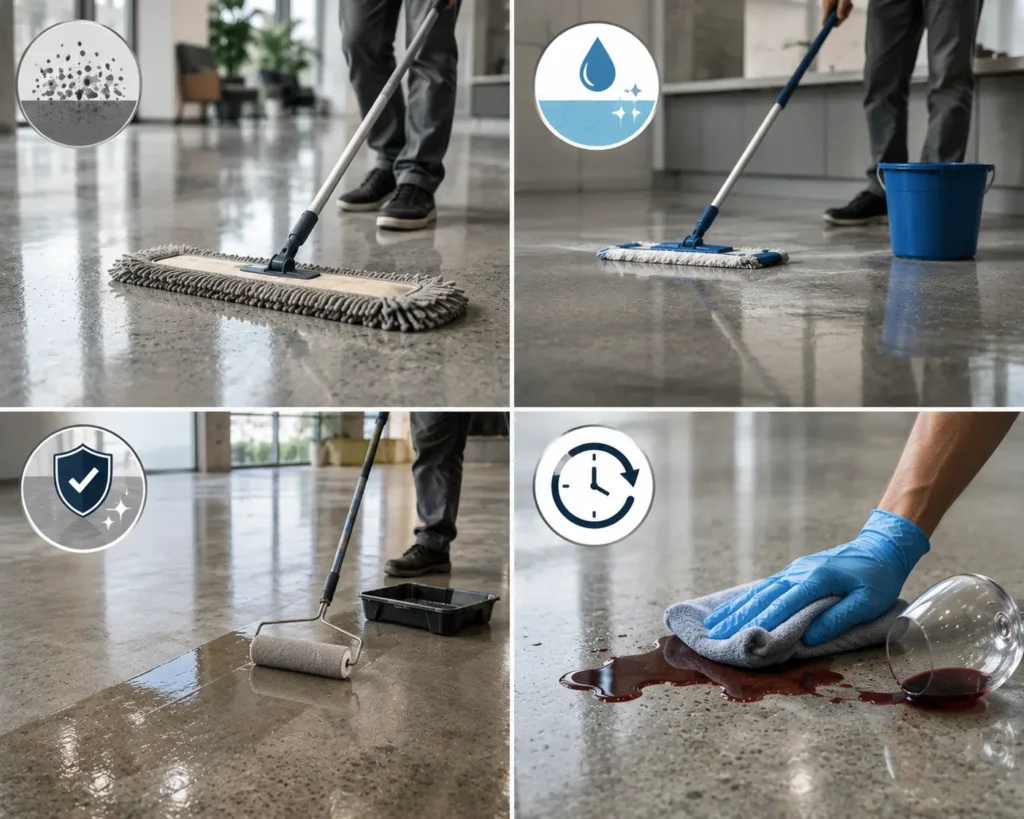
- Daily dry mopping — remove grit and dirt with a microfiber dust mop. Grit particles act as an abrasive on polished surfaces — dragging grit under foot traffic scratches the finish faster than anything else.
- Weekly wet mopping — use a pH-neutral cleaner formulated for polished concrete. Avoid acidic cleaners (vinegar, citrus), alkaline cleaners above pH 10, and ammonia — all strip guard coat and dull the finish.
- Reapply guard coat every 2–3 years — traffic volume determines frequency. Light residential use needs recoating every 3 years. Heavy commercial use needs recoating every 12–18 months.
- Immediate spill cleanup — oil, red wine, and acidic liquids etch polished concrete if left longer than 30 minutes. Wipe spills immediately with a damp cloth — dried stains require re-polishing to remove.
Conclusion
Surface preparation decides the foundation. Unfilled cracks, unremoved coatings, and skipped hardness testing show through every finish level. No amount of polishing corrects bad prep.
Densifier timing determines gloss potential. Apply it too early and it sits on closed pores. Apply it too late and the surface is already too refined to absorb it. The 100-grit window is precise — work within it.
Grit sequence discipline determines finish quality. Skipping grits leaves visible scratch patterns under gloss. Every grit must run until its predecessor’s scratches are gone — inspect under a work light, not the overhead fluorescents.




