
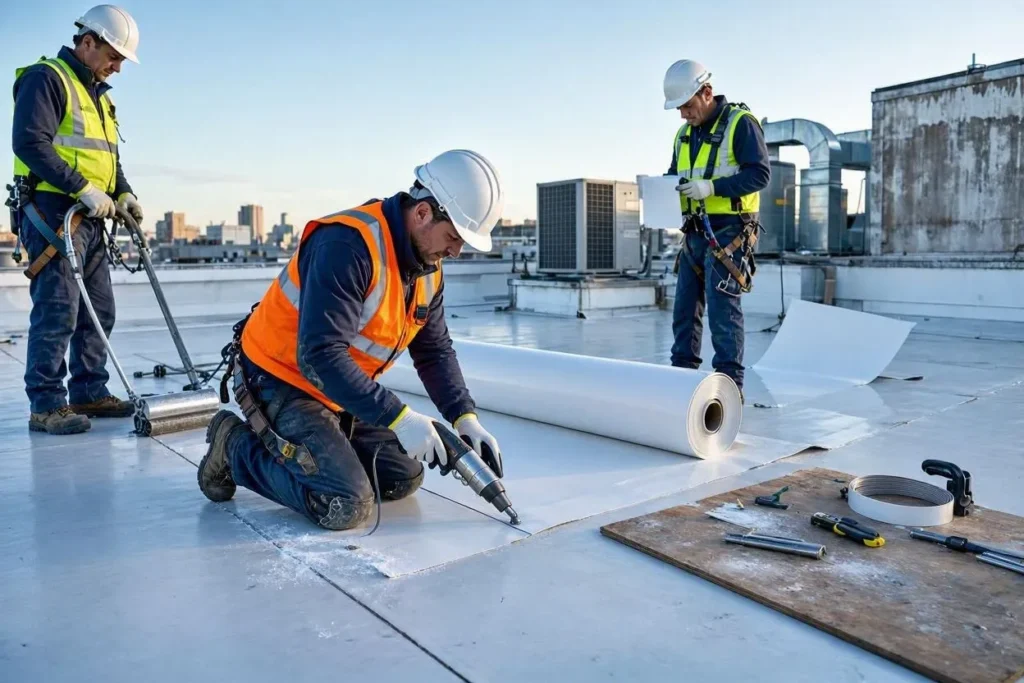
Thermoplastic Polyolefin (TPO) roofing covers more commercial low-slope buildings in the United States than any other single-ply membrane. The difference between a roof that lasts 12 years and one that lasts 25 usually comes down to one thing: maintenance. A distribution warehouse in Ohio with a scheduled inspection plan can run its original TPO membrane for two decades. A strip mall two towns over, skipping inspections after installation, might see membrane failure by year 11. Same material, different outcome. Here’s what TPO roof maintenance actually involves, how often to do it, what it costs, and where the line sits between a task you can handle yourself and one that needs a licensed contractor.
What Is TPO Roof Maintenance?
TPO roof maintenance is the ongoing schedule of inspections, cleaning, and minor repairs that keeps a Thermoplastic Polyolefin membrane watertight and reflective over its full service life. It covers four core activities: visual and physical inspection of seams and penetrations, surface cleaning to remove debris and biological growth, prompt repair of small punctures or seam separations, and documentation of every service event for warranty purposes.
Facility teams sometimes confuse maintenance with repair. Repair fixes damage that’s already happened. Maintenance exists to keep that damage from happening in the first place, or to catch it while the fix still costs a few hundred dollars instead of a full membrane replacement.
Why TPO Roof Maintenance Matters
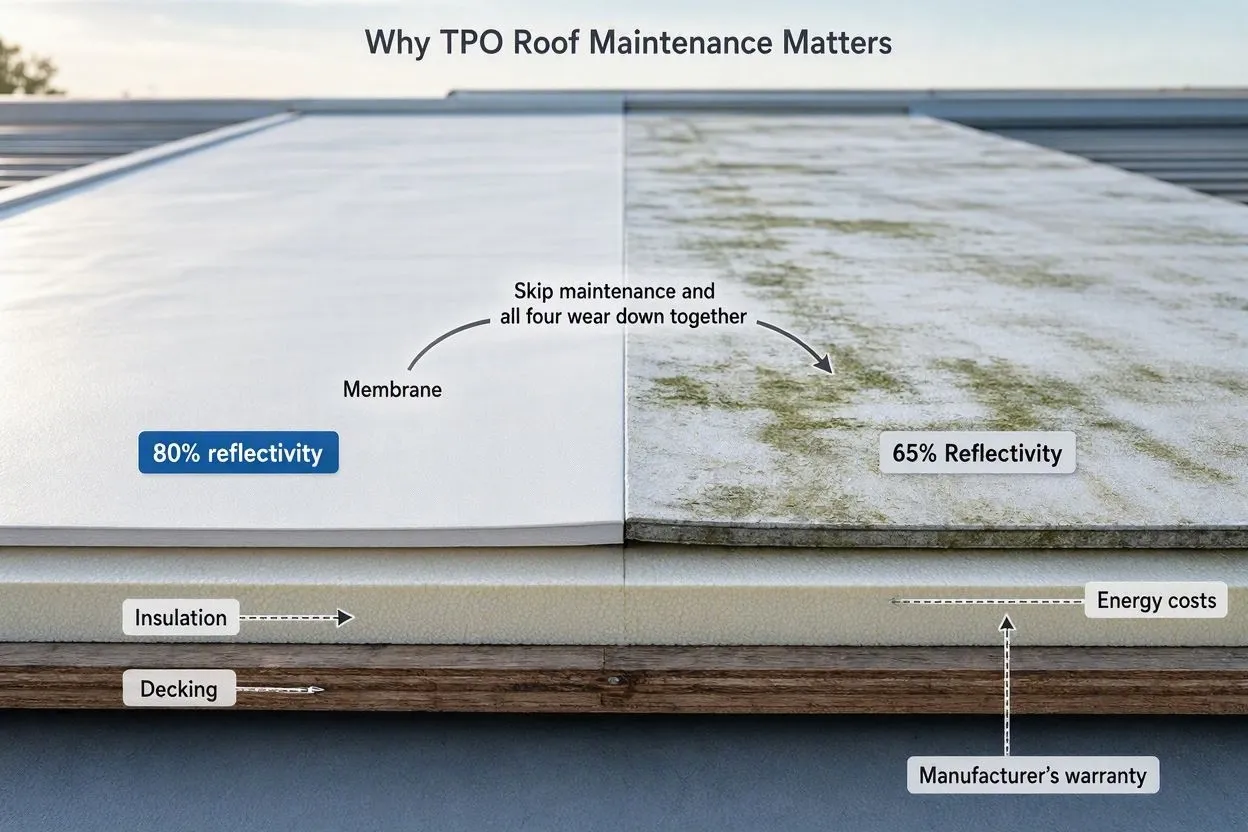
TPO roof maintenance protects four things at once: the membrane, the insulation and decking beneath it, the building’s energy costs, and the manufacturer’s warranty. Skip it, and all four wear down together, just at different speeds.
- Reflectivity drops first. New white TPO reflects over 80% of solar radiation, but a dirty, algae-streaked surface can fall below 65% within three to five years, quietly eating into the roof’s energy efficiency and reflectivity as cooling loads and HVAC costs climb.
- Water damage follows close behind. A single unaddressed seam lets roof deck moisture build up, where insulation loses R-value and steel decking corrodes. This is exactly what roof leak prevention is supposed to catch early: one retail chain lost six figures in inventory after ignoring a leak for eight months, a problem that would have cost under $500 to fix early.
- Warranty coverage ties it all together. Most TPO warranties (10, 15, or 20 years, depending on membrane thickness) require documented, periodic maintenance, and missing that paperwork can get a valid defect claim denied.
How Often Should You Inspect a TPO Roof?
Inspect a TPO roof at least twice a year, once in spring and once in fall, plus an extra check after any severe weather event: hailstorms, winds above 50 mph (80 km/h), or heavy snow. That’s the baseline behind most manufacturer guidelines and the National Roofing Contractors Association (NRCA), the trade group that sets the industry standard for a roof maintenance schedule. Climate and age both push that baseline higher. A facility in coastal Florida, dealing with hurricane season and near-constant humidity, often moves to quarterly inspections, while a Minnesota warehouse might add a dedicated post-winter check every March to catch ice-related seam stress before summer heat spreads it further.
Age matters too. A TPO membrane in years one through five, still under warranty and freshly installed, usually holds to the standard twice-yearly schedule. Once a roof passes year 15, many contractors move to three inspections a year, since older membranes wear faster than new ones.
What to Check During a TPO Roof Inspection
A TPO roof inspection covers five specific zones: seams, flashing and penetrations, drainage systems, membrane surface, and rooftop equipment mounts. Each zone fails differently, so each needs its own check.
- Seams: Heat-welded seams should show no separation, bubbling, or visible gaps. A probe test with a seam tool confirms bond strength.
- Flashing and penetrations: Check sealant around vents, skylights, pipe boots, and HVAC curbs for cracking, shrinkage, or pulling away from the substrate.
- Drainage systems: Scuppers, internal drains, and gutters need to run clear. Standing water more than 48 hours after rainfall signals a drainage problem.
- Membrane surface: Look for punctures, blistering (a sign of trapped moisture), discoloration, and granular loss on the top layer.
- Rooftop equipment mounts: HVAC units, satellite dishes, and solar mounts create stress points where the membrane flexes. Check the perimeter of each mount for wear.
A property manager in Phoenix caught a slow leak during a routine fall inspection just by noticing a single blistered patch roughly 6 inches (15 cm) wide near an HVAC curb. Trapped moisture from a pinhole puncture too small to see from ground level. The repair cost $180. Left through another Arizona summer, thermal cycling would likely have widened the puncture into a seam failure costing thousands.
How to Clean a TPO Roof
Clean a TPO roof using a low-pressure rinse, a non-abrasive TPO-safe cleaning solution, and a soft-bristle brush. Never harsh chemicals or high-pressure equipment. The process runs in five steps:
- Clear loose debris, including leaves, branches, and dust, by hand or with a leaf blower before introducing any water.
- Rinse the surface with a power washer set no higher than 2,000 PSI (138 bar), working from the roof’s high point toward drains.
- Apply a mild detergent or TPO-approved cleaning solution with a soft-bristle push broom, scrubbing in sections so you don’t miss spots.
- Rinse the cleaning solution and loosened dirt toward the drains, repeating the scrub-and-rinse cycle on stubborn algae or mold patches.
- Walk the roof once dry to confirm no residue, streaking, or membrane damage remains from the cleaning process.
Avoid bleach, solvents, and petroleum-based cleaners entirely. These break down the TPO’s plasticizers and speed up surface cracking. Cleaning frequency depends on local conditions: a roof near a highway with heavy diesel exhaust needs cleaning twice as often as one in a low-traffic suburban business park, sometimes every two to three months versus twice a year.
TPO Roof Maintenance by Season
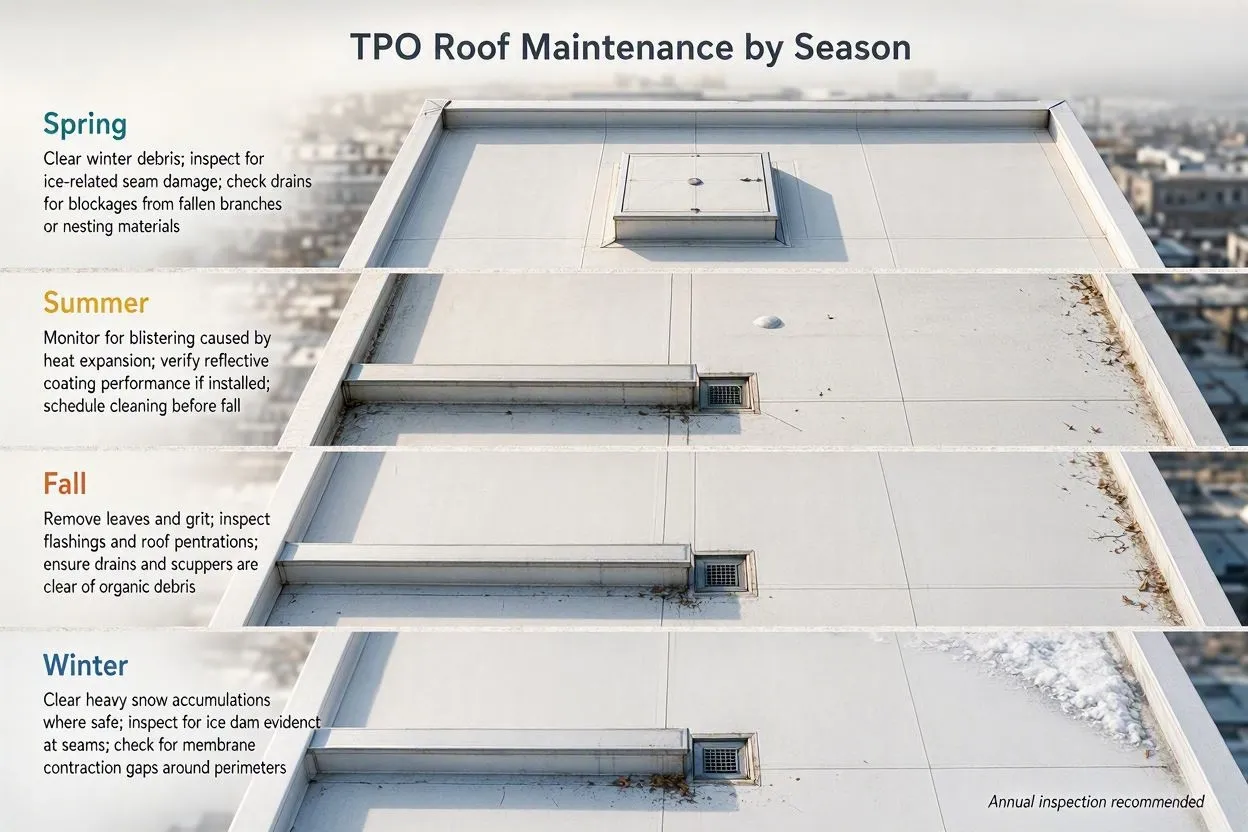
Each season puts a different kind of stress on a TPO membrane, so maintenance tasks should shift with the calendar rather than follow one fixed checklist year-round.
- Spring: Clear winter debris, inspect for ice-related seam damage, and check drains for blockages from fallen branches or nesting materials.
- Summer: Monitor for blistering caused by heat expansion, verify reflective coating performance if one is installed, and schedule cleaning before peak cooling season to get the most out of reflectivity.
- Fall: Remove leaves before they compost into drain-clogging sludge, inspect flashing before winter freeze cycles begin, and confirm gutters and scuppers run clear ahead of the first freeze.
- Winter: Limit foot traffic, since cold membrane becomes more brittle and prone to cracking under stress. Remove heavy snow accumulation with plastic shovels only, never metal, to avoid punctures.
A building in Chicago that schedules its fall inspection before the first hard freeze typically avoids the ice-dam-related seam failures that hit unprepared roofs every February.
TPO Roof Maintenance by Climate Zone
TPO roof maintenance needs shift by region. In the humid Southeast, including Georgia, Alabama, and the Gulf Coast, algae and mold growth speeds up fast in warm, wet air, so roofs there often need cleaning every 90 days instead of twice a year, plus closer attention to drainage once afternoon thunderstorms start rolling in from May through September. Snow-load regions like the Upper Midwest and New England face the opposite problem: membrane flexibility drops once temperatures fall below 40°F (4°C), and freeze-thaw cycling cuts into the membrane’s puncture resistance, so foot traffic restrictions matter more here than almost anywhere else.
Desert climates bring a third kind of stress. In the Southwest, including Arizona, Nevada, and inland California, a white TPO surface can top 150°F (66°C) in peak summer sun, and that daily swing drives the thermal shock, or expansion-contraction cycling, that wears on seams over time. Frequent seam checks matter most here. The freeze-thaw problem up north just gets swapped for a heat-cycling one.
DIY vs. Professional TPO Roof Maintenance
Property owners can safely handle visual inspections and basic cleaning themselves. Seam repairs, flashing work, and warranty-related documentation require a licensed roofing contractor. The line sits at anything involving the membrane’s waterproofing integrity.
In-house staff can walk the roof for obvious debris or standing water, clear drains of leaves and sediment, and photograph visible damage for later professional review. None of that demands specialized tools or TPO-specific training.
Contractor-level tasks include probing seams to test weld strength, applying TPO-compatible patches to punctures, and running infrared thermography scans to detect subsurface moisture invisible to the naked eye. A facility manager in Texas once tried a DIY patch using standard roofing cement instead of a TPO-compatible product. The incompatible material failed to bond, and the resulting leak caused ceiling tile damage that cost more than a professional repair would have from the start.
Warranty documentation is another reason to bring in a licensed inspector every year: most manufacturers require proof of professional service to keep coverage valid, and a facility team’s own notes typically don’t satisfy that requirement.
TPO Roof Maintenance Cost vs. Replacement Cost
Annual TPO roof maintenance typically runs $0.05 to $0.15 per square foot, while full membrane replacement runs $5 to $10 per square foot. That makes maintenance roughly 40 to 100 times cheaper per year than replacement.
The return on investment builds across the roof’s full service life rather than in any single budget cycle. A building spending $2,000 a year on inspections, cleaning, and minor repairs pays roughly $40,000 over 20 years, protecting a membrane that would otherwise face premature replacement around year 12 to 14 from neglect. Skip that budget, and you can trigger an early $150,000 replacement bill five to eight years ahead of schedule. Insulation damage, decking repair, and regional labor rates all add to that final invoice once neglect reaches the roof deck.
| Cost Factor | TPO Roof Maintenance | TPO Roof Replacement |
| Cost per square foot | $0.05–$0.15 | $5–$10 |
| Annual budget (20,000 sq ft roof) | $1,000–$3,000 | N/A (one-time cost) |
| Total project cost (20,000 sq ft roof) | N/A (recurring) | $100,000–$200,000 |
| Typical trigger | Two inspections, 1–2 cleanings, minor repairs | Membrane failure, expired warranty, structural damage |
| 20-year cost with consistent upkeep | ~$40,000 total | Avoided or delayed 6–10 years |
| 20-year cost with neglect | Early replacement by year 12–14 | $100,000–$200,000, several years ahead of schedule |
| Key cost driver | Labor rate, roof size, inspection frequency | Membrane thickness, insulation upgrades, regional labor rates |
TPO vs. EPDM vs. Modified Bitumen: Maintenance Requirements Compared
TPO roofing requires more frequent cleaning than EPDM but offers easier repairs than Modified Bitumen, which makes it a moderate-maintenance option among the three major low-slope membrane types.
| Feature | TPO | EPDM | Modified Bitumen |
| Inspection frequency | Twice yearly | Once yearly | Twice yearly, especially post-storm |
| Cleaning needs | Moderate to high (reflectivity-dependent) | Low | High (debris accumulates in seams) |
| Repair method | Heat-welded, TPO-compatible patches | Adhesive patch, relatively simple | Torch-applied or cold-adhesive layering |
| Typical lifespan with maintenance | 20–30 years | 25–30 years | 15–20 years |
| Reflectivity maintenance priority | High (white membrane) | Low (typically black, non-reflective) | Low to moderate |
EPDM demands less attention overall since its dark surface doesn’t lose reflectivity the way white TPO does, but it also skips the energy savings that make TPO attractive in the first place. Modified Bitumen sits at the other end, needing more frequent debris management since its layered construction traps dirt more easily than a single smooth TPO sheet.
Manufacturer Warranty Requirements for TPO Roofs
Manufacturer warranties on TPO roofs typically require two things: proof of periodic professional inspection and a maintained repair log documenting every service event. Miss either, and a claim for a covered defect can get denied even when the failure itself qualifies. This is really what people mean by roof warranty compliance: it’s not just about catching damage, it’s about proving you caught it.
Standard documentation includes:
- Original installation specs and construction records
- Dated inspection reports with photos, ideally tied to an ongoing preventive maintenance plan rather than one-off visits
- Records of every repair, including materials used, such as TPO-compatible repair kits or heat-welded patches
- Any modifications made to the roof after installation, such as new HVAC unit placement
- Reflectivity test results, which the Cool Roof Rating Council (CRRC), the group that certifies reflective roofing products, recommends keeping on file for buildings pursuing energy rebates tied to cool-roof, energy-efficient roofing performance
Membrane thickness affects warranty terms directly. A 45-mil (1.14 mm) TPO membrane typically carries a shorter warranty than a 60-mil (1.52 mm) or 80-mil (2.03 mm) membrane, since thicker single-ply roofing material resists puncture and UV degradation longer. Building owners should check their specific membrane thickness against ASTM D6878, the industry standard specification for TPO sheet roofing, to understand exactly what performance level their warranty is measuring against.
Many owners bring in a roofing consultant, or lean on their commercial roofing company directly, to walk through TPO roof warranty requirements before signing off on major work. A single undocumented repair, or a roof restoration project handled by an uncertified crew, is enough to void coverage that took years to build up.
Common TPO Roof Problems and Early Warning Signs
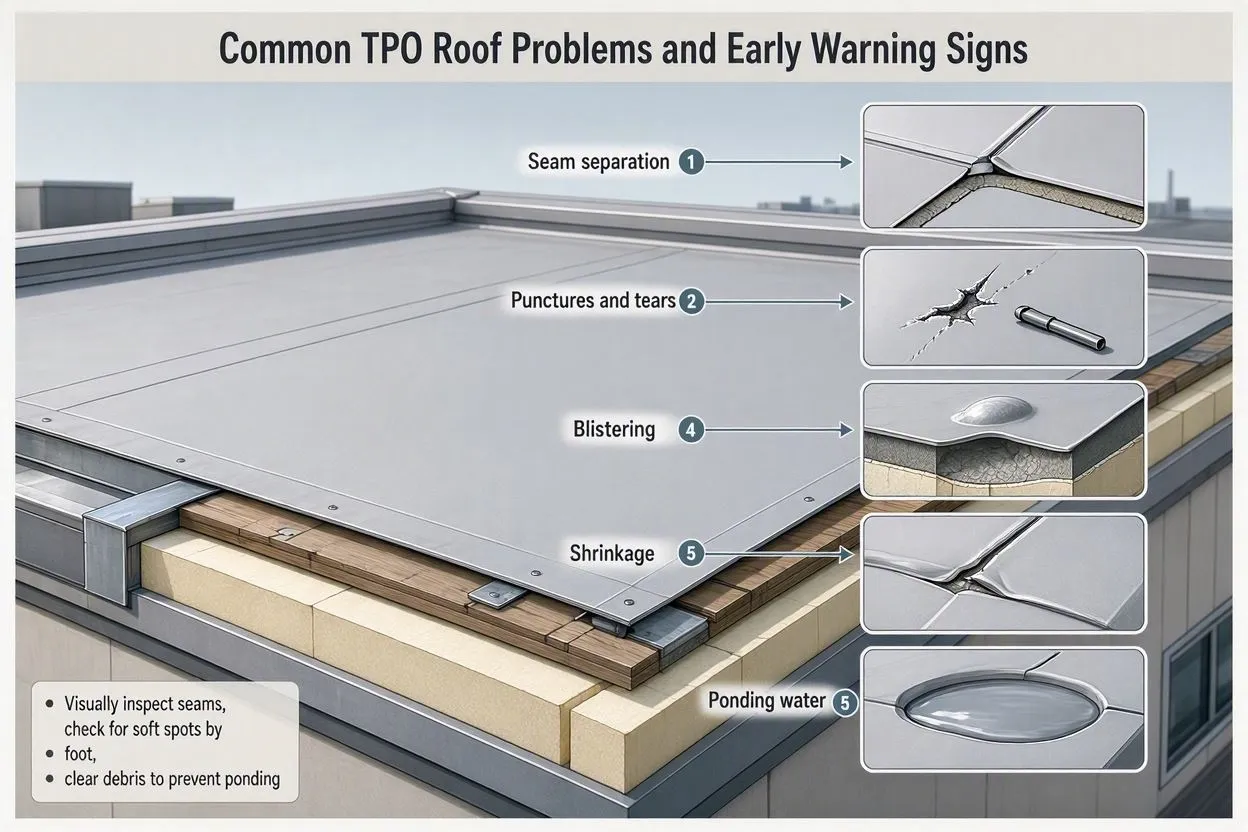
Seam separation, punctures and tears, blistering, shrinkage, and ponding water are the five recurring signs of TPO roof damage, and each one announces itself early if you know where to look. Seam separation shows up as a slight lift or gap at a T-joint, where three membrane sections meet. Punctures and tears usually trace back to dropped tools, sharp debris, or foot traffic. Blistering feels like a soft, raised bubble underfoot, a sign that moisture is trapped beneath the membrane. Shrinkage is the slow one: it tugs at fastener points and flashing edges over years, not weeks.
Ponding water makes everything else worse, since standing water past 48 hours keeps the membrane saturated and stresses seams nonstop. Catch these signs early and TPO roof repair cost stays in the hundreds, not thousands. A maintenance technician at a New Jersey distribution center once caught shrinkage just by noticing flashing pulled a quarter-inch (6 mm) off a parapet wall. That fix ran under $300.
TPO Roof Maintenance Checklist
A complete TPO roof maintenance checklist covers inspection, cleaning, documentation, and seasonal prep in a repeatable, twice-yearly cycle:
- Inspect seams, flashing, and penetrations for separation or cracking
- Check drainage systems for blockages and standing water
- Clean the membrane surface with a TPO-safe, non-abrasive solution
- Photograph and log any visible damage with date and location
- Verify rooftop equipment mounts show no stress cracking at the base
- Trim overhanging tree branches to prevent scratches and debris buildup
- Confirm warranty documentation is current and filed with the manufacturer
- Schedule a professional evaluation if any seam or flashing issue appears
Building owners who follow this exact sequence twice a year, spring and fall, typically catch 90% or more of developing problems before they need anything beyond a minor patch.
Conclusion
TPO roof maintenance comes down to a short list of repeatable actions: inspect twice a year, clean on a schedule that matches local climate, document everything for warranty purposes, and know when a task needs a licensed contractor instead of in-house staff. Skipping that routine doesn’t save money. It trades a $1,000 to $3,000 annual maintenance budget for a $100,000-plus replacement bill several years ahead of schedule. A membrane installed today, maintained on this schedule, can reasonably reach 25 to 30 years of service before replacement becomes necessary.




