
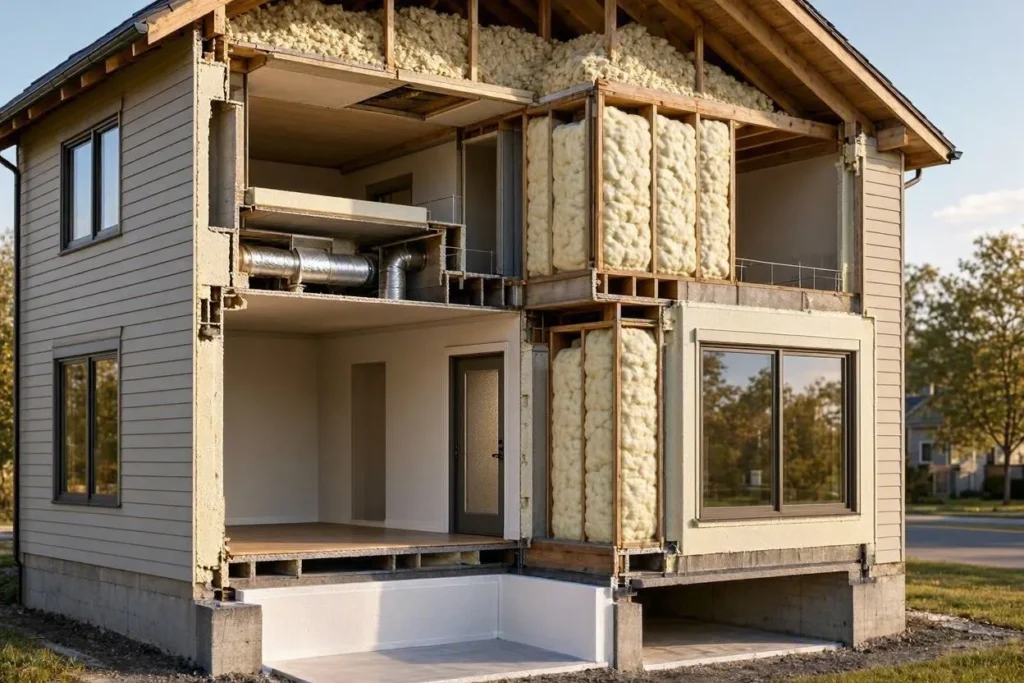
Heat doesn’t leave a house through one big opening. It slips out through dozens of small ones: a gap around a light fixture, an uninsulated rim joist, a window that hasn’t been resealed since the house was built. Each one lets conditioned air escape, and together they add up to a meaningful chunk of a typical energy bill. Figuring out how to improve your home’s insulation starts with knowing which rooms lose the most heat first, not with buying material and hoping it helps. Below is a room-by-room walk through attic, wall, window, and basement fixes roughly in order of impact, with R-value targets and cost ranges for US homeowners tackling the project in 2026.
Getting Started: Air Sealing and R-Value Basics
What’s the Fastest Way to Improve Home Insulation?
Seal air leaks around the attic hatch, recessed lighting, and rim joists before you add any new insulation material. A poorly sealed home loses conditioned air through hundreds of small gaps, and piling insulation on top of those gaps wastes both money and material. Air sealing costs less than $200 in materials for most homes and takes a weekend.
Air sealing comes first because heat moves through convection, not just conduction. Insulation slows conductive heat transfer, but it does nothing to stop air actively leaking through a crack. Skip this step and even R-49 attic insulation underperforms its rating.
What Does ‘R-Value’ Actually Mean?
R-value measures a material’s resistance to heat flow: the higher the number, the better the insulation performs. An R-value of 30 resists twice the heat transfer of an R-15 material at the same thickness. The Department of Energy (DOE) recommends attic insulation between R-30 and R-60 depending on climate zone, while wall insulation typically falls between R-13 and R-23.
Manufacturers test R-value under controlled lab conditions, so real-world performance depends heavily on installation quality too. Compressed fibreglass batts can lose a large share of their rated R-value, because trapped air pockets, not the material itself, do most of the insulating work. A batt rated R-19 that’s been crushed to fit a 3.5-inch stud cavity performs closer to R-11 in practice.
Climate zone determines the target number. Homes in cold-winter regions like Minneapolis need roughly double the attic R-value of homes in Miami, since colder regions lose heat faster and for more months of the year.
What Insulation R-Value Do You Need for Your Climate Zone?
The required R-value depends on the IECC climate zone, ranging from R-30 attic insulation in Zone 1 (southern Florida) up to R-60 in Zone 7 (northern Minnesota and Alaska). The DOE publishes a climate zone map dividing the US into eight numbered zones, each with its own recommended R-values for attics, walls, and floors.
Recommended attic R-values by zone:
- Zone 1–2 (southern Texas, southern Florida): R-30 to R-49
- Zone 3 (northern Texas, coastal California): R-30 to R-60
- Zone 4 (Virginia, Kentucky): R-38 to R-60
- Zone 5 (Ohio, Pennsylvania): R-49 to R-60
- Zone 6 (Minnesota, Wisconsin): R-49 to R-60
- Zone 7–8 (northern Minnesota, interior Alaska): R-49 to R-60
Wall insulation targets stay narrower across zones, typically R-13 to R-21, since wall cavities have a fixed depth no matter what stud size you’re working with. Homeowners can find their exact zone using the DOE’s zip-code-based climate zone lookup tool, which beats trying to eyeball it off a printed map.
Do You Need a Home Energy Audit Before Adding Insulation?
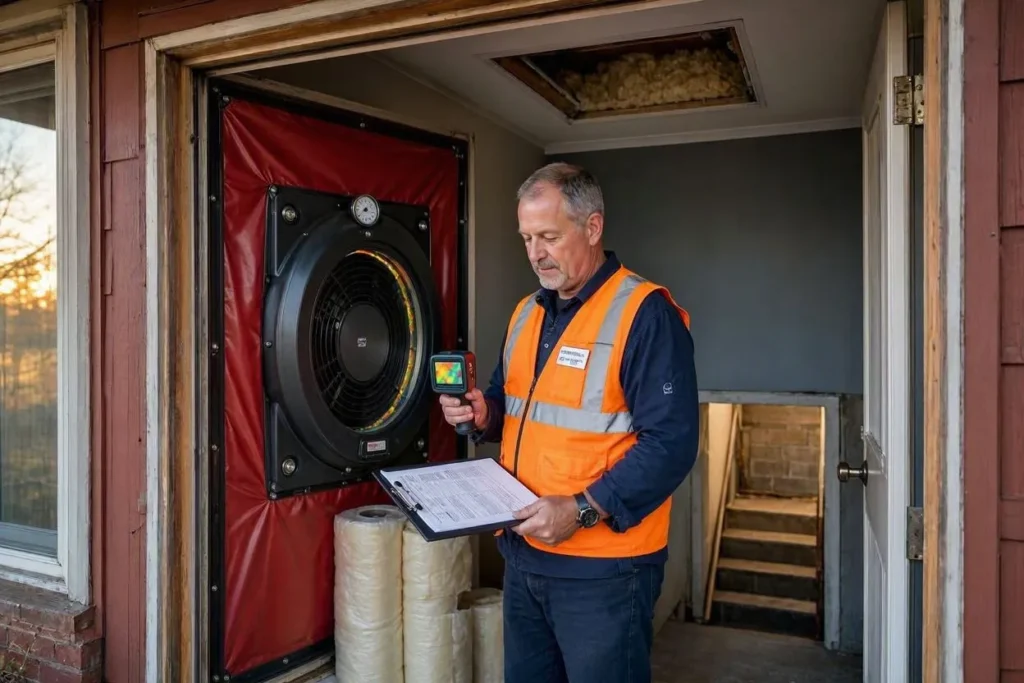
For anything beyond the small, obvious fixes, yes. A home energy audit identifies exactly where a house loses heat, so you don’t waste money insulating the wrong location before you touch attic, wall, or basement work. A certified auditor uses a blower door test, a calibrated fan mounted in an exterior doorway that pressurises the home and pinpoints leaks you’d never spot on a walkthrough.
Audits typically cost between $200 and $400 for a standalone visit, though some utility companies offer them free or subsidised, so it’s worth checking with yours before booking one. Infrared thermal imaging, often bundled into a professional audit, shows temperature differences on wall and ceiling surfaces that point to missing or compressed insulation hiding behind the finished surface.
Skipping the audit isn’t much of a risk for small, obvious fixes like door sweeps or hatch sealing. It becomes a costlier gap for anyone planning a whole-house upgrade running several thousand dollars, since the audit is what keeps you from spending on areas that don’t need it.
Room-by-Room Insulation
How Do You Insulate an Attic?
Seal air leaks first, then add blown-in cellulose or fibreglass batts to reach the R-value recommended for your climate zone. Attics account for a large share of a home’s total heat loss, which makes this the highest-priority space in most insulation projects.
The sequence that works:
- Seal penetrations around plumbing stacks, electrical wiring, and HVAC ducts using expanding foam or caulk.
- Install airtight covers over recessed light fixtures rated IC (insulation contact) before covering them with insulation.
- Weatherstrip the attic access hatch and add rigid foam board to its back side.
- Add blown-in insulation to reach the target depth. Fourteen inches of cellulose delivers roughly R-49 in most cold-climate zones.
- Maintain soffit-to-ridge airflow with baffles so the insulation doesn’t choke off attic ventilation.
Ventilation matters just as much as insulation depth. Block the soffit vents completely and moisture builds up in the attic, which leads to mould growth and rotted roof decking within a few years.
How Do You Insulate Walls in an Existing Home?
Blown-in cellulose, injected through small drilled holes, is the go-to method for existing walls, since it avoids ripping out drywall or exterior siding. Walls typically account for the single largest share of heat loss in an uninsulated home, more than the attic or windows and doors, which makes this one of the highest-value fixes even though it’s often overlooked in favor of more visible projects.
A contractor drills a hole roughly 2 inches wide into each stud cavity, blows in dense-pack cellulose or fibreglass, and patches the hole afterward. For a typical 2,000-square-foot house, the whole process takes a day or two. Homes built after 1990 in most US states already meet code-minimum wall insulation, so this step matters most for houses built before 1980.
Spray foam works well for open-wall renovations, where the drywall’s already off for other work. Closed-cell spray foam reaches roughly R-6.5 per inch, well above the R-value of fibreglass batts at the same thickness, and it also acts as its own air barrier, which means you can skip the separate air-sealing step other materials need.
How Do You Seal Air Leaks Around Windows and Doors?
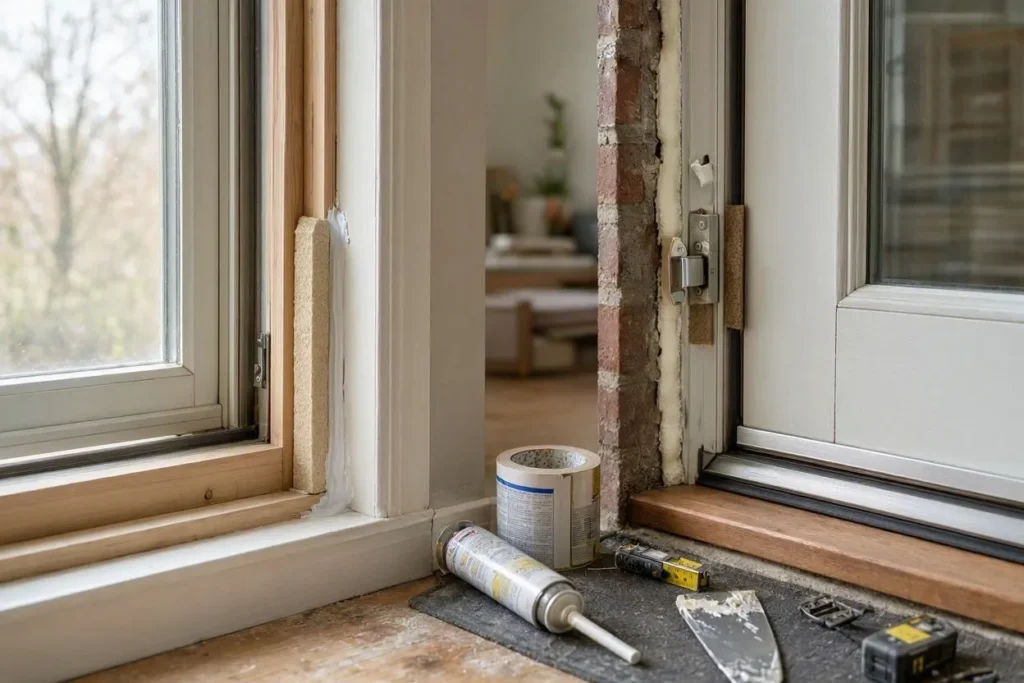
Weatherstripping, caulk, and door sweeps handle most window and door leaks, and the gaps that matter most are where sashes meet frames and where frames meet the surrounding wall. Windows and doors together typically account for a smaller share of a home’s air leakage than walls or the attic, but they’re cheap and fast to fix, which makes them worth doing regardless of priority order.
A handful of fixes cover most of that leakage:
- Rope caulk seals gaps around window sashes without permanently fixing the window shut.
- Adhesive-backed foam tape closes the gap between a door and its frame.
- Door sweeps block the draft that sneaks in at the bottom threshold.
- Storm windows add a second glazing layer over existing single-pane windows and meaningfully cut heat loss in older homes.
- Thermal curtains reduce heat loss through glass at night, when outdoor temperatures drop fastest.
Renters without permission to touch window frames still have options. A tapestry hung on an exterior-facing wall, or a bookcase pushed up against that same wall, adds a measurable insulating layer, and neither one needs landlord approval.
How Do You Insulate a Basement or Crawl Space?
Seal the rim joist first, then add rigid foam board to the foundation walls, working from the top down to the footing. The rim joist, the band of wood where the foundation meets the floor framing, leaks more air per square foot than almost any other part of a house.
Basement insulation follows a clear order:
- Seal rim joist gaps with expanding spray foam or masonry caulk.
- Fill foundation wall cracks with hydraulic cement or insulating caulk.
- Attach rigid foam board (R-5 per inch) directly to the interior foundation walls.
- Frame and insulate stud walls in front of the foam board if you’re finishing the space.
- Deal with moisture, using a dehumidifier or vapour barrier, before you close up any wall cavity.
Crawl spaces need different handling. Encapsulation, sealing the space with heavy plastic sheeting and insulating the foundation walls instead of the floor above, keeps ductwork and plumbing inside the conditioned envelope. In homes with exposed HVAC ducts running underneath, that can meaningfully cut energy loss through the zone.
Cost, Incentives, and DIY vs. Professional
How Much Does It Cost to Insulate a Home?
Home insulation costs vary widely with square footage, material, and local labor rates, but as a rough guide: attic-only DIY work often lands around $1,500, while a full-house professional retrofit can run $12,000 or more. Get a couple of local quotes before budgeting, since prices shift year to year and by region.
Attic insulation installed by a contractor is usually the most cost-effective square footage you’ll insulate, since the space is open and labor-efficient. Wall insulation via drill-and-fill tends to cost more per square foot, since it requires drilling, patching, and more skilled labor. Basement rim joist sealing and rigid foam board installation is typically the smallest line item of the four, since it covers a shorter linear run.
Return on investment depends heavily on your climate zone and how under-insulated your home currently is. In cold climates, upgrading a poorly insulated attic to a modern R-value target tends to pay for itself in energy savings within several years, though the exact timeline depends on local energy prices.
Are There Tax Credits for Home Insulation in 2026?
No, not federally, as of 2026. The Energy Efficient Home Improvement Credit (Section 25C), which used to cover 30% of insulation material costs up to $1,200 a year, was repealed by the One Big Beautiful Bill Act and expired for any improvement placed in service after December 31, 2025. If you completed a qualifying insulation project in 2025, you can still claim it on your 2025 tax return, but the credit does not apply to projects completed in 2026 or later.
Some state and utility-run rebate programs are separate from that federal credit and may still be running, so it’s worth checking directly with your state energy office or utility provider for current offers rather than assuming a subsidy applies. Programs and amounts change often enough that anything stated here could be out of date by the time you read it.
If you’re weighing whether to insulate without a tax credit in the mix, it’s worth remembering the credit was never more than a modest bonus on top of the real savings: the energy you stop wasting every winter.
DIY vs. Professional Insulation: Which Should You Choose?
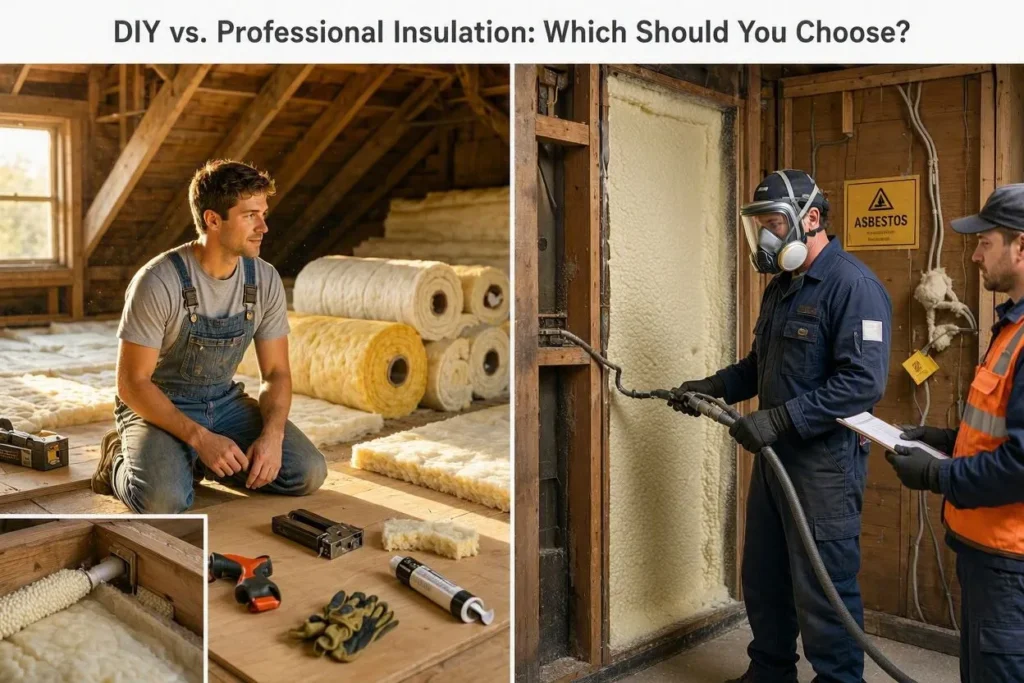
DIY works well for attic insulation, air sealing, and basement rim joist work. Bring in a professional for wall insulation, spray foam, and anything involving asbestos or knob-and-tube wiring. Attic work happens in open, accessible space where mistakes are easy to fix. Wall insulation, on the other hand, happens inside a closed cavity, and errors there go unnoticed until someone opens the wall again years later.
Home Depot and most equipment rental centres loan out blown-in insulation machines free with a material purchase over a set minimum, which makes attic DIY projects a good financial move for anyone comfortable working in tight, hot spaces. A typical DIY attic project takes one full weekend for a 1,500-square-foot attic.
Safety should override cost savings in a few specific cases. Homes built before 1980 may still have vermiculite attic insulation contaminated with asbestos, and disturbing it without proper testing and containment is a serious health hazard. If you’re at all unsure how old your attic insulation is or what it’s made of, get a professional inspection before you touch it.
Conclusion
Improving home insulation starts with sealing air leaks, moves through attic and wall upgrades matched to a specific R-value target, and finishes with windows, doors, and basement or crawl space work. Walls and the attic usually offer the biggest return, since together they account for more heat loss than any other part of the house. There’s no federal tax credit backing insulation projects in 2026, but the underlying math still holds: a well-sealed, properly insulated home costs noticeably less to heat and cool, year after year.




