
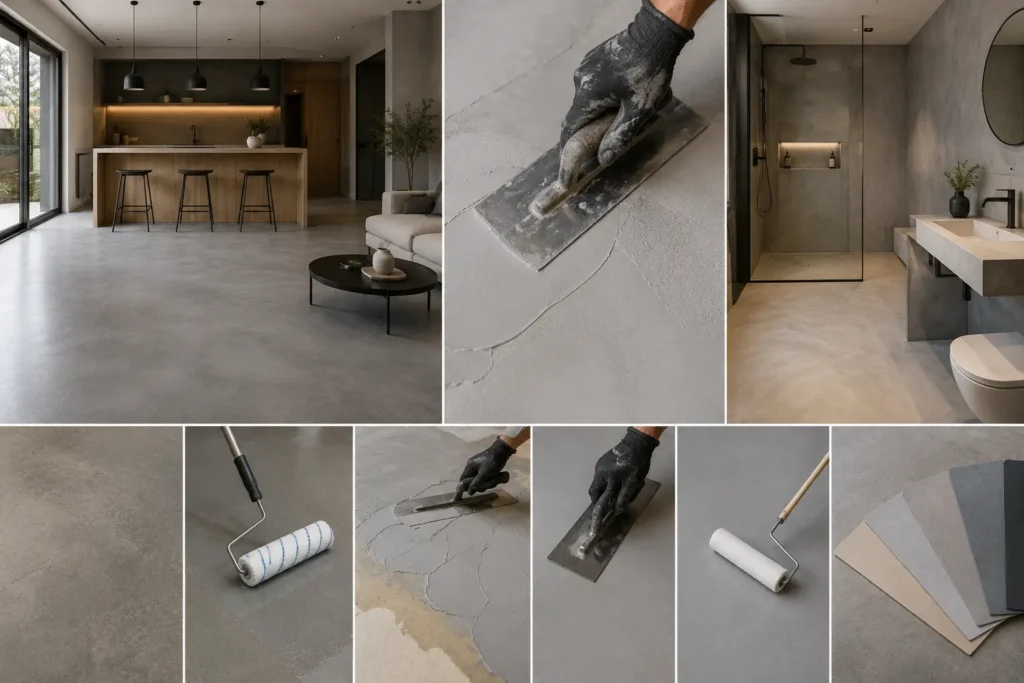
Micro concrete is a 2–3 mm (0.08–0.12 in) thick polymer-modified cement coating applied over existing surfaces to create a seamless, joint-free finish that looks like polished concrete. It bonds directly over existing tiles, concrete, plywood, and plasterboard no demolition needed.
Most homeowners confuse micro concrete with microcement or polished concrete. All 3 are different materials with different thicknesses, applications, and costs. This guide explains the differences, covers the full application process step by step, and gives you real cost figures for 2026.
What Is Micro Concrete?
Micro concrete is a cement-based decorative coating made from 5 ingredients: Portland cement, fine aggregates (sand particles under 0.5 mm / 0.02 in), polymers, water-based resin, and mineral pigments. The polymer content makes the coating flexible and highly adhesive properties that standard concrete lacks.
Micro concrete applies in multiple thin layers using a steel trowel or spatula, building up to a total thickness of 2–10 mm (0.08–0.39 in) depending on the product and substrate condition. The result is a monolithic, continuous surface with no grout lines, no joints, and no seams.
3 names refer to the same or very similar materials: micro concrete, microcement, and microtopping. Technically, microcement is thinner (2–3 mm / 0.08–0.12 in) and more flexible. Micro concrete can go thicker (up to 10–50 mm / 0.39–1.97 in) and contains coarser aggregate for added structural strength. In everyday use, most suppliers use the terms interchangeably.
Micro Concrete vs Microcement vs Polished Concrete
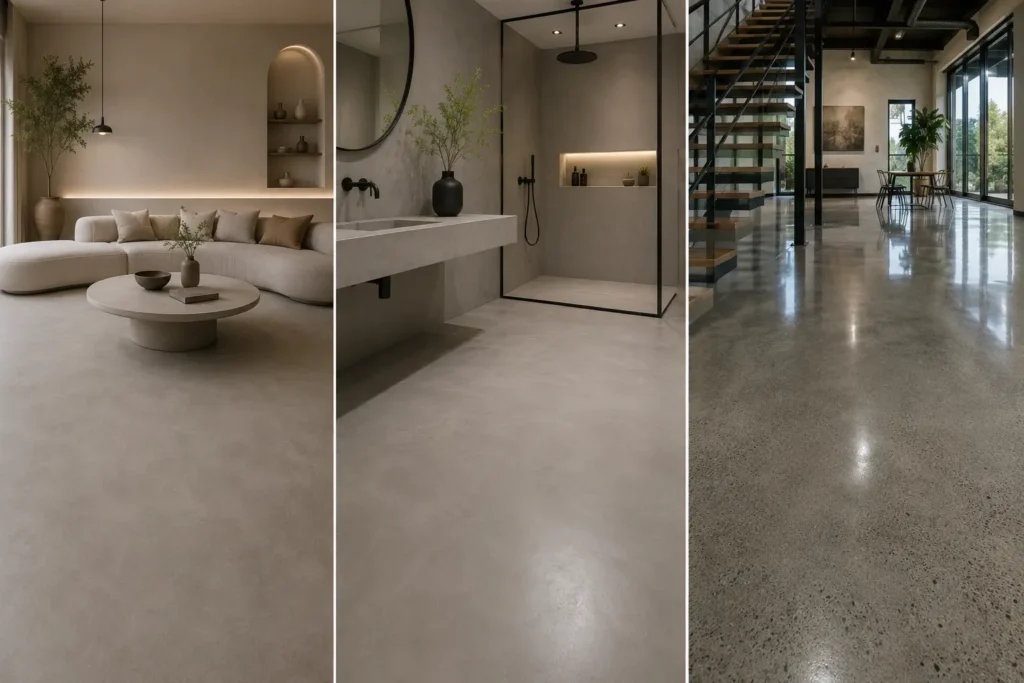
Choosing the wrong material wastes money and produces the wrong result. Here is how all 3 compare:
| Feature | Micro Concrete | Microcement | Polished Concrete |
| Thickness | 2–10 mm (0.08–0.39 in) | 2–3 mm (0.08–0.12 in) | 100+ mm (3.9+ in) |
| Applied over existing floor? | Yes | Yes | No — structural pour |
| Demolition needed? | No | No | Yes |
| DIY possible? | Skilled DIY only | Professional only | Professional only |
| Cost installed | $8–$20 / sq ft | $10–$25 / sq ft | $3–$10 / sq ft |
| Best for | Floors, steps, repairs | Walls, bathrooms, floors | New build floors |
| Lifespan (sealed) | 10–20 years | 10–20 years | 20–50 years |
Choose micro concrete for renovation projects where existing floors or tiles are in sound condition and demolition is not practical. Choose polished concrete for new builds where the structural slab can be finished in place.
What Surfaces Does Micro Concrete Bond To?
Micro concrete bonds to 8 common substrates more than most flooring materials:
- Concrete slabs and screed — the most common base; sand or grind high spots first
- Existing ceramic and porcelain tiles — clean, degrease, and apply bonding primer; no removal needed
- Plywood and OSB subfloors — prime with a flexible bonding primer; add fibreglass mesh at joints to prevent cracking
- Plasterboard / drywall — for wall applications; prime with a high-build bonding primer
- Natural stone and marble — clean thoroughly; use a non-absorbent substrate primer
- Metal surfaces — clean rust and grease; apply rust-inhibiting bonding primer
- MDF and wood furniture — sand lightly; apply wood-compatible bonding primer
- Existing concrete countertops — clean and degrease; apply bonding primer for adhesion
Micro concrete does not bond to: soft wood floors with significant flex, rubber or vinyl flooring, or surfaces contaminated with wax, silicone, or oil that cannot be fully removed.
Tools and Materials Needed
Prepare everything before starting. Micro concrete has limited working time once mixed — stopping mid-application to find a missing tool causes visible joins in the finished surface.
Surface preparation materials:
- Angle grinder or belt sander — grinds down high spots and removes loose material
- Concrete degreaser — removes oil, grease, and wax before priming
- Self-leveling compound — fills low spots and levels uneven substrates before application
- Fibreglass reinforcement mesh — applied over joints, cracks, and board edges to prevent cracking through the micro concrete layer
- Bonding primer — critical for adhesion; product type depends on substrate (absorbent vs non-absorbent)
Application tools:
- Steel trowel/Japanese spatula — main application tool; flat, flexible blade 200–300 mm (8–12 in) wide
- Notched trowel — spreads base coat evenly before smoothing
- Fine-grain sanding block or 120-grit sandpaper — smooths between coats
- Short-nap paint roller (4 mm / 3/16 in) — applies primer and sealer coats
- Mixing paddle + electric drill — mixes micro concrete components thoroughly
- Safety gear: nitrile gloves, knee pads, dust mask for sanding, safety glasses
How to Apply Micro Concrete: 8-Step Process
A micro concrete floor takes 5–7 days from start to finish not because of hard work, but because each layer needs correct curing time before the next coat. Rushing the process causes delamination and surface cracking.
Step 1: Prepare the Substrate
Surface preparation determines whether the micro concrete lasts 2 years or 20 years. Every failure — cracking, delamination, bubbling — traces back to prep shortcuts.
- Remove all furniture, rugs, and fixtures from the area.
- Grind or sand down high spots so the floor is within 3 mm (1/8 in) of flat across any 2-metre (6.5 ft) length.
- Fill low spots and holes with self-leveling compound. Let it cure fully minimum 24 hours.
- Degrease the entire surface with a concrete degreaser. Any grease or oil on the substrate prevents primer and micro concrete from bonding. Rinse thoroughly and allow to dry completely.
- Repair cracks wider than 1 mm (0.04 in) with flexible crack filler. Let it cure before proceeding.
Step 2: Apply Fibreglass Reinforcement Mesh
Embed fibreglass mesh over every joint, crack repair, and change of substrate for example, where a tile floor meets a concrete threshold, or where two sheets of plywood join. The mesh prevents the micro concrete layer from cracking along those lines.
Cut the mesh to size and press it into the first coat of primer or bonding adhesive while it is still wet. Smooth it flat with a trowel. No mesh overlaps should protrude above the surface.
Step 3: Apply Bonding Primer
The primer type depends on the substrate: use an absorbent primer (water-based acrylic) for concrete and screed. Use a non-absorbent primer (epoxy-based) for tiles, metal, and stone. Use a moisture-blocking primer for damp basements and bathrooms.
- Roll the primer evenly across the full surface using a 4 mm (3/16 in) nap roller.
- Cut edges and corners with a 50 mm (2 in) brush.
- Dry time: 3–6 hours at 65°F (18°C). The primer must be fully dry tacky to the touch is not dry enough.
- Apply a second primer coat on highly porous or absorbent substrates. Allow to dry again before proceeding.
Basement moisture getting into the substrate before priming causes primer failure. Persistent damp basements often trace back to roof drainage directing water toward the foundation. A professional roof inspection identifies gutter and downspout problems at the source before they damage interior floor work.
Step 4: Apply the Base Coat (First Micro Concrete Layer)
Mix the micro concrete base coat according to the manufacturer’s ratio typically 3 parts powder to 1 part liquid resin by weight. Mix for 3–5 minutes with a paddle drill until lump-free. Let the mix rest for 2 minutes, then stir once more before applying.
- Pour a manageable amount (enough for 1–2 m² / 10–20 sq ft at a time) onto the primed surface.
- Spread with a notched trowel to achieve even thickness of 1–1.5 mm (0.04–0.06 in).
- Smooth immediately with a steel trowel using long, overlapping strokes. Work quickly — micro concrete starts to set within 20–30 minutes depending on temperature and humidity.
- Dry time: minimum 12–24 hours before sanding or applying the next coat.
Step 5: Sand the Base Coat
Light sanding between coats removes trowel marks and high spots, ensuring the next coat adheres evenly. Use 120-grit sandpaper or a fine-grain sanding block.
Sand the entire surface with light, circular passes. Do not sand through to the substrate remove only surface irregularities. Vacuum all dust thoroughly before the next coat. Dust left on the surface prevents inter-coat adhesion.
Step 6: Apply the Finish Coat (Second Micro Concrete Layer)
The finish coat determines the final appearance texture, colour uniformity, and smoothness all come from this layer. Mix fresh micro concrete as before.
- Apply in the same sequence: spread with a notched trowel, smooth immediately with a steel trowel.
- Work in consistent stroke directions — horizontal for horizontal surfaces, vertical for walls. Consistent direction produces a uniform trowel texture.
- Feather edges carefully where sections meet to avoid visible joins. Micro concrete must be applied wet-on-wet at joins — never let one section dry before joining the next.
- Dry time: 24 hours minimum before sealing.
Step 7: Sand the Finish Coat
Sand again with 150–180 grit sandpaper for a smoother surface, or leave the natural trowel texture for a more industrial look. Finer sanding (220 grit) produces a near-polished appearance.
Vacuum all dust completely. Run a damp cloth over the surface and allow to dry before sealing. Any remaining dust seals under the topcoat and creates a dull, uneven finish.
Step 8: Apply Sealer Topcoat (2–3 Coats)
Sealing is not optional — unsealed micro concrete absorbs water, oil, and stains immediately. The sealer creates the protective film that gives micro concrete its durability and makes cleaning easy.
2 main sealer types:
- Polyurethane (PU) sealer — most durable option; resists abrasion, chemicals, and UV exposure. Best for floors, commercial spaces, and outdoor areas. Apply 2–3 coats.
- Water-based acrylic sealer — lower odour; suitable for bathrooms, kitchens, and indoor walls. Apply 2–3 coats.
To apply sealer:
- Roll the first sealer coat with a 4 mm (3/16 in) nap roller. Cut edges with a brush.
- Dry time between sealer coats: 2–4 hours at 65°F (18°C).
- Apply 2nd sealer coat perpendicular to the first (cross-coat) for even coverage.
- Apply 3rd coat for floors in high-traffic areas or wet areas (bathrooms, kitchens).
- Full cure before foot traffic: 24–48 hours. Full cure before placing furniture: 7 days.
Heavy rain and leaks from above are the fastest way to ruin a freshly sealed micro concrete floor. Roof leaks introduce water between the sealer and the micro concrete layer, causing delamination and staining. Roof repair services fix active leaks before they reach your new floor finish.
Drying and Curing Times at a Glance
Temperature and humidity directly affect cure times. All times below assume 65°F (18°C) and 50% relative humidity (RH). Cold or humid conditions extend these times significantly.
| Stage | Minimum Wait | Ideal Wait | Notes |
| After substrate prep | 24 hrs | 48 hrs | Surface must be fully dry |
| After primer coat | 3–6 hrs | 12 hrs | Tacky = not ready |
| After base coat | 12 hrs | 24 hrs | Sand before next coat |
| After finish coat | 24 hrs | 36 hrs | Vacuum dust before sealing |
| Between sealer coats | 2–4 hrs | 6 hrs | Cross-coat direction |
| Before foot traffic | 24–48 hrs | 48 hrs | Socks only — no shoes |
| Before furniture | 7 days | 7 days | Full cure required |
Where to Use Micro Concrete
Micro Concrete Bathroom Floors and Walls
Micro concrete is fully waterproof when sealed with a polyurethane topcoat — making it one of the best alternatives to tiles in bathrooms and wet rooms. A sealed micro concrete bathroom floor has no grout lines, which eliminates the mold and mildew buildup that grout harbours.
Apply 3 sealer coats in bathrooms and shower areas one more coat than standard floor applications. Use a PU sealer rated for continuous water exposure. Re-seal bathroom floors every 3–5 years depending on traffic and cleaning frequency.
Micro Concrete Kitchen Floors and Countertops
Kitchen floors need a hard-wearing, anti-slip sealer finish add an anti-skid additive (fine sand or aluminium oxide grit) to the final sealer coat. This improves traction on a wet kitchen floor without affecting appearance significantly.
Kitchen countertops require 3–4 sealer coats. Acidic spills wine, lemon juice, vinegar damage the sealer over time if not wiped up promptly. Re-seal countertops every 2–3 years for best protection.
Micro Concrete Garage Floors
Micro concrete handles light vehicle traffic when applied at 4–6 mm (0.16–0.24 in) total thickness and sealed with a 2-part polyurethane topcoat. Standard residential car parking is within spec heavy commercial vehicles are not.
Garage moisture from roof runoff pools against the garage apron and seeps under the door, wetting the substrate before and after application. Preventive roof maintenance redirects water away from the garage entrance and protects the floor from below-slab moisture.
Outdoor Micro Concrete Patios and Steps
Use UV-stable polyurethane sealer for any outdoor application standard PU sealer yellows in direct sunlight within 12–18 months. Aliphatic PU sealers resist UV degradation and maintain colour stability outdoors.
Apply micro concrete at a minimum 4 mm (0.16 in) thickness outdoors thicker than indoor applications for freeze-thaw resistance. Add an anti-slip additive to all outdoor sealer coats. Do not apply micro concrete in temperatures below 50°F (10°C) or above 95°F (35°C).
Micro Concrete: 7 Pros and 5 Cons
| Pros | Cons |
| No demolition — applies over existing tiles and floors | Higher cost than tile or vinyl: $8–$20 per sq ft installed |
| 2–3 mm thin — minimal floor height increase | Skilled application — DIY errors are visible and hard to fix |
| Seamless, joint-free finish — no grout to clean or seal | Requires re-sealing every 3–5 years |
| Works on floors, walls, countertops, stairs, showers | Long project timeline: 5–7 days minimum |
| Fully waterproof when sealed with PU topcoat | Acidic spills damage sealer if not wiped immediately |
| 100+ colour options with custom tinting possible | |
| 10–20 year lifespan with correct sealing and maintenance |
Micro Concrete Cost: Full Breakdown for 2026
Micro concrete costs $8–$20 per square foot ($86–$215 per m²) professionally installed. DIY material costs run $3–$8 per square foot ($32–$86 per m²) depending on product quality. A 200 sq ft (18.6 m²) bathroom floor costs $1,600–$4,000 professionally installed.
| Item | Cost Range | Notes |
| Micro concrete base coat (10 kg / 22 lb bag) | $45–$90 per bag | Covers ~10 m² (108 sq ft) at 1 mm thickness |
| Finish coat (10 kg / 22 lb bag) | $55–$110 per bag | Same coverage as base coat |
| Bonding primer (1 gallon / 3.8 L) | $25–$55 | Covers 150–200 sq ft (13.9–18.6 m²) |
| Polyurethane sealer (1 gallon / 3.8 L) | $40–$80 | 3 coats covers ~120 sq ft (11.1 m²) |
| Fibreglass mesh (per 10 m² / 108 sq ft) | $15–$30 | Used at joints and cracks only |
| Professional labor | $5–$15 per sq ft | Varies by location and complexity |
| Full DIY project (200 sq ft / 18.6 m²) | $600–$1,600 | Materials only |
| Full professional install (200 sq ft / 18.6 m²) | $1,600–$4,000 | Materials + labor |
How to Maintain Micro Concrete Floors
Daily and weekly maintenance is simple micro concrete’s sealed surface resists dirt and is easy to clean. The key rules:
- Daily: Dry sweep or microfibre mop to remove grit and dust. Grit particles scratch the sealer surface under foot traffic, dulling the finish over time.
- Weekly: Damp mop with a pH-neutral cleaner and warm water. Never use acidic cleaners (vinegar, citrus), bleach, or abrasive scrubbing pads on sealed micro concrete all 3 damage the sealer coat.
- Immediately: Wipe up acidic spills — wine, coffee, citrus juice, vinegar within 5 minutes. Prolonged contact with acid degrades the PU sealer.
- Every 3–5 years: Re-apply 1–2 coats of topcoat sealer when the floor surface no longer beads water. Light sanding (220 grit) before resealing improves adhesion of the new sealer.
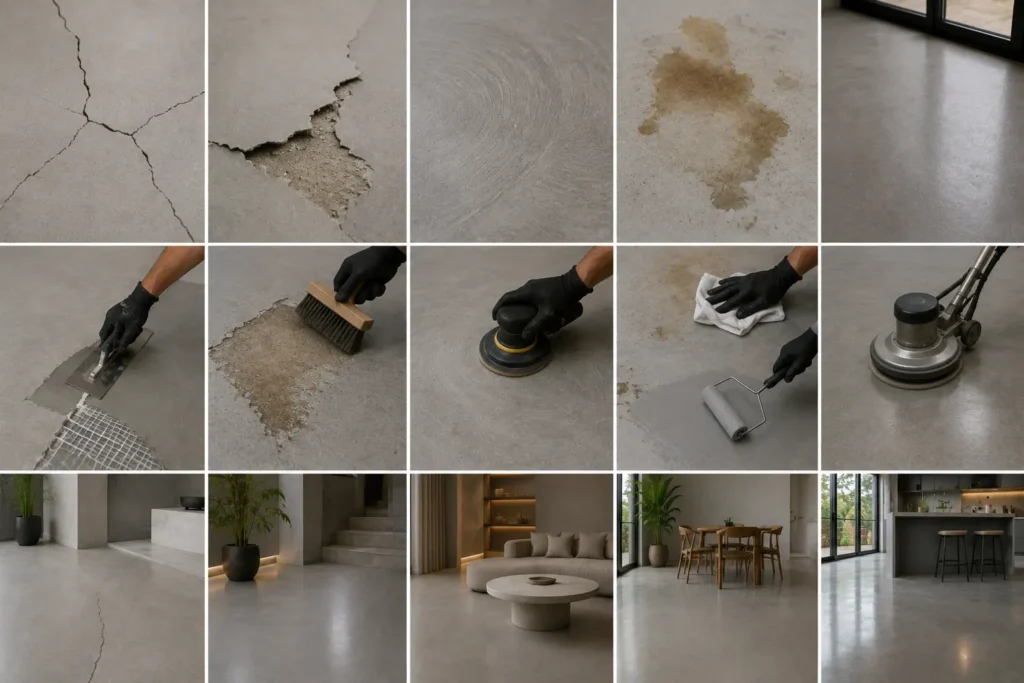
5 Common Micro Concrete Problems and Fixes
| Problem | Cause | Fix |
| Surface cracking | Substrate movement, joints not meshed, or too thick single coat | Sand back affected area, apply fibreglass mesh, recoat in 2 thin layers |
| Delamination (lifting) | Inadequate primer or contaminated substrate | Remove delaminated section, regrease, reprime, recoat |
| Visible trowel marks | Uneven pressure during application or coat too thick | Sand with 180 grit, apply thin skim finish coat |
| Staining through sealer | Insufficient sealer coats or acidic spill not cleaned promptly | Light sand, clean stain, reapply 2 fresh sealer coats |
| Dull or hazy finish | Dust not fully removed before sealing | Sand lightly with 220 grit, wipe clean, apply fresh sealer coat |
Conclusion
Micro concrete transforms any existing surface into a seamless, polished-concrete look without demolition. The material cost is higher than tile, but the absence of grout lines, the application over existing floors, and the 10–20 year lifespan make it cost-effective for renovation projects.
Preparation is 80% of the result. Clean substrate, correct primer, fibreglass mesh at every joint, and 2 thin application coats produce a floor that lasts. The sealer is what protects it apply 3 coats in wet areas, reseal every 3–5 years, and avoid acidic cleaners throughout.




